16,17.....beam rails, Beam rails, Operating instructions – BUG-O Systems BEAM BUG III User Manual
Page 16
9
16
BEAM RAILS
1. ARR-9114 BEAM RAIL for 14" (350 mm) Beams “Square Cut Only”.
2. ARR-9214 BEAM RAIL for “MITER CUTTING” up to 14" (350 mm)
Beams.
3. ARR-9236 BEAM RAIL for “MITER CUTTING” up to 36" (900 mm)
Beams.
These rails have a swivel magnet bar on one side for easy alignment, and
are fastened by clamps on the opposite flange of the beam.
OPERATING INSTRUCTIONS
4. Plug the Power Cord (W) into an appropriate power source. Pilot Light (Y)
will glow when power is on.
5. Open Torch Valves (EE) throw Quick Acting Manifold (S) lever “Down”
to “Open” position to set fuel gas and oxygen regulators. See
Chart (M)
on the side of machine for tip size and pressure vs. thickness.
6. Close Torch Valves (EE), reopen slightly and light - adjust preheat
flame. Turn off preheat with
Quick Acting Manifold (S).
7. To make a square cut: (Ref. Fig. 4, 5 & 6).
A. Set Rack (G) in holes on Flange Rail (B) which corresponds to
the thickness of the flange you are cutting. Run
BEAM BUG III
out beyond flange and swing torch so tip faces flange.
B. Run Flange Rail (B) downwards until Torch Tip (DD) is slightly
below bottom of flange and stop (use maximum speed).
C. Switch on gases using the Quick Acting Manifold (S) light
Torch (BB), and set cutting speed. When preheat is adequate,
open
Cutting Oxygen Valve (FF) [bat handle on torch] and start
vertical travel - adjust speed to suit.
NOTE: As cut comes close to web slow down vertical travel to
insure adequate penetration of web - once past web, increase
travel speed to optimum.
D. When cut has reached the top of flange, turn off preheat gases
using the
Quick Acting Manifold (S) and Cutting Oxygen Valve
(FF), limit switch will stop travel.
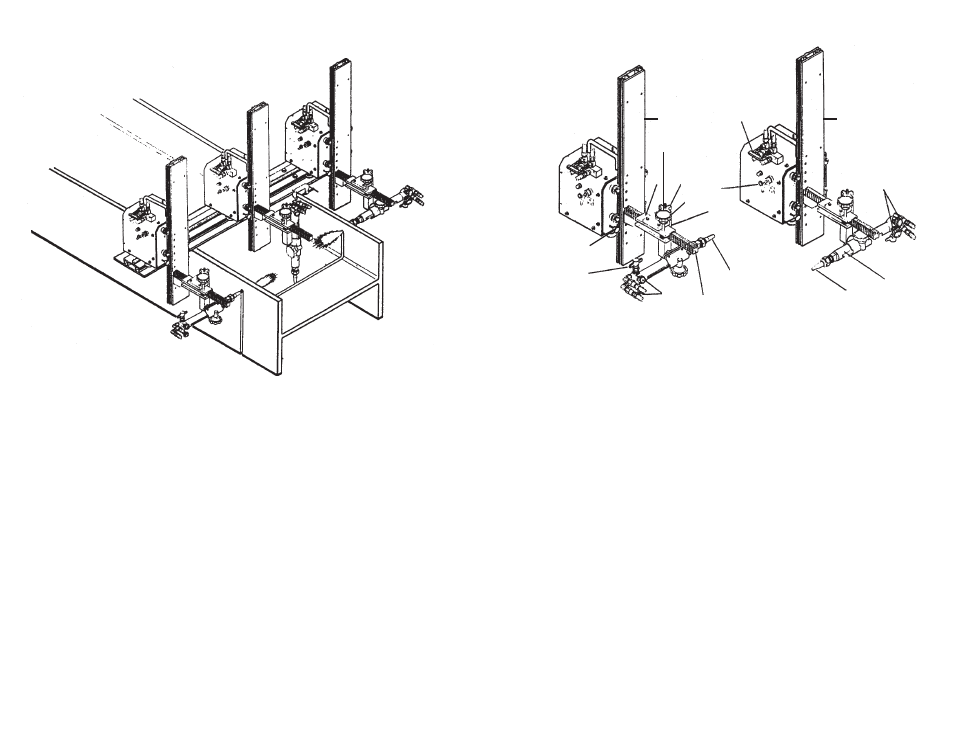
SQUARE CUTS
S
I
U
T
H
Y
DD
G
FF
DD
BB
EE
BB
Figure 3
B
R
B
V