Fireplace installation – Desa V42V-A User Manual
Page 19
www.desatech.com
111906-01F
19
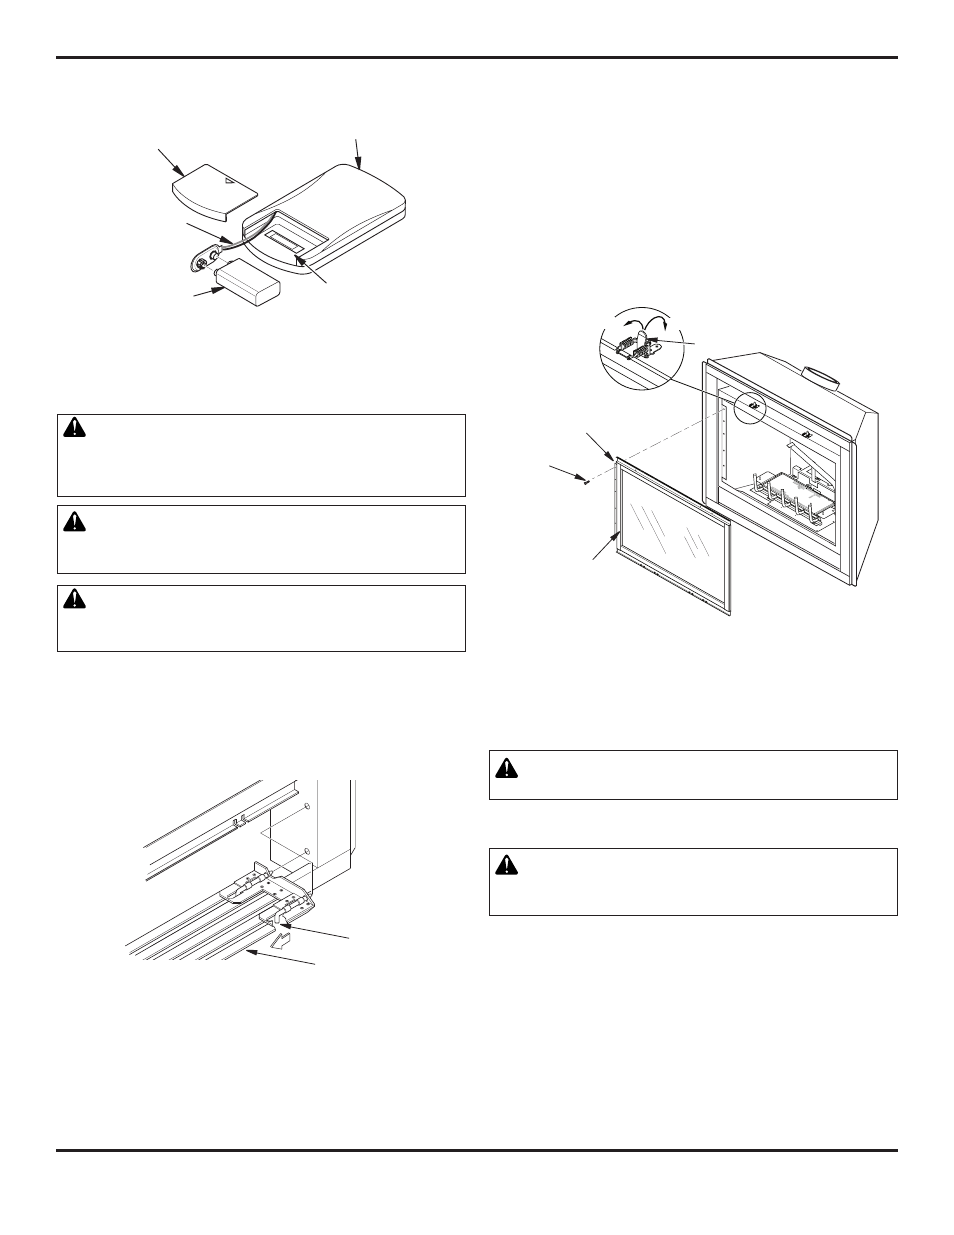
Figure 39 - Installing Alkaline Battery in Hand-Held Remote
Control Unit
FIREPLAcE INSTALLATION
Continued
REMOvING/REPLACING GLASS DOOR
CAUtION: Do not operate this fireplace with a bro-
ken glass door panel or without the glass door panel
securely in place. For replacement part information see
Replacement Parts, page 28.
CAUtION: Wear gloves and safety glasses while
handling or removing broken glass. Do not remove if
glass is hot. keep children and pets away from glass.
WARNING: If fireplace has been running, turn off
and unplug fireplace. Let cool before removing glass
door or louvers.
Removing Louver Panels
Remove the top and bottom louver panels by simultaneously pulling
both top end spring latches towards the center of the appliance until
they are disengaged from the locating holes (see Figure 40). Repeat
for bottom spring latches and pull the louvers outward. To install or
replace items removed, simply reverse the procedures above.
Figure 40 - Removing Louver Panel
Louver Panel
Spring Latch
Removing Glass Door
If replacement of glass is necessary, the entire assembly, glass and
frame, must be replaced. If glass is broken, wear gloves and tape
the remaining fragments onto the frame.
1. Remove screen assembly by pushing the rod either left or right
and then down and forward to remove screen/rod assembly
from the firebox. Set assembly aside.
Lock
Unlock
Glass
Frame
Assembly
Screw
Figure 41 - Removing/Replacing Glass Door
Hinge
Latch
2. Lift up on latches to unlock. There are two on top of firebox and
two below firebox that hold glass door in place (see Figure 41).
3. While holding glass door to prevent it from falling and causing
injury, remove the five screws from the hinge located on the
left side of door frame assembly (see Figure 41).
4. Remount the new frame at the hinge with five new screws
before closing door. This will ensure seating of the gasket.
5. Close glass door frame. Lock latches by placing the bar under the
tab on door and pushing down and back on latch (see Figure 41).
6. Replace screen/rod assembly by reversing step 1.
7. Replace louvers by reversing procedure under Removing Lou-
ver Panels.
Battery Cover
Remote Control Unit
Terminal
Wires
9-Volt
Battery
Battery
Housing
Cleaning Glass Door
See Cleaning and Maintenance on page 24.
INStALLING BRICK LINER MODELS
BL42DA(SA) AND BL42DHA(SA)
WARNING: If fireplace has been running, turn off and
unplug fireplace. Let cool before installing brick liner.
You may purchase brick liner from your local retailer or see Ac-
cessories, page 29.
CAUtION: Always handle brick panels with two
hands. Do not force brick panels into place. Excessive
force will break brick panels.
1. Remove top and bottom louvers to allow access to door
latches.
2. Unlock door latches and open glass door. See steps 1 and 2 of
Removing/Replacing Glass Door.
3. If installing brick liner in new fireplace, go to step 4. If install-
ing brick liner in an existing fireplace, carefully remove logs,
lava rock, and ember material.
4. Remove three screws from deflector shield on the inside top
of firebox. Set shield and screws aside.
5. Install rear brick panel first. Rest bottom edge of panel on back
edge of grate (see Figure 42, page 20).