Assembly – Brinly CC-560 BH Cultivator User Manual
Page 7
1007076 Rev. A
7
14
20
8
13
3
17
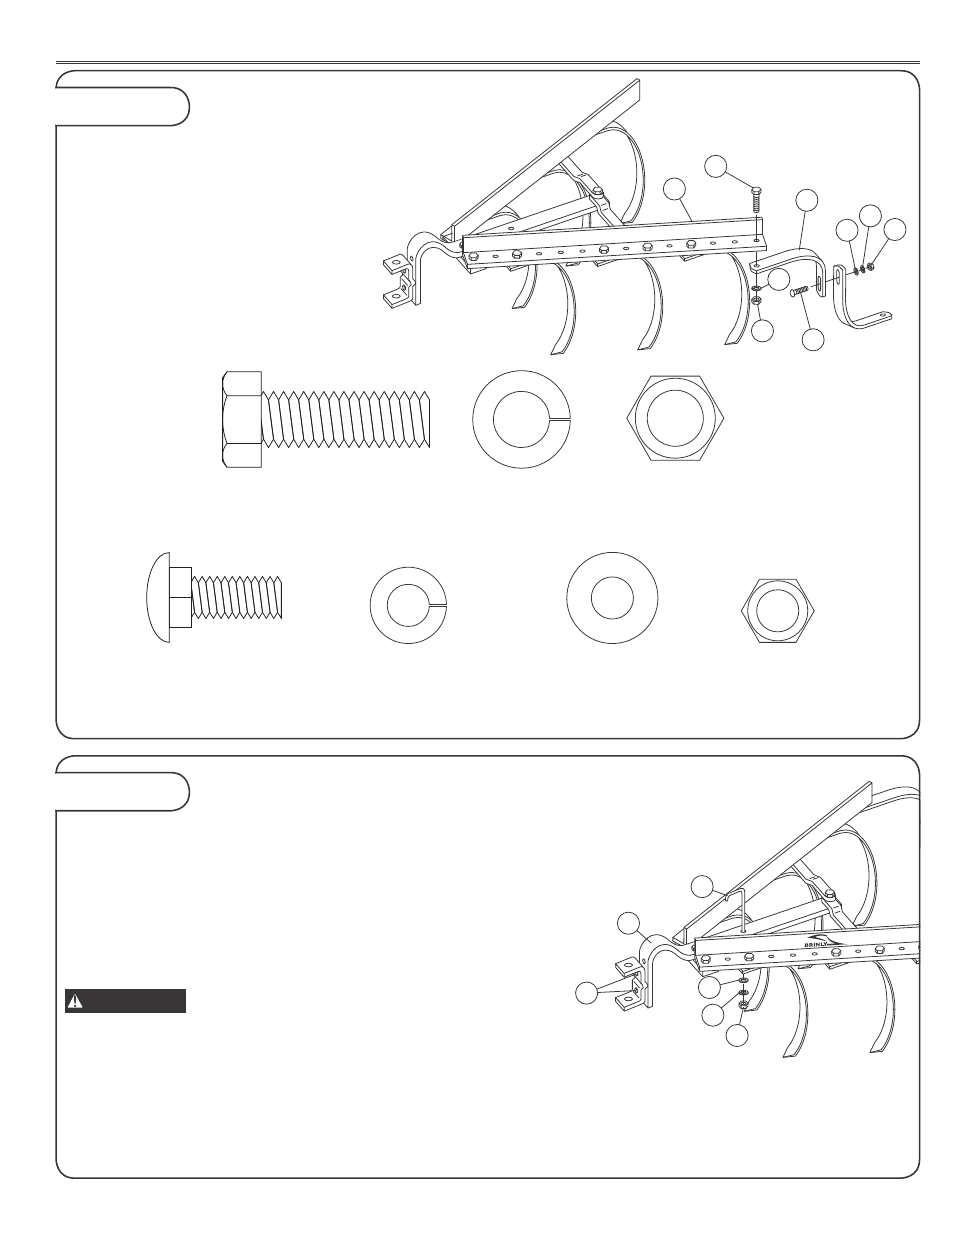
5a. Assemble one of the Gauge Shoe
halves (7) to Frame Angle (4) using 1/2" x
1-1/2" Bolts (10), 1/2" Lockwashers (19),
and 1/2" Nuts (15). Note slot orientation in
illustration.
5b. Attach Gauge Shoe halves (7) together
using 3/8" x 1" Carriage Bolt (12), 3/8"
Washer (20), 3/8" Lockwasher (17), and
3/8" Nut (14).
6a. Attach Cultivator to your Tractor Hitch in lowered position.
6b. Adjust Hitch Bracket on Cultivator to obtain desired depth of
Cultivator.
6c. Cultivator should be parallel to ground. Adjust Plow Bolts (13) to
level Cultivator Shanks. Pull Bar (3) may be inverted to increase depth
of cultivation.
6d. Adjust Gauge Shoes (7) to maintain depth.
Tighten all bolts
securely.
IMPORTANT
Cultivator must be stabilized to eliminate
"side to side" movement when cultivating crops. This is an
adjustment on the Sleeve Hitch, refer to Sleeve Hitch Manual for
instructions.
6e. If additional weight is needed (see page 3) concrete block should
be attached to the center of the Pull Bar (3) with the Rod Tie Down (8),
3/8" Plain Washer (20), 3/8" Lockwasher (17), and 3/8" Nut (14).
Figure 5
Figure 6
GAUGE SHOE ASSEMBLY
MOUNTING ADJUSTMENT
ASSEMBLY
17
14
20
12
15
19
7
10
4
(10)
Bolt, 1/2" x 1-1/2"
Qty. 2
(12)
Carriage Bolt, 3/8" x 1"
Qty. 2
(19)
Lockwasher, 1/2"
Qty. 2
(17)
Flat Washer, 3/8"
Qty. 2
(20)
Lockwasher, 3/8"
Qty. 2
(15)
Nut, 1/2"
Qty. 2
(14)
Nut, 3/8"
Qty. 2