Adjustment, Operation maintenance – Brinly BB-56 BH Rear Blade User Manual
Page 7
L-1434 Rev. B
7
ADJUSTMENT
6. Attach the blade to the sleeve hitch on your tractor
using the middle holes in the blade hitch.
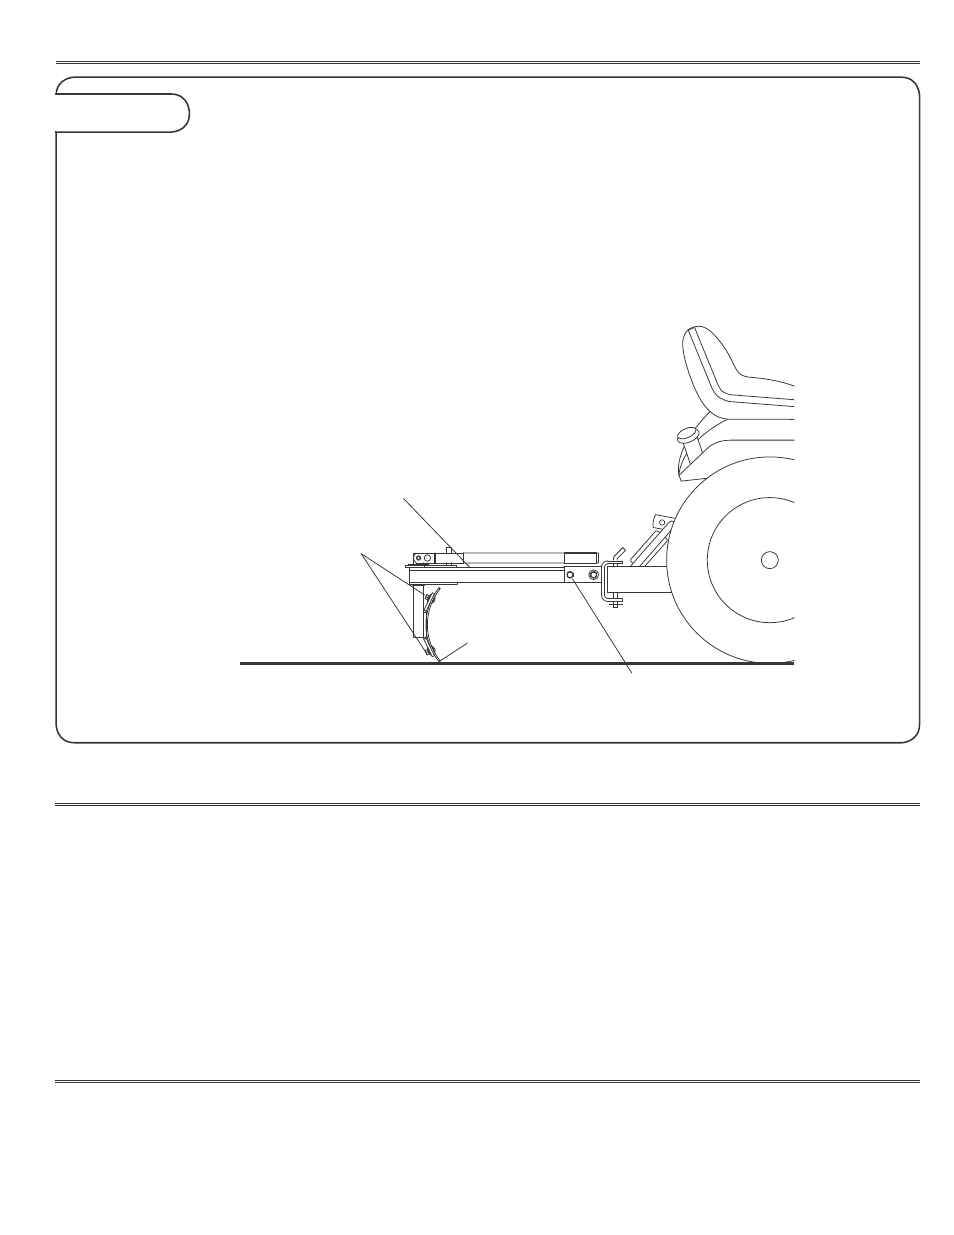
7. Position the tractor (with blade) on a hard, level surface.
Lower the blade and check to make sure it is level, side
to side, and then tighten the (4) 3/8" x 1" Carriage Bolts
holding the blade to the blade mount.
8. Place a level on the top of the drawbar. Adjust hitch
assembly until drawbar is level front to back. Tighten the
(4) 1/2" x 1-1/4" Hex Bolts securely.
Figure 3
Blade Level Adjustment
(side to side)
(4) 3/8" x 1" Carriage Bolts
Level Drawbar at This Surface
(front to back)
Drawbar Level Adjustment
(front to back)
(4) 1/2" x 1-1/4” Hex Bolts
Point of
Blade Edge
9. The stabilizer bolts on the hitch should be tightened
against the yoke on drawbar to prevent any "side sway"
during the operation of the blade.
10. The operating depth of the blade needs to be set now.
Make sure the tractor hitch is free to allow blade to go
below ground level, but still maintaining a minimum of 5"
transport height when raised. Refer to your tractor and/or
sleeve hitch manual for any necessary adjustments.
OPERATION
MAINTENANCE
Various blade angles (left and right) are obtained by lifting
lever, rotating the blade to the desired angle, then lowering
the lever into one of the locking holes.
To use the blade with the tractor in reverse gear, raise the
lever, rotate the blade 180 degrees and lock into the desired
position.
The rear blade is designed to be used in a variety of light
jobs such as leveling, scraping, raking, back filling, snow
removal, etc.
The tractor speed while operating the rear blade should be
governed by the task to be accomplished.
While grading, do not attempt to cut excessive amounts of
hard packed material at a high rate of speed.
NOTE: Operate at a speed which allows loose material that
has piled up on the face of the blade to be deposited in low
areas.
After the blade edge has worn considerably, it should
be rotated (from bottom to top) to provide a "new" edge.
Remove the four 3/8" x 1" Carriage Bolts, rotate the blade,
and then reassemble the unit with the "new" edge on the
surface.
Lubricate all pivoting points with a drop or two of 30 weight
oil.