Rough-in installation – Blu Bathworks TSP811S User Manual
Page 3
2014-01
1 866 907 0122 blubathworks.com
®
2
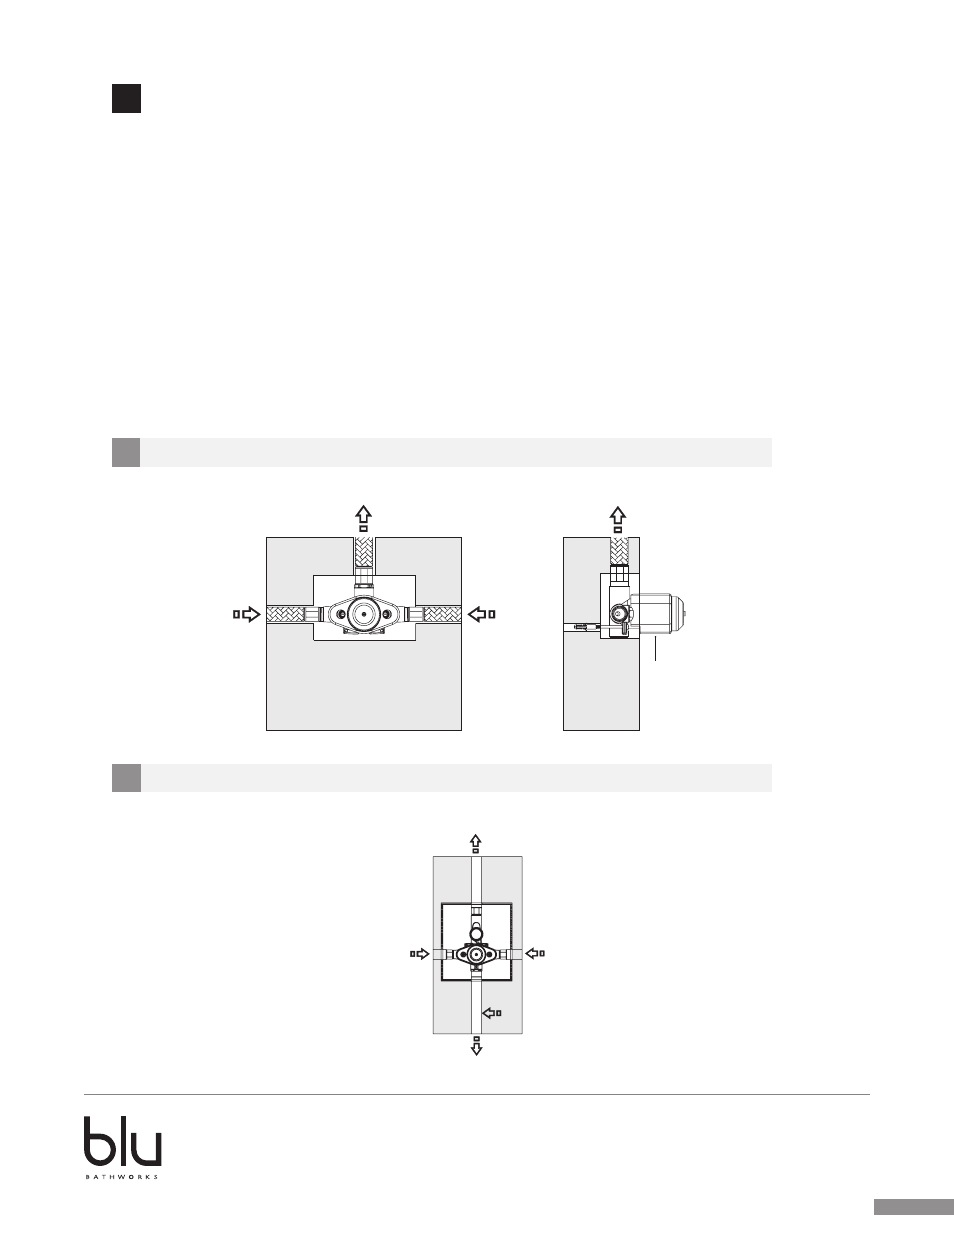
Connect the
shower
Connect the
shower
Connect cold
inlet
Connect hot
inlet
Min/Max
guide on
mud guard
1
Rough-In Installation
Refer to illustration A for 811 series and illustration B for 821 series
•
Make sure the valve body is positioned according to valve markings so the inlets are situated
with hot piped on the left and cold piped on the right (refer to illustration 1).
•
IMPORTANT – Valve rough in depth is 1
5
⁄
8
” – 2
1
⁄
8
” (40-55mm) measured from the centerline of
the inlets to the surface of the finished wall.
•
Run
1
⁄
2
” (12.5mm) copper (or equivalent) supply lines to the proper height of the valve inlets and
be sure to secure all piping and fittings.
•
Fittings for the diverter valve should be installed at the same rough in depth as the valve body.
The primary fitting water source is provided at the top of the valve with the diverter fitting supply
provided at the bottom of the valve.
•
Tile guard should remain fixed until tile is complete and trim is installed.
•
Prior to tiling, Blu recommends that the valve be tested. Open the supply lines ensuring the
cartridge is closed and check all supply connections to the valve for possible leaks.
•
Open the cartridge and test both the primary fitting and the diverter for any possible leaks. At
this time ensure smooth water flow occurs through both fittings.
811 series rough-in connections
821 series rough-in connections
Connect to handheld shower or overhead rain shower.
Connect cold inlet
Connect hot inlet
Connect pipe to tub spout or overhead rain shower.
A
B