Enclosed drawers for tables with channel frame, Assembly instructions – Belshaw Adamatic Sugaring Table User Manual
Page 2
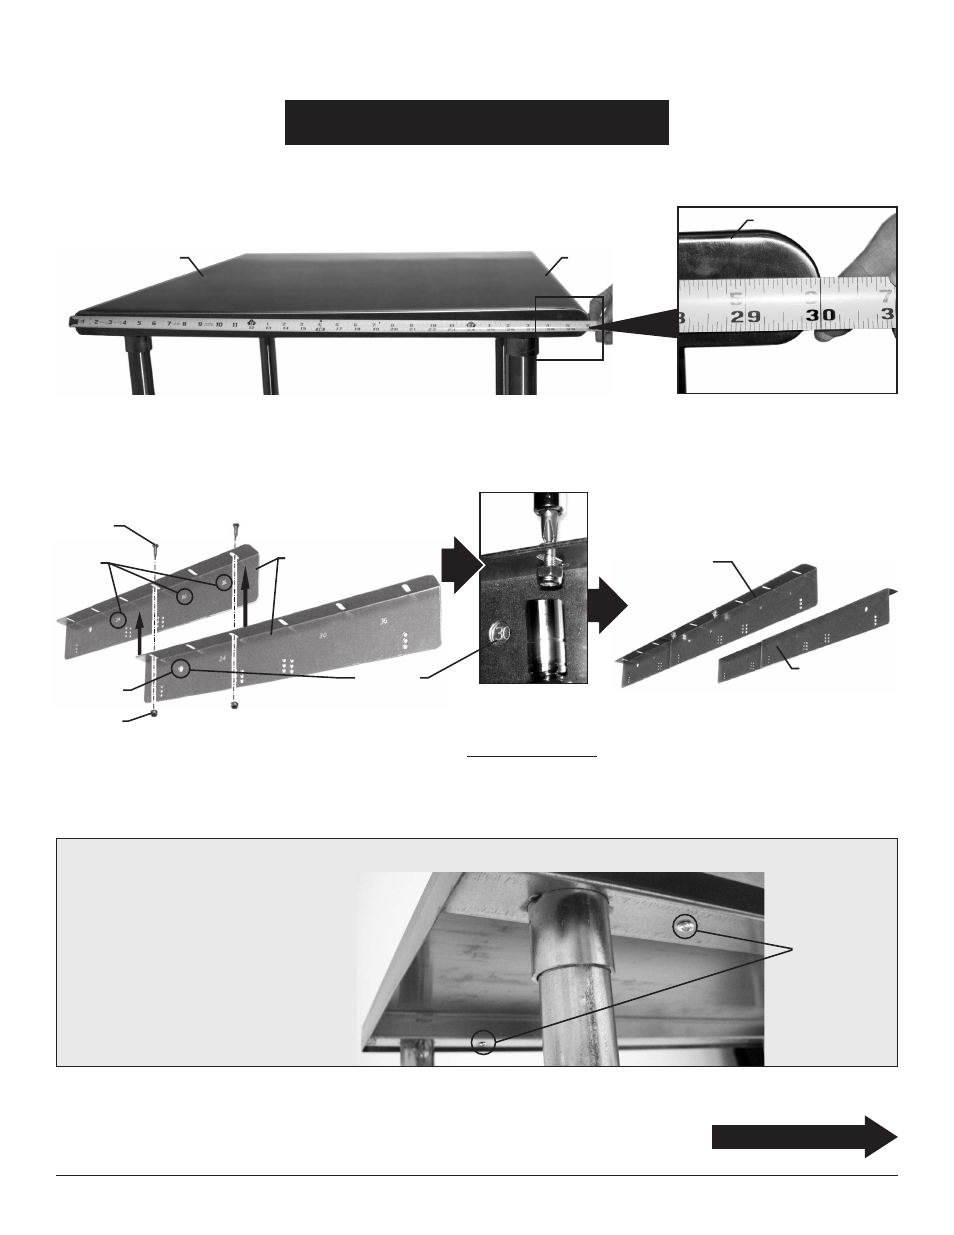
left-hand
bracket assembly
right-hand
bracket assembly
Step 2 - Assemble brackets, based on front-to-back dimension of tabletop (24˝, 30˝, or 36˝).
Each bracket assembly consists of two bracket angles. Align hole in the first bracket angle with applicable tabletop dimension number in
the second bracket angle, and assemble as shown.
PLEASE NOTE: As an example, assembly for a 30˝ tabletop is shown.
Item #1
bracket
angles
Item #3
#373748 screw
tabletop
dimension
numbers
Item #4
#313196 hex nut
When aligned
properly, the tabletop
dimension number
will appear through
this hole.
bracket
angle hole
Use screwdriver and
socket or wrench to
join bracket angles.
Do NOT fully tighten.
ASSEMBLY INSTRUCTIONS
Enclosed Drawers for Tables with Channel Frame
2
Step 1 - Measure front-to-back dimension of tabletop (24˝, 30˝, or 36˝).
This will determine how to assemble brackets in Step 2.
Front-to-back dimension
shown here is 30˝.
tabletop
front of tabletop
rear of tabletop
(continued on Page 3)
Before continuing, please read the following about tabletop channels (located underneath tabletop):
For 20˝ x 20˝ drawers
Tables with channels feature predrilled holes
with screws (see photo at right) for bracket
assemblies. Take the screws out and set
aside.
For 15˝ x 20˝ drawers:
Tables with channels require holes to be
drilled, using a 1/8˝ drill bit.
front and rear
predrilled holes and
screws (shown for
left-hand bracket
assembly)
Drawers #501572, 502943, 502946, 502947, 502971 and 502972