Replacing needle – Baby Lock Sashiko 2 (BLQK2) Instruction and Reference Guide User Manual
Page 34
M
A
I
N
T
E
N
A
N
C
E
33
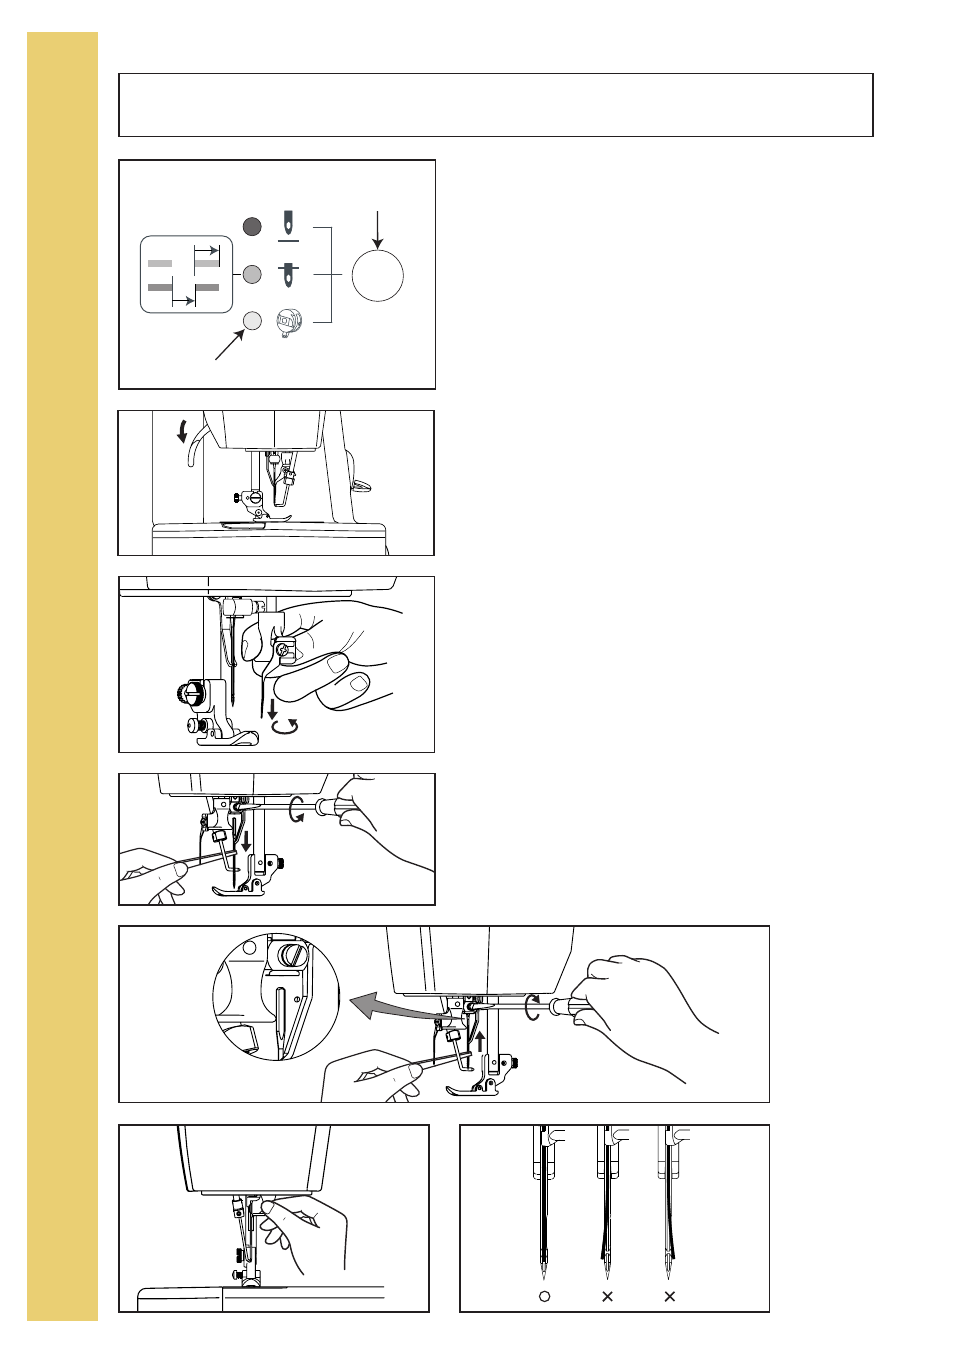
Replacing Needle
1. Press and hold the positioning button for approxi-
mately 2 seconds to set the machine to the loading
position. (Fig. A)
REMINDER: Remove fabric and cut thread before
putting machine into the loading position.
2. Lower the presser foot. (Fig. B)
3. To move the latch wire from in front of the needle
grasp the latch wire lever and pull straight down, turn
the lever 90 degrees towards you and release. Lever
will remain in the down position. (Fig. C)
4. While holding needle with tweezers loosen the nee-
dle clamp screw and remove needle. (Fig. D)
5. With the flat side of the new needle facing the right
side of needle clamp insert the needle into the open-
ing as far up as it will go. Securely tighten the nee-
dle clamp screw. (Fig. E)
6. Restore the latch wire to its original position. (Fig. F)
7. After restoring the latch wire, make sure the latch
wire is in the center channel of needle. (Fig. G)
A
B
C
D
E
F
G
Loading
Position
Positioning
Button