Installation, Installation overview, Recommended installation procedure – Avalon Firestyles Hideaway User Manual
Page 8
8
Installation
(for qualified installers only)
Travis Industries
4030612
1 0 0 - 0 1 1 4 8
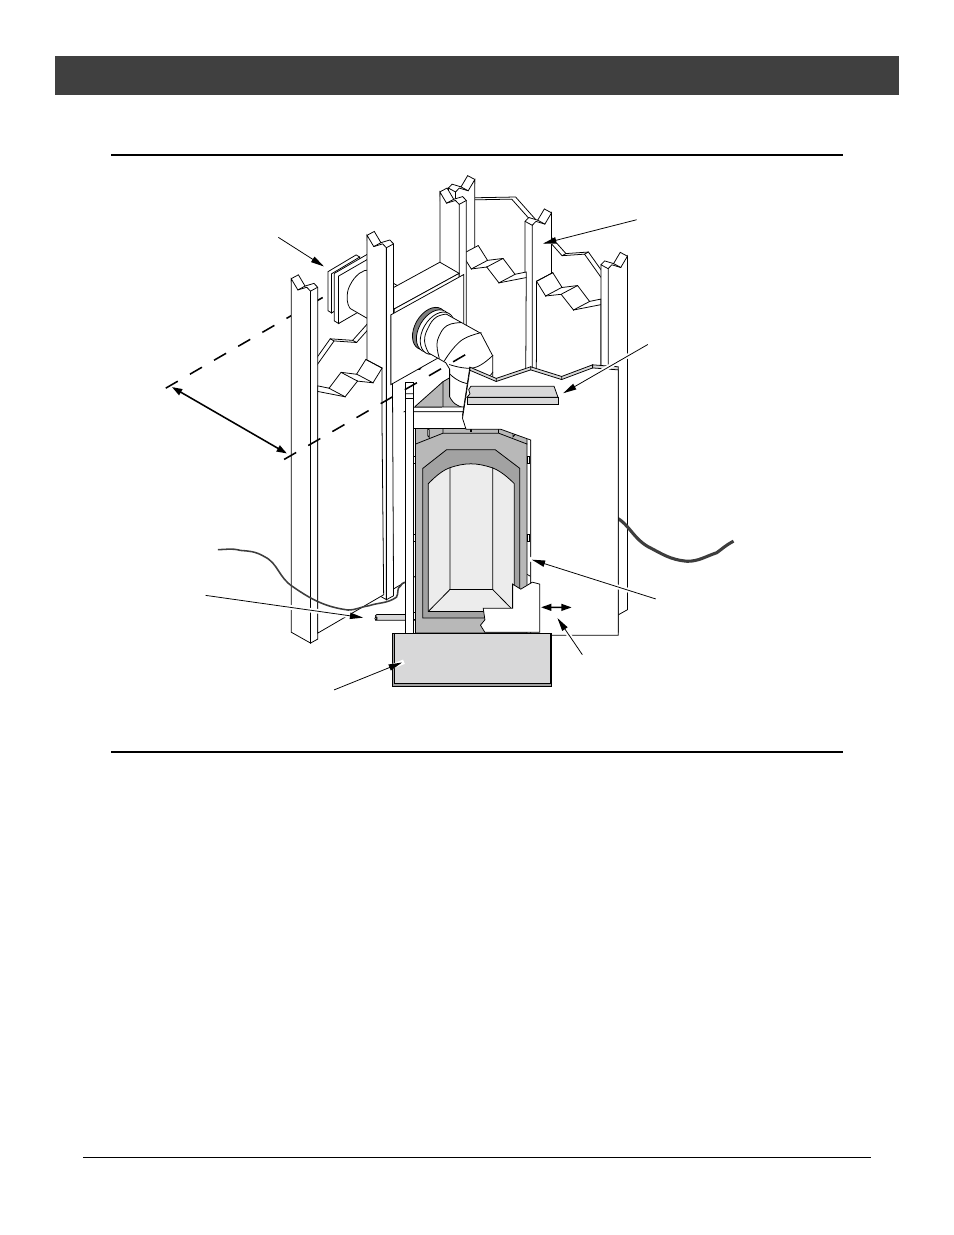
Installation Overview
See the section
"Termination
Requirements"
Drywall
Non-combustible facing
(see the section "Facing
Requirements")
Gas Line
(left side or beneath)
See the section
"Mantel Requirements"
Insulation or drywall must
not fill the 1/2" gap around
the sides of the fireplace.
See the section
"Vent Requirements"
See the section "Minimum
Framing Dimensions"
See the section
"Hearth Requirements"
Thermostat Wire
(either side)
See the section
"Electrical Connection"
1" Min. Clearance from Face to Side Wall
Recommended Installation Procedure
1.
Frame the opening for the fireplace. Make sure to allow for vent installation.
2.
Tack a strip of the facing material (drywall, hardboard, dura-rock, etc.) on the frame on both sides of
the fireplace opening. NOTE: This strip will be removed after the fireplace is secured to the floor.
This facing thickness must represent the total thickness of the finished facing. FOR EXAMPLE: If
tile is to be used, include the thickness of the backboard, tile, and tile adhesive.
3.
Insert the fireplace into the framing. Slide it back until the standoff flanges (the 1/4” flanges on the
stand-offs) contact the strip of facing material. Verify all clearances at this point.
4.
Secure the fireplace to the floor by screwing or nailing through the nail-down plates (found on
both sides and back of the fireplace).
5.
Complete the gas line installation.
6.
Complete the electrical hook-up.
7.
Complete the vent installation.
8.
Install the hearth (if applicable).
9.
Remove the strips of facing material. Install the facing.
10.
Install the mantel (if applicable).