4 installation of hdd – Aplex Technology ACS-2695A User Manual
Page 12
ACS-2695 User Manual
12
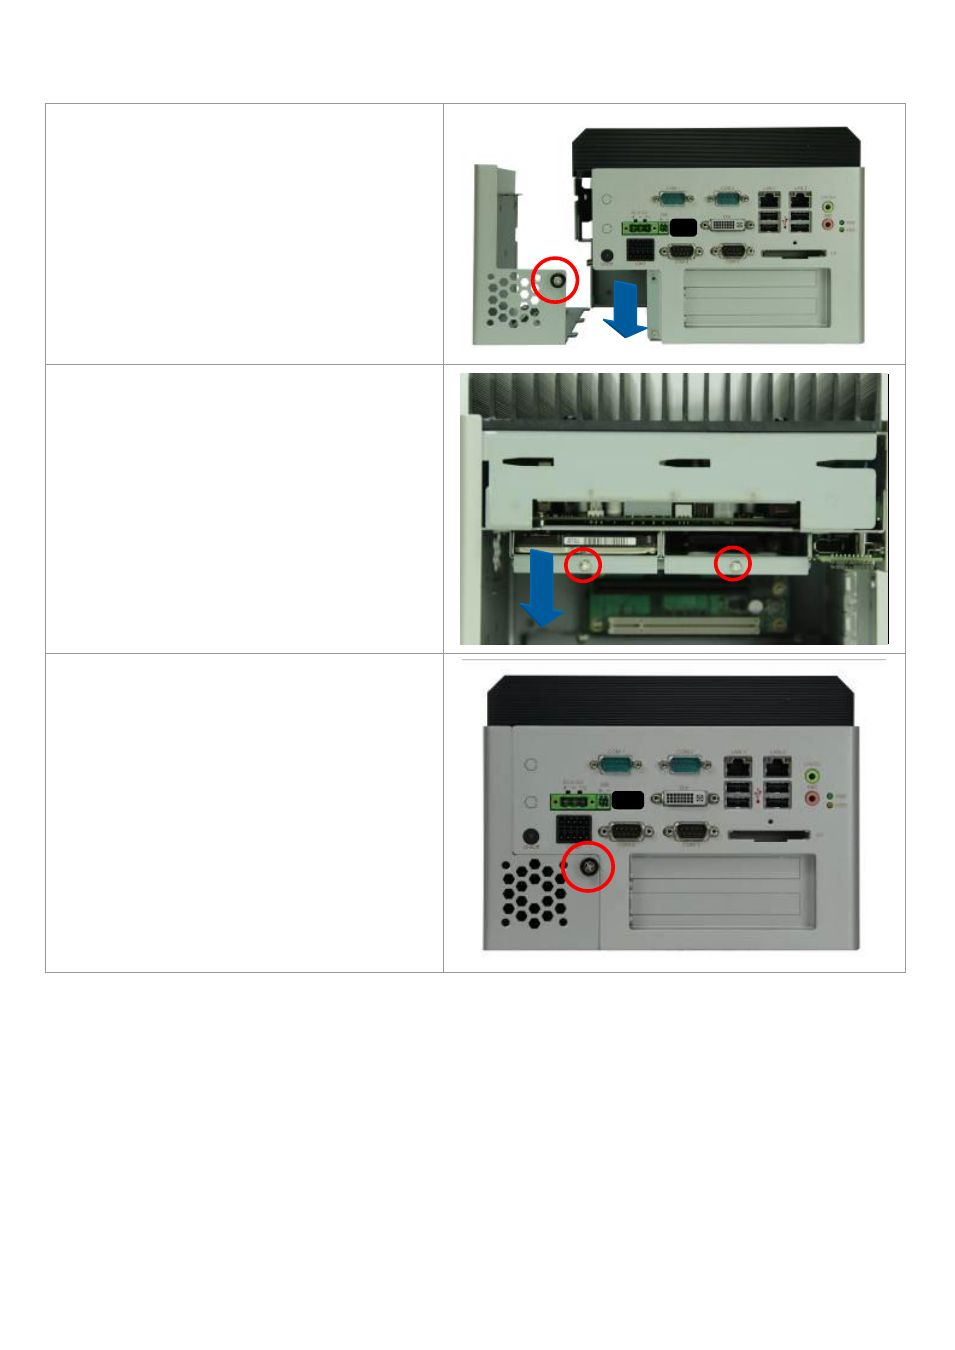
1.4 Installation of HDD
Step 1
There is one screw which connects to the
chassis. Pull out the chassis towards the I/O
side after unscrewing as shown in the picture
ACS-2695
Step 2
There are 2 screws to deal with when
enclosing or removing the HDD bracket as
shown in the picture ACS-2695
Loosen screw and draw the HDD bracket
out as shown in the picture ACS-2695
Step 3
Tighten the 1 screw as shown in the picture.
That’s how it should look after it has been
installed.
See also other documents in the category Aplex Technology Computer hardware:
- APC-3597B (77 pages)
- ARCHMI-921P (114 pages)
- APC-3791A (77 pages)
- APC-3985A (94 pages)
- APC-3585A (65 pages)
- APC-3918 (102 pages)
- APC-3228A (96 pages)
- APC-3917B (91 pages)
- APC-3249A (88 pages)
- APC-3765 (80 pages)
- APC-3919 (87 pages)
- APC-3918P (87 pages)
- APC-3081 (58 pages)
- ACS-2110 (91 pages)
- ACS-2110 (89 pages)
- ARCHMI-715P (108 pages)
- ARCHMI-721P (114 pages)
- AHM-6077 (63 pages)
- ARCHMI-821P (121 pages)
- AHM-6120 (27 pages)
- ACS-2645 (69 pages)
- AHM-6196A (89 pages)
- ACS-2665C (72 pages)
- ACS-2685 (82 pages)
- ACS-2120 (59 pages)
- ACS-2675C (73 pages)
- ACS-2160 (56 pages)
- ADP-1198P (29 pages)
- ACS-2170 (77 pages)
- ACS-2702 (48 pages)
- ARCDIS-115P (41 pages)
- ACS-2210A (72 pages)
- ADP-1196 (16 pages)
- ARCDIS-121P (54 pages)
- ADP-1224A (44 pages)
- ADP-1081A (12 pages)
- OPD-1156 (39 pages)
- OPD-1086B (29 pages)