Retrofit / pre-skimmed plasterboard, Patch plastered finish, Alignment and plastering preparation – Amina iQ Developer Series User Manual
Page 16
Retrofit / pre-skimmed plasterboard
Patch plastered finish
Alignment and plastering preparation
1 4
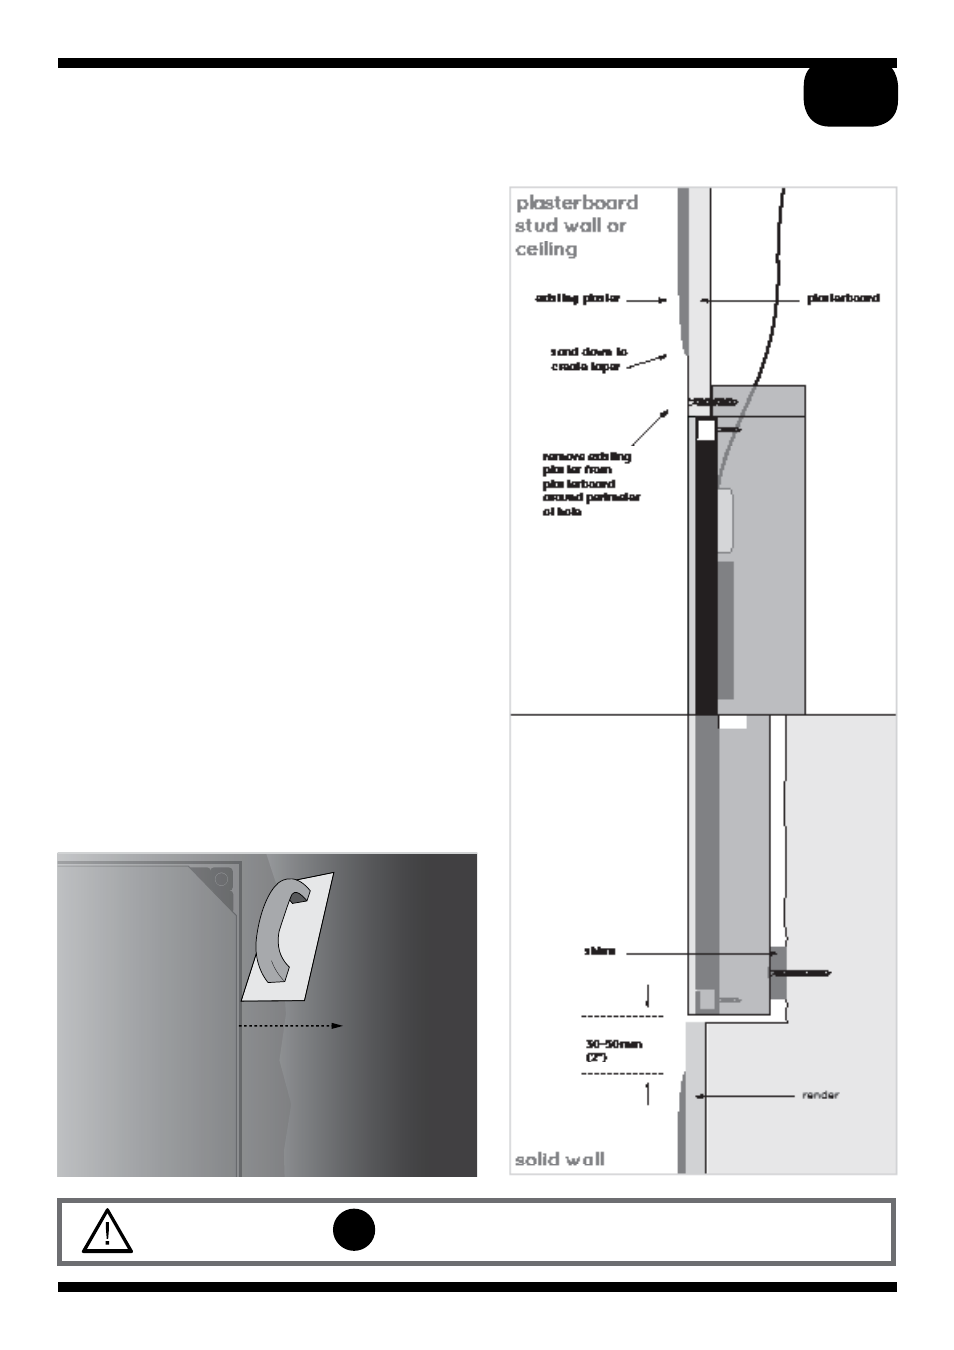
Speaker alignment required for plastering
After removing a 30-50mm (3/16 - 2”) wide
section of existing plaster surrounding the
cutout, the front face of the speaker should
be flush with the paper face of the
plasterboard.
This is the method that will be used during
plastering (Section D). It positions the speaker
to be patch plastered with a 2mm (5/64”)
skim across the speaker front, blended with
the existing plaster on the plasterboard.
Amina recommend British Gypsum Easi-fill®
which allows a smooth accurate finish using
fine sandpaper or a wet sponge.
For walls /ceilings that have already been
plastered.
30-50mm
3/16 - 2”
sand down to
create taper
existing plaster
remove existing
plaster from
plasterboard
Retrofit / pre-skimmed plasterboard
Patch plastered finish
Alignment and plastering preparation
For walls /ceilings that have already been plaster
finished.
Speaker alignment required for plastering
After removing a 30-50mm (approx 2”) wide
section of existing plaster surrounding the cut
out, the front face of the speaker should be
flush with the paper face of the plasterboard.
To patch plaster:
Skim across the speaker front and blend with
the existing finished plaster.
Amina recommend British Gypsum Easi-fill®
which allows a smooth accurate finish using
fine sandpaper or a wet sponge.
13
Continue to section
C
B1