Oklahoma Sound #22 User Manual
Page 4
O
klahOma
S
Ound
C
OrpOratiOn
TABLE TOP LECTERN: Model 22
inStallation oF haRdwaRe
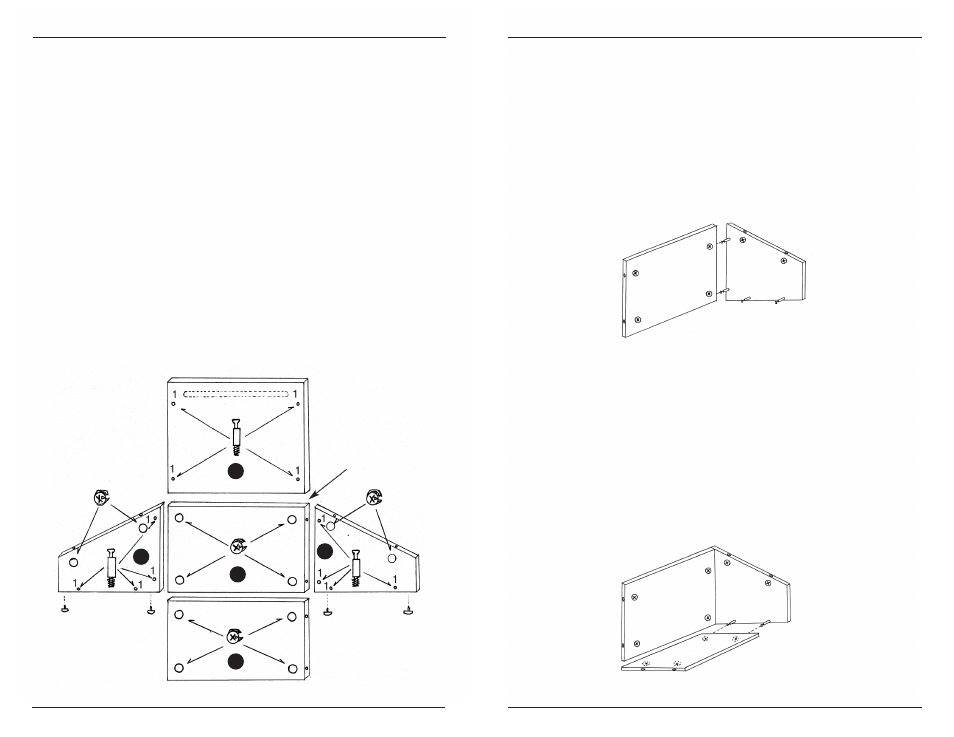
1) Lay out the wood panels as shown in Diagram A (make
sure the factory drilled holes are facing upwards) You
can determine the top of the front panel by identifying
the edge cut on an angle.
2) Identify the holes numbered "1" in Diagram A. Screw
the bolts into the inserts with the #2 Phillips head
screwdriver. Be sure to tighten the screws all the way.
BE CAREFUL NOT TO OVER-TIGHTEN THE BOLTS AS THIS
WILL FORCE THE INSERTS TO STRIP THE WOOD!
3) The cams should be inserted in the larger holes as
shown on diagram. MAKE SURE THE ARROW ON THE
CAM IS POINTING TO THE CLOSEST EDGE AND ALIGNED
WITH THE HOLE ON THE EDGE.
4) Using a hammer gently tap plastic glides into bottom
edge as shown below (Diagram A). GLIDES SHOULD BE
INSTALLED NO FURTHER THAN ONE INCH FROM END.
A
B
C
E
D
Diagram "A"
Angle Cut Edge
aSSemBly oF leCteRn
It is important that the instructions on the assembly are
followed carefully
1) The first piece of the lectern to be assembled will be
the front Panel B. Align the holes on the front panel
edges with the two cam bolts on the side Panel A.
Tighten the cams by turning clock-wise until locked
(Diagram B)
2) The next piece to be assembled will be the bottom
Panel E. Make sure the cams face the bottom of the
lectern. The two bolts on Panel A will align with the two
holes on the edge of the bottom Panel E (these holes
reach until the cams). Gently push the panel down on
to the cam bolts until the panel is completely on the
right side panel. Tighten Cams
(Diagram C)
Notice there will be a gap of between 3/4" and 1" between
the bottom panel and the front panel this is needed for
the optional model #112 see back page.
Diagram "B"
Diagram "C"
4
5