Oklahoma Sound #6010 User Manual
Page 3
O
klahOma
S
Ound
C
OrpOratiOn
ARiSTOCRAT SOuND FLOOR LECTERN: Model 6010
6
3
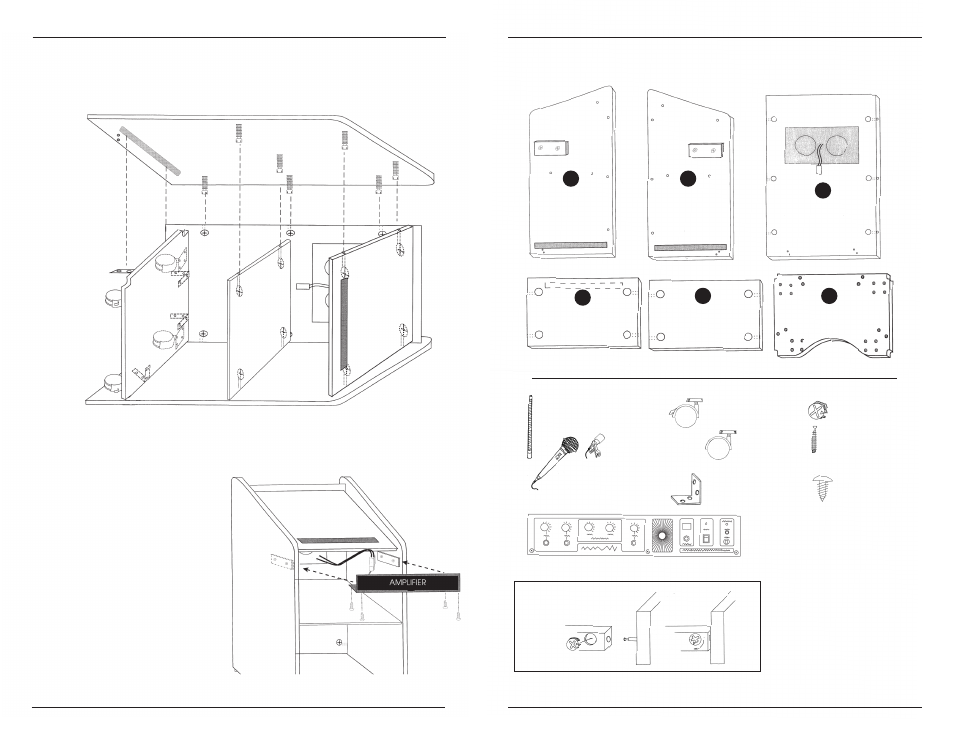
4) Now apply Panel C to the semi assembled unit. Be sure to align the cam
bolts to the holes on both Panel B and Panel E. Be sure that Panel F is se-
curely in groove. Tighten cams. (Diagram C)
5) Screw the corner braces on the bottom Panel F into Panels A, B and C.
6) Connect the plug coming out of the speakers on Panel B to the plug coming
out of the back of the amp. Fit the amp between the two sides and bring
the amp up until it reaches the
cleats (wood stub) then from the
bottom of the amp screw in four
screws. (Diagram D)
7) Once again go over all the cams
and check to make sure the lec-
tern is sturdy.
8) Screw on gooseneck mic holder
and install microphone for
sound use.
Congratulations! You have success-
fully assembled your lectern, which
if
cared for correctly should give you
long and satisfactory usage.
Diagram "C"
Diagram "D"
Left Side Panel
Right Side Panel
Front Panel
assembly parts
Top
(Reading Surface)
Shelf
Bottom
tools required
#2 Phillips Head
Screwdriver
Hammer
cam lock assembly
(1) Gooseneck
............................................
(1) Hand-held
Condenser Mic
............................................
(1) Tie-Clip
Mic
..........................
(2) Locking Casters
........................................
(14) Cams
..........................
(14) Cam Bolts
..........................
(36) #8
1/2" Phillips
Screw
..........................
(2) Non
Locking
Casters
.............................
(4) Corner Braces
.....................................
(1) Amplifier
Series 700
................................................................
A
B
C
E
D
F