Oklahoma Sound #PRC 400 User Manual
Page 5
5
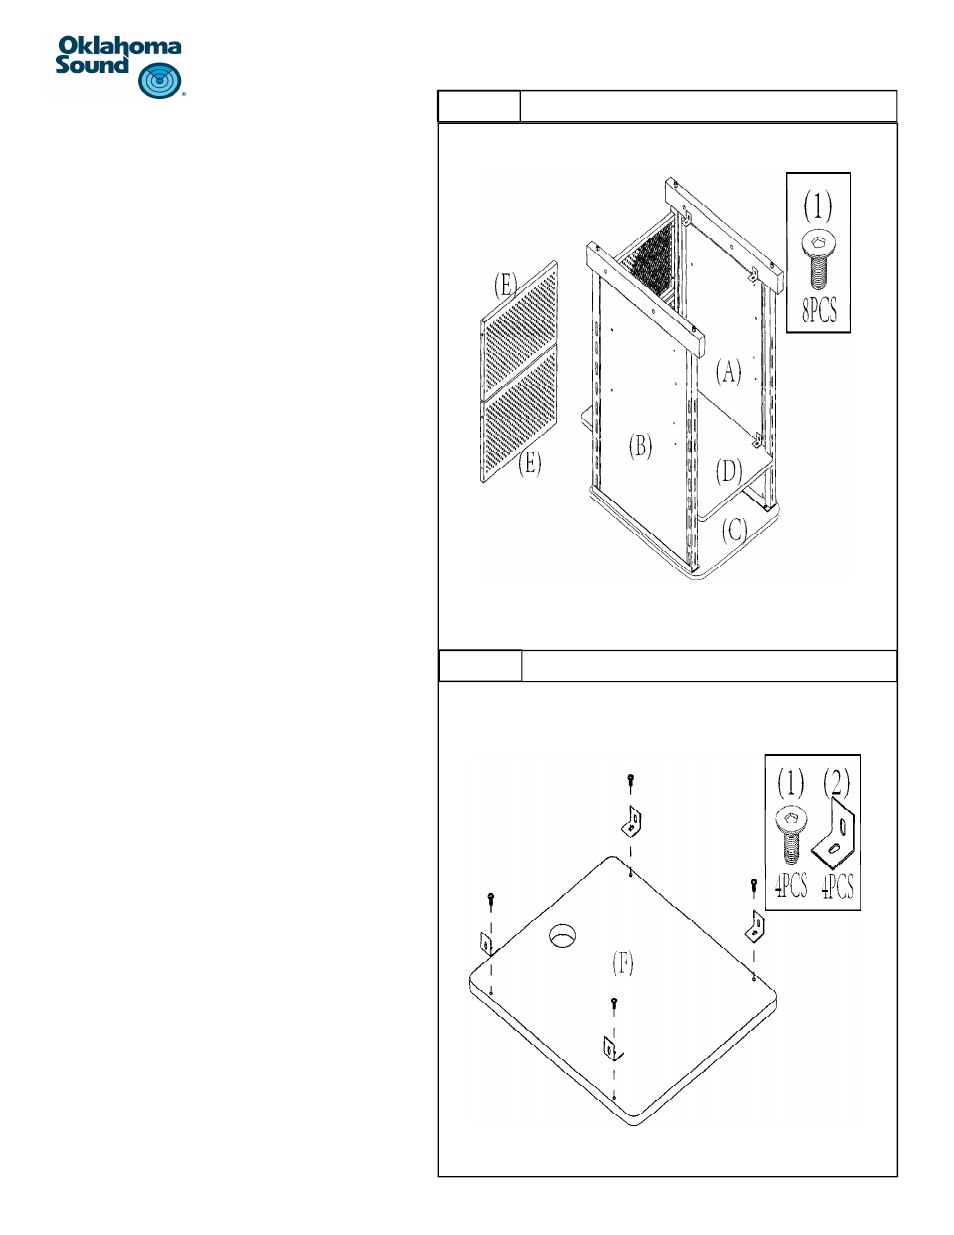
Step 3:
a) Locate the two front metal panels part #E.
b) The two panels will slip between the two side
panels right above the projector panel #D as
shown.
c) The two panels will be mounted one on top of
each other. Each of the panels has two holes at
each end.
d) Align the two holes on each end of each panel
with the holes on the inside edge of the side
panels.
e) Once the holes are aligned use bolts #1 to aƩach
panel #E to the side panel by first threading the
bolt through the holes on the edge of panel #E
and then into the edges of each side panel.
f) This process should be done to aƩach both pan-
els #E to the front of the unit.
g) Use the provided hex key, part #11 to Ɵghten
the bolt in place.
Step 4:
a) Locate the adjustable cabinet shelf panel #F and
lay it down on a clean surface facing down with
the holes facing upwards.
b) AƩach four “L” brackets part #2 to the two sides
of the panel as shown. Make sure that the verƟ-
cal side is at the edge of the panel as shown.
c) Use four bolts #1 to aƩach the brackets by in-
serƟng the bolt through the hole on the bracket
and into the embedded T-nuts in the panel.
d) Use the provided hex key, part #11 to Ɵghten
the bolt in place.
STEP 3
STEP 4