Oklahoma Sound #LSS User Manual
Page 5
5
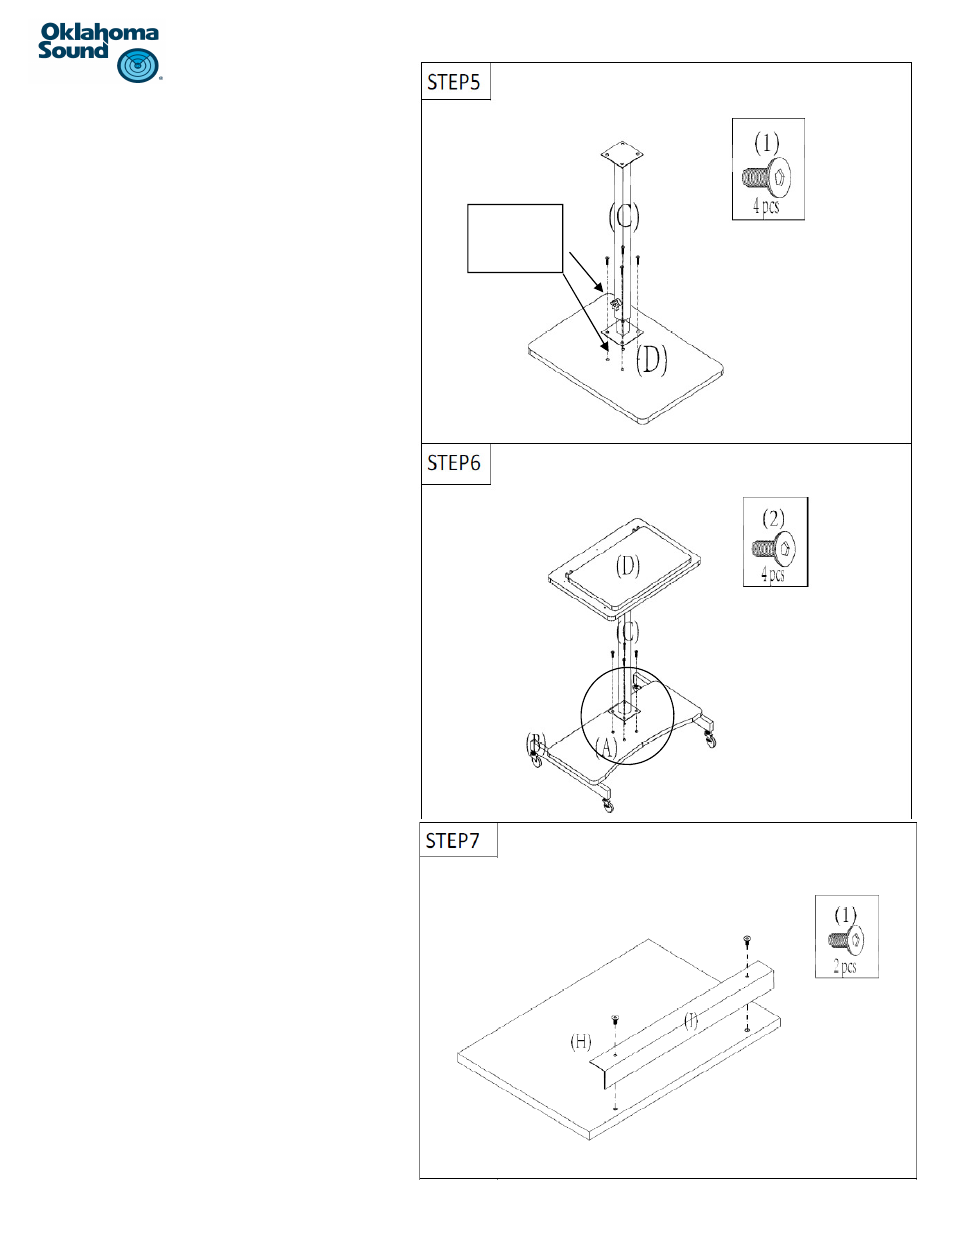
Step 5:
a) Locate panel #D and lay it down on a clean, soŌ sur-
face with the four T-nuts in the middle of shelf facing
upwards as shown.
b) Turn the column part #C upside down (adjustable
knob closer to panel #D) and align the four holes on
the column mounƟng plate with the four embedded
T- nuts in panel #D.
c)
The knob should be facing the front (rounded edge)
of the pullout shelf on the surface of panel #D.
d) Use four of bolts #1 to secure the column to panel
#D as shown.
e) Use the provided hex key (hardware #10) to Ɵghten
the bolts securely so that the panel is securely fas-
tened to the column.
Step 6:
a) Carefully turn the column and the aƩached panel #D
over. Locate the mounƟng plate on the boƩom end
of the column.
b) Align the four holes on the mounƟng plate with the
four predrilled holes in the center of panel #A as
shown. Make sure the knob is facing the front of
panel #A.
c)
Use four bolts #2 to secure the column to panel #A
as shown. The screws will go through panel #A and
screw into the metal frame panel #B.
d) Use the provided hex key (hardware #10) to Ɵghten
the bolts securely.
. Step 7:
a) Locate panel #H and the metal book stop part #I.
b) Lay panel #H on a clean, soŌ surface facing down-
wards with two T-nuts at the edge facing upwards as
shown.
c)
IdenƟfy the metal book stop part #I. Align the two
holes on part #I with the two embedded T-nuts on
panel #H as shown.
d) Use two of bolts #1 two secure the book-stopper,
part #I in place.
e) The verƟcal (no holes) porƟon of the book stop
should wrap along the edge of panel #H.
f)
Use the provided hex key (hardware #10) to Ɵghten
the bolts securely.
g) Place the reading surface on the side for a later step.
Adjustable
knob close to
panel #D