3 step 10, 4 step 11 – KBC Networks VPS Solar Power Kits User Manual
Page 9
VPS Series User Manual
Manual-VPS_Series-Rev1409
Copyright © KBC Networks 2014
Page 9 of 12
www.kbcnetworks.com
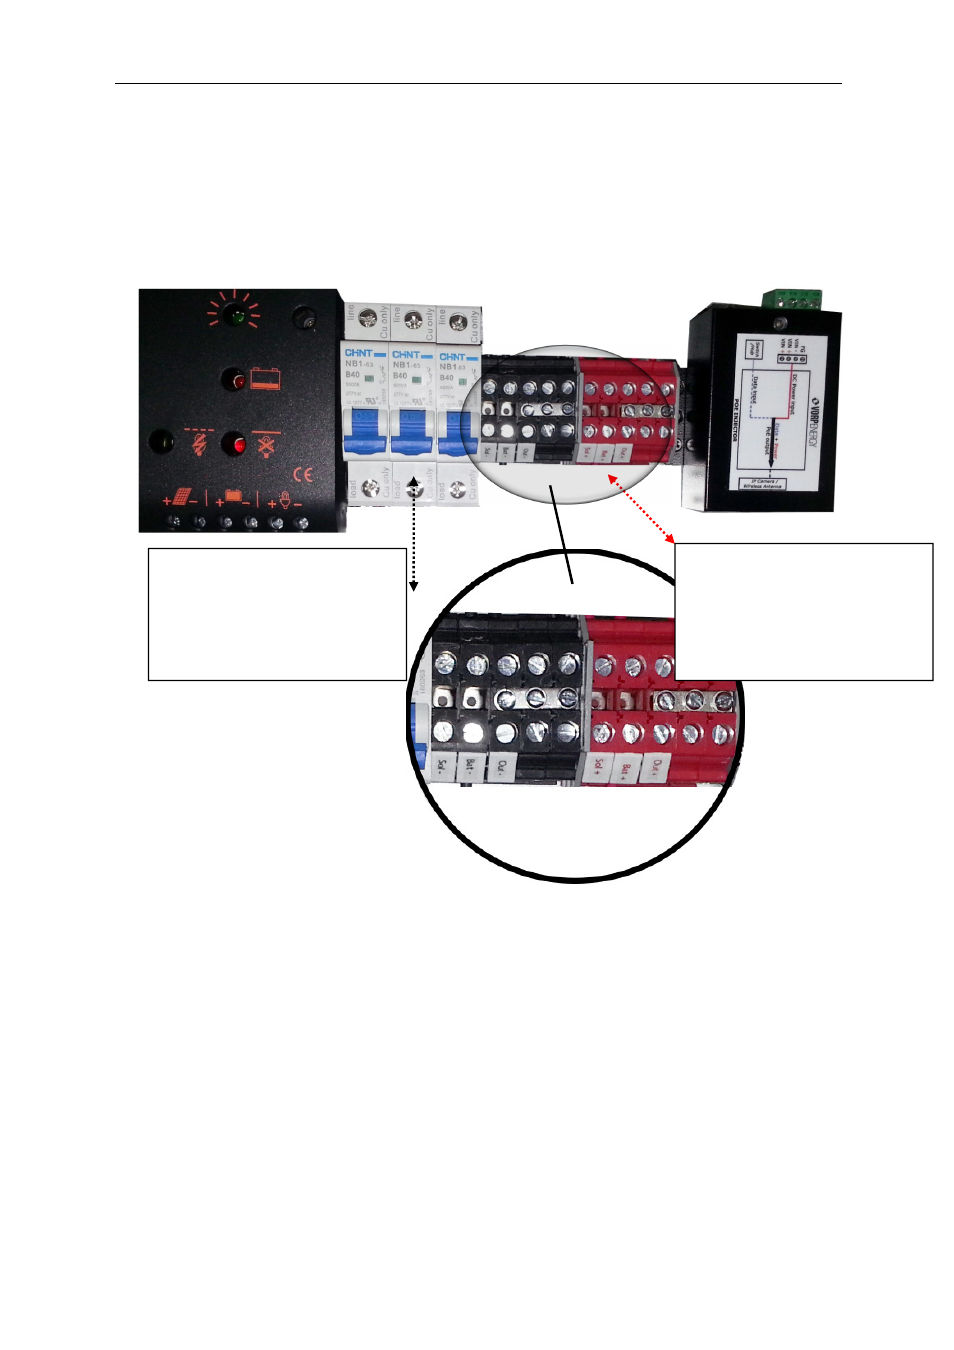
3.3 Step 10:
Route the solar panel cables up through the installed cable glands on the bottom of the
enclosure and into the Black and Red terminal blocks labeled
SOL +
and SOL -. Give
yourself a few inches of slack in the cable and then tighten glands. Connect cables
coming out of the enclosure to the cables coming from the solar panel.
3.4 Step 11:
If the accessories or your equipment is DIN rail mountable then mount to available DIN
rail. If not then place equipment in any available area. Connect the power from the
accessories and your equipment to the Red and Black outputs on the terminal blocks
labeled OUT + and OUT –
Note:
To prevent battery over-discharge all equipment loads must be hooked to the
terminal block for output power. This output will disconnect the load if the battery
voltage drops below 11V and this will protect the battery from over-discharge. If
batteries get completely discharged because the equipment was connected directly to
the battery, you will reduce the battery life and you will most likely need to
supercharge them with a good quality 10A automotive battery charger.
Negative (BLACK) Terminal
Blocks
Sol -
= Solar Panel
Bat -
= Battery Cable
Out -
= Output Load
Positive (RED) Terminal
Blocks
Sol +
= Solar Panel
Bat +
= Battery Cable
Out +
= Output Load