Connection diagram, Installation steps, Onnection – CUE CRS DemoSet User Manual
Page 4: Iagram, Nstallation, Teps
User Manual
Page 4
www.cuesystem.com
[email protected]
Cue Reservation System Demo Set
C
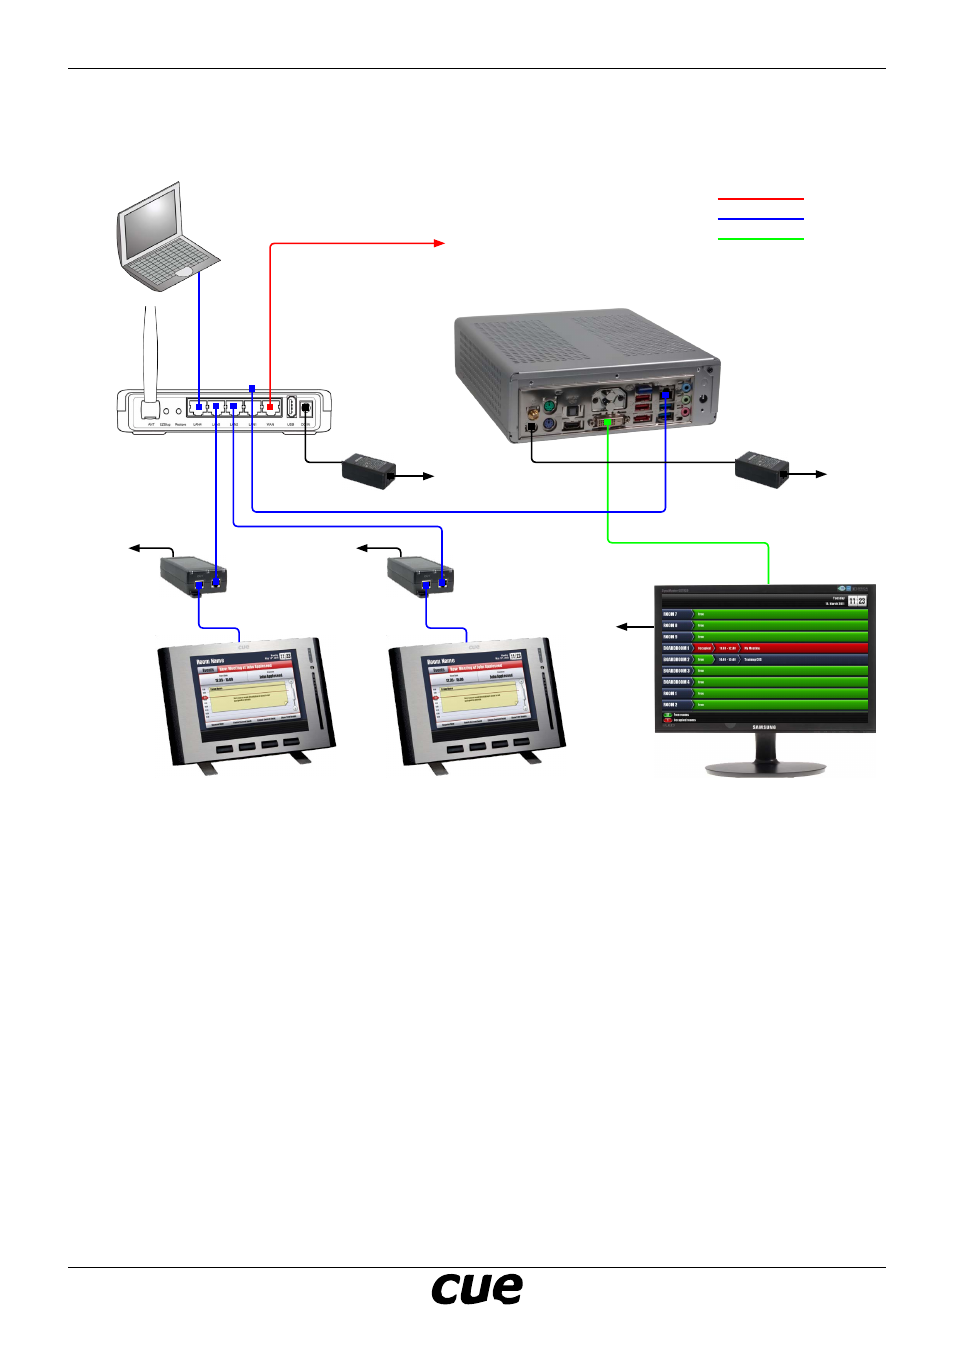
onneCtion
D
iagram
Room Overview Display
BOARDROOM 1
touchCUE-8X02
192.168.10.11
BOARDROOM 2
touchCUE-8X02
192.168.10.12
Router
192.168.10.1
DVI
Ethernet
WAN
Company Network with
DHCP
enabled and Internet Access
230 VAC
230 VAC
PoE Adapter
PoE Adapter
230 VAC
230 VAC
PC for Microsoft
Exchange
Access
230 VAC
i
nstallation
s
teps
1. Don’t connect any power supply.
2. Connect Router WAN port to your network
with Internet access. Network has to be
DHCP enabled.
3. Connect ipCUE-omega CUEnet(LAN) port to
the router output LAN1.
4. Connect both touch panels touchCUE-8X02 to
the router outputs LAN2 and LAN3 using PoE
Adapters.
5. Connect PC for Microsoft Exchange Access to
router output LAN4. Ethernet card on PC has
to be DHCP enabled.
6. Connect ipCUE-omega HDMI/DVI output to
LCD display using cable HDMI to DVI.
7. Connect power supplies using following order
• Router
• Touch panels and LCD monitor
• ipCUE-omega
8. Wait approx. 1 to 2 minutes for system
initialization, connection to the Microsoft
Exchange server and data download.
ipCUE-omega
192.168.10.10