Configuration menu – Casella CEL CEL24X User Manual
Page 13
7.
CONFIGURATION MENU
The Configuration Menu (Refer
to Figure 9) is used to make changes to the Display
Contrast, Calibration Level and the Signal Input Source.
To access the Configuration Menu press and hold the Right key when switching the
instrument on (by pressing the Power ON key).
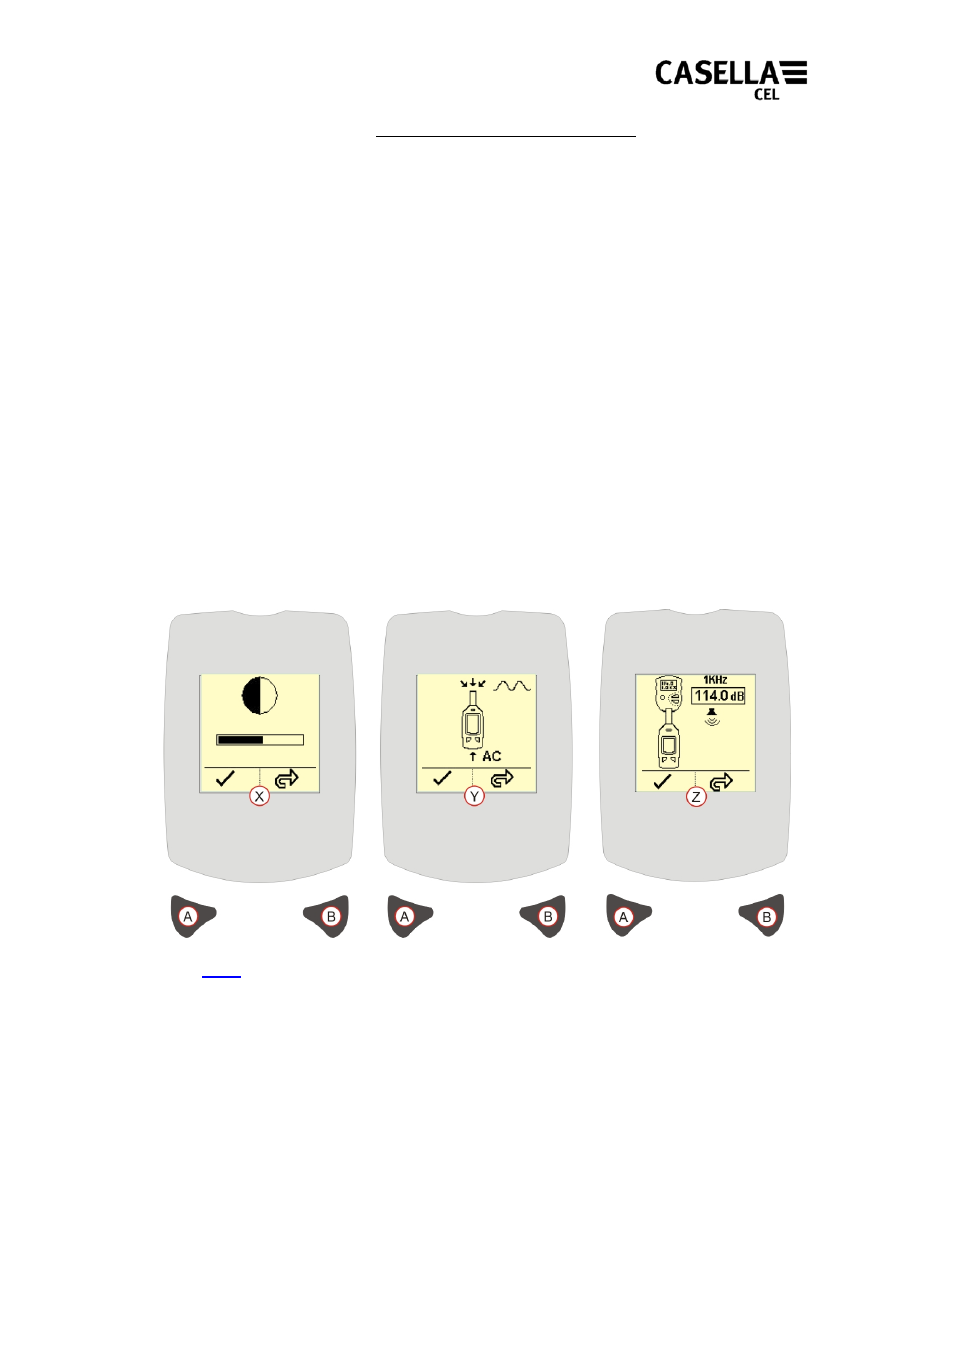
DISPLAY CONTRAST
– [Figure 9 Reference X]. Press Right key (B) to adjust the
Contrast. When the contrast is considered ideal press Left key (A) to accept the
changes and progress to the Calibration Level screen.
SIGNAL INPUT SOURCE
– [Figure 9 Reference Y].
Note:
This option is for the use of acoustic
laboratories only.
This screen allows the Signal Input to be routed from the inbuilt microphone, or from
an external signal connected via the auxiliary 2.5mm headphone socket. Press Right
key (B) to toggle between microphone input and alternating current input.
The default Power-Up selection is Microphone Input. Press the Left key (A) to confirm
any changes.
CALIBRATION LEVEL
– [Figure 9 Reference Z]. This screen is used to set the
nominal output level of the acoustic calibrator e.g. 114.0dB. Press Right key (B) to
adjust the calibration level. Refer to the calibration certificate for the acoustic
calibrator for the calibrator output level. Press Left key (A) to accept the changes and
progress to the main measurement screen.
Figure 9 Configuration Menu
13