Alto Professional AEQ231 User Manual
Page 4
4
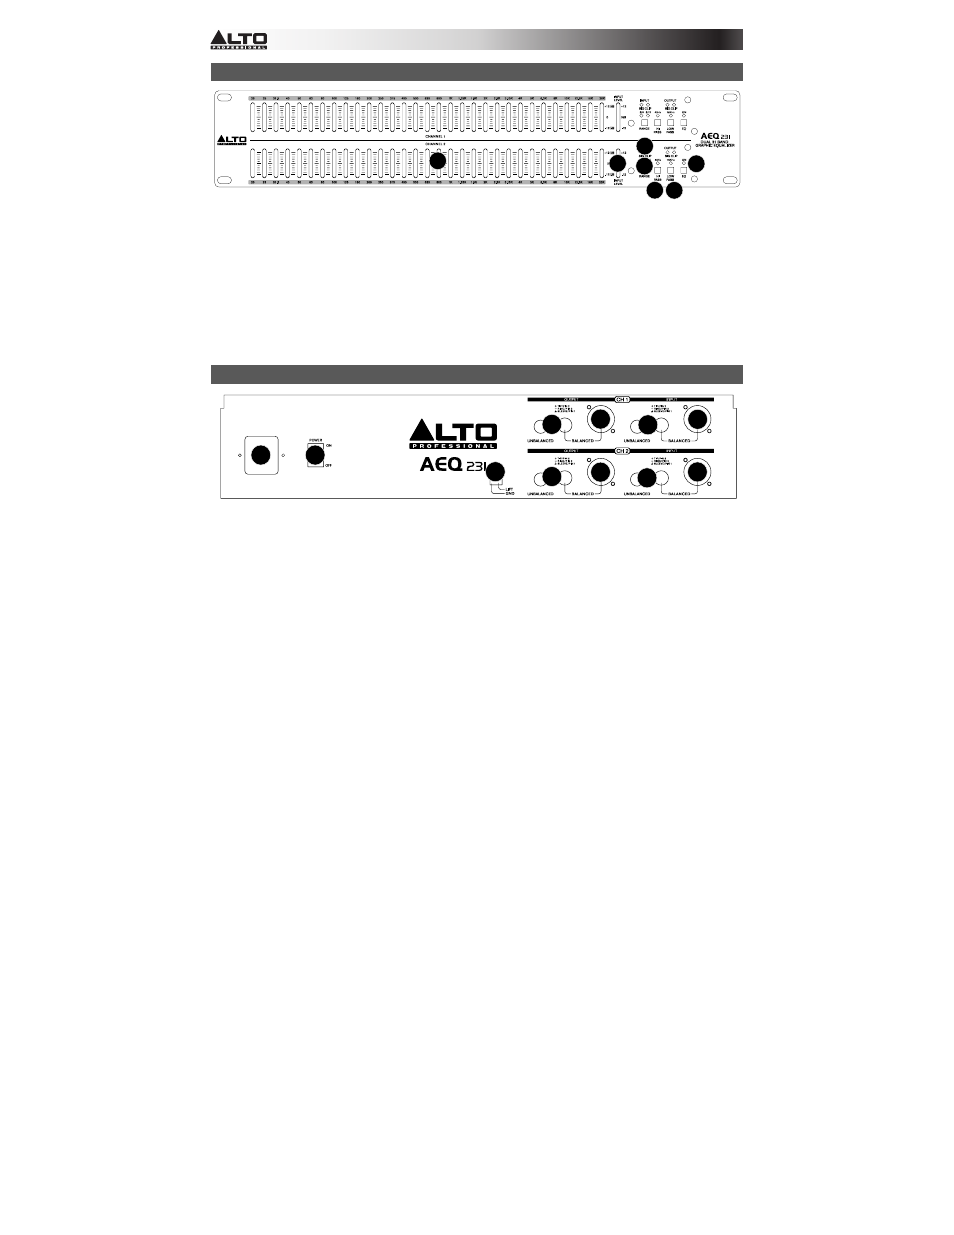
FRONT PANEL
1.
EQ Bands – Use these sliders to boost or cut the level of each audio frequency band.
When all the sliders are
in the center position, the equalizer outputs a flat frequency response.
2.
Input Level Meter – Displays the level of the incoming signal.
The "0 dB" position is unity gain (no boost or
attenuation). If the clip LED lights continuously, turn down this control.
3.
SIG CLIP – Flashes red when the input or output signal gets within
5 dB of
clipping. If this occurs, turn down
the input or output signal to avoid distortion.
4.
Range –
Selects which of the two boost/cut ranges the EQ band sliders will use, either ±6 dB or ±15 dB.
WARNING: Adjusting this switch generates a loud transient. Before changing the setting of the switch, reduce
the audio level of your power amplifier.
5.
Hi Pass – Reduces the low frequencies from the signal.
6.
Low Pass – Reduces the high frequencies from the signal.
7.
EQ On – Select to bypass the EQ and hear the unprocessed signal.
REAR PANEL
1.
Power Connector –
Connect the included power cable here.
2.
Power Switch – Use this switch to power AEQ231 on/off.
3.
Ground Lift – Disconnects the signal ground from the chassis ground. If the equalizer is causing any
hum or
buzz in your system due to a ground loop, move this switch to the "lift" position.
4.
RCA Outputs – Connect these outputs to a mixer’s Aux Return or powered speakers.
5.
1/4” and XLR Outputs – Connect these outputs to a mixer’s Aux Return or powered speakers.
6.
RCA Inputs
– Connect these inputs to a mixer’s Main output or Aux Send.
7.
1/4” and XLR Inputs – Connect these inputs to a mixer’s Main output or Aux Send.
1
2
3
4
4
5
5
6
6
7
7
1
1
2
2
3
3
4
4 5
5
6
6
7
7
1
2
3
4
4
5
5
6
6
7
7
1
2 4
5 6
7
3