Installation – Desa 10542 User Manual
Page 11
www.desatech.com
113680-01A
11
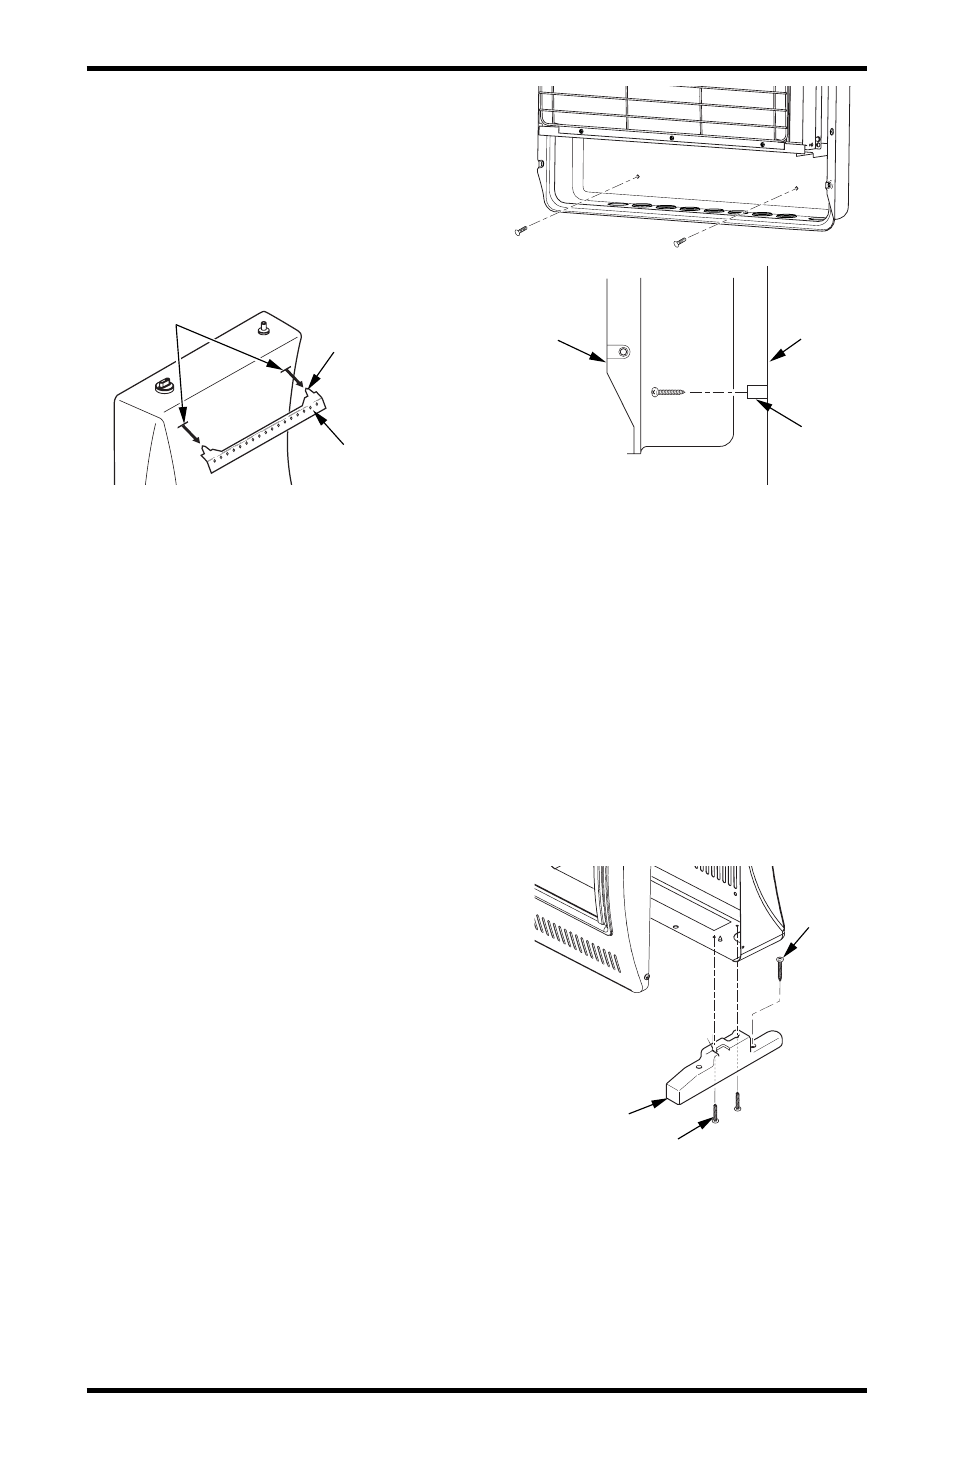
Figure 12 - Installing Bottom Mounting
Screws
Side View
Front View
Wall
Spacer
Heater
Installing Bottom Mounting Screws
1. Locate two bottom mounting holes. These
holes are near bottom on back panel of heater
(see Figure 12).
2. Mark screw locations on wall.
3. Remove heater from mounting bracket.
4. If installing bottom mounting screws into hol-
low or solid wall, install wall anchors. Fol-
low steps 1 through 4 under Attaching To Wall
Anchor Method, page 10.
If installing bottom mounting screw into wall
stud, drill holes at marked locations using
9/64" drill bit.
5. Replace heater onto mounting bracket.
6. Place spacers between bottom mounting holes
and wall anchor or drilled hole.
7. Hold spacer in place with one hand. With other
hand, insert mounting screw through bottom
mounting hole and spacer. Place tip of screw
in opening of wall anchor or drilled hole.
8. Tighten both screws until heater is firmly se-
cured to wall. Do not over tighten.
Note:
Do not replace front panel at this time.
Replace front panel after making gas con-
nections and checking for leaks (see page 14).
INSTALLATION
Continued
MOUNTING HEATER TO FLOOR
WITH OPTIONAL FLOOR KIT
Mounting Base Feet to Heater
1. Lay heater cabinet on its back on a table with
the heater bottom overhanging the table edge.
2. Align holes in base foot with mounting holes
on bottom of cabinet (see Figure 13).
3. Secure base foot to heater using sheet metal
screws.
4. Repeat for other side.
Figure 13 - Installing Base Feet
Sheet Metal Screw
Wood
Screw
Base Foot
Mounting Base Feet to Floor (Where
required by local code)
1. Remove front panel (see Removing Front
Panel of Heater, page 9).
2. Position heater with base feet in desired loca-
tion. Mark holes for drilling. Remove heater
with base.
Figure 11 - Mounting Heater Onto
Mounting Bracket
Placing Heater On Mounting Bracket
1. Locate two horizontal slots on back panel of
heater.
2. Place heater onto mounting bracket. Slide
horizontal slots onto stand-out tabs on mount-
ing bracket.
Mounting Bracket
(attached to wall)
Horizontal
Slots
Stand-Out Tab