Sd c, Usb f – Optoma ML1500 User Manual
Page 5
55
m
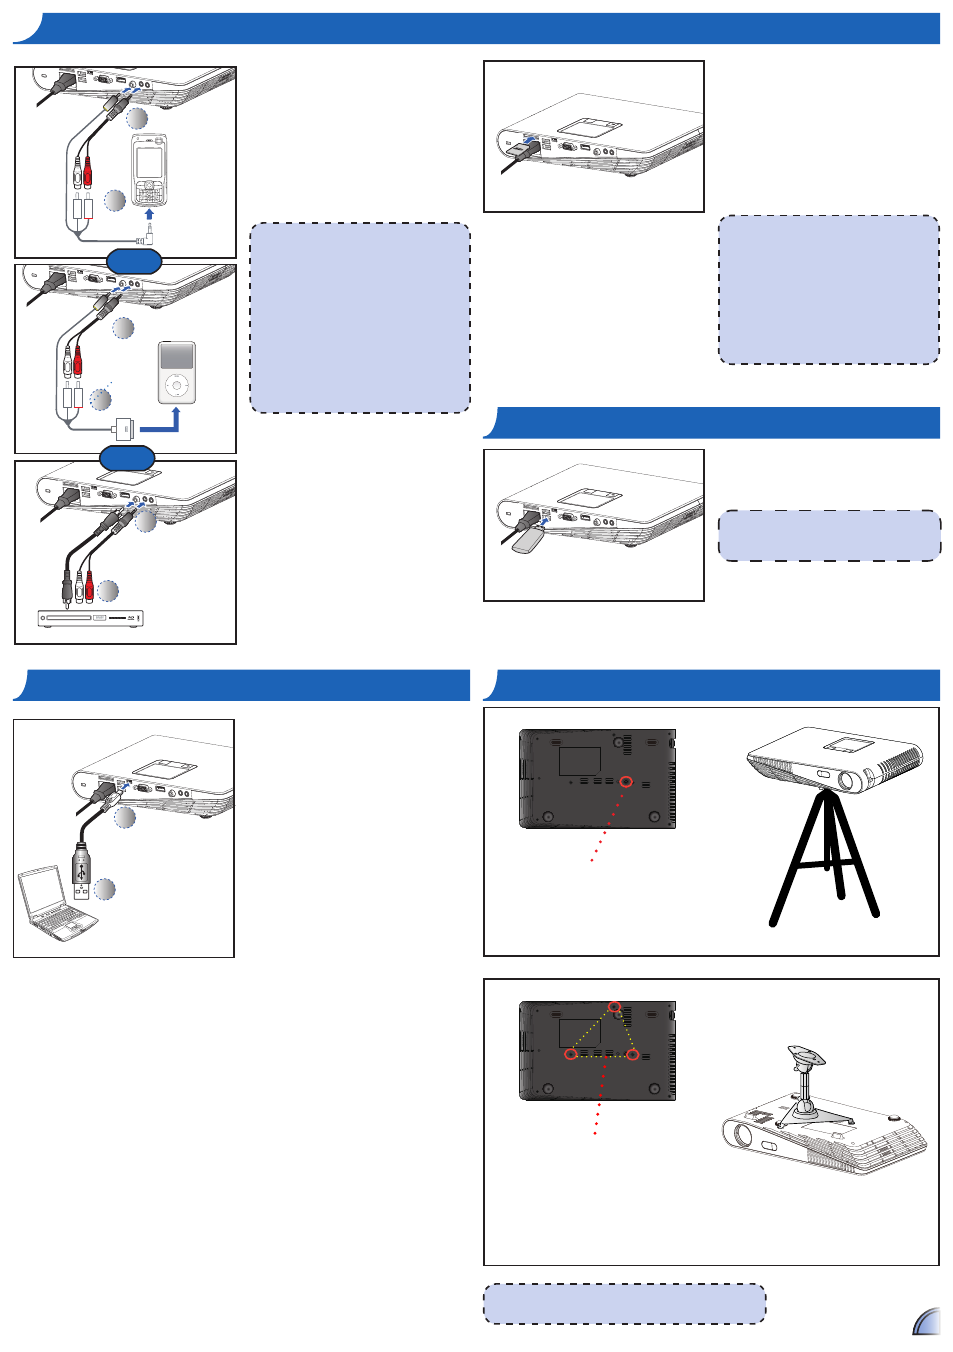
ount
the
p
rojector
The tripod and ceiling mount are optional accessories1
I
nSert
SD c
arD
I
nSert
uSB f
laSh
D
rIve
LOCK
Insert an SD card into the slot with the
gold contacts facing down1
To remove the SD card, push the card to
•
eject it from the slot1
Do not remove the SD card while the
•
projector is projecting image from
the card1 This can cause data loss or
damage the card1
Supports SD card size up to 32GB1
•
The SD card is not included in the
•
package1
Plug a USB flash drive into the USB
Type A port at the back of projector1
Support USB flash drive with FAT32 format.
c
onnect
c
omputer
for
u
Ser
m
anual
2
1
1 Connect a laptop or PC using the
Micro USB to USB Type-A cable1
21 Turn on the projector1
31 CD-ROM icon will appear on the
laptop/PC screen1
41 Click CD-ROM icon and open
User Manual1
11 Connect the AV input source1
(~)
21 After powering on the projector,
press direct source button on the
remote or swipe left or right on the
touch panel1
11 All other brand and product names are
trademarks or registered trademarks of
their respective companies1
21 The cables connecting the video output
devices are not supplied, please contact
the device vendor or Optoma1
31 iPod nano/iPod touch/iPhone/iPod classic
(version 5 and above)
41 Designed for iPod/iPhone/Mobile phone/
PMP with TV out functions1 Using with
devices with audio signal voltage >
113Vrms is not recommended1
1
2
1
2
or
For video and
audio input
Screw a standard tripod into the screw
hole on the projector1
Screw hole for tripod
*Standard Tripod
11 Place the projector upside down on a flat surface.
21 Line up the three mounting holes and use the three ceiling mount
screws to secure the mount to the projector1
Screw holes (M3x11) for ceiling mount
*Ceiling Mount
c
onnect
i
nput
S
ource
- c
ompoSIte
av
In
TM
2
1
or