Nexen S-1200 822516 User Manual
Page 4
4
FORM NO. L-20092-F-0912
INTRODUCTION
Read this manual carefully, making full use of its explanations and instructions. The “Know How” of safe, continuous,
trouble-free operation depends on the degree of your understanding of the system and your willingness to keep all
components in proper operating condition. Pay particular attention to all NOTES, CAUTIONS, and WARNINGS to
avoid the risk of personal injury or property damage. It is important to understand that these NOTES, CAUTIONS, and
WARNINGS are not exhaustive. Nexen cannot possibly know or evaluate all conceivable methods in which service may
be performed, or the possible hazardous consequences of each method. Accordingly, anyone who uses a procedure
that is not recommended by Nexen must first satisfy themselves that neither their safety or the safety of the product will
be jeopardized by the service method selected.
CAUTION
Per OSHA regulations, Nexen recommends using a guard that will not restrict the flow
of cooling air around the unit if the unit has rotating parts. Contact your local Nexen
Distributor for information about guards designed for Nexen products.
INSTALLATION
NOTE: There are two different Housing Guard configurations, If your Housing Guard is secured to the front or back
side of the Brake, Clutch, or mounting surface proceed with Steps 1-4 and Figure 1. If your Housing Guard is secured
to the side of the Brake, Clutch, or mounting surface proceed with Steps 4-6 and Figure 2.
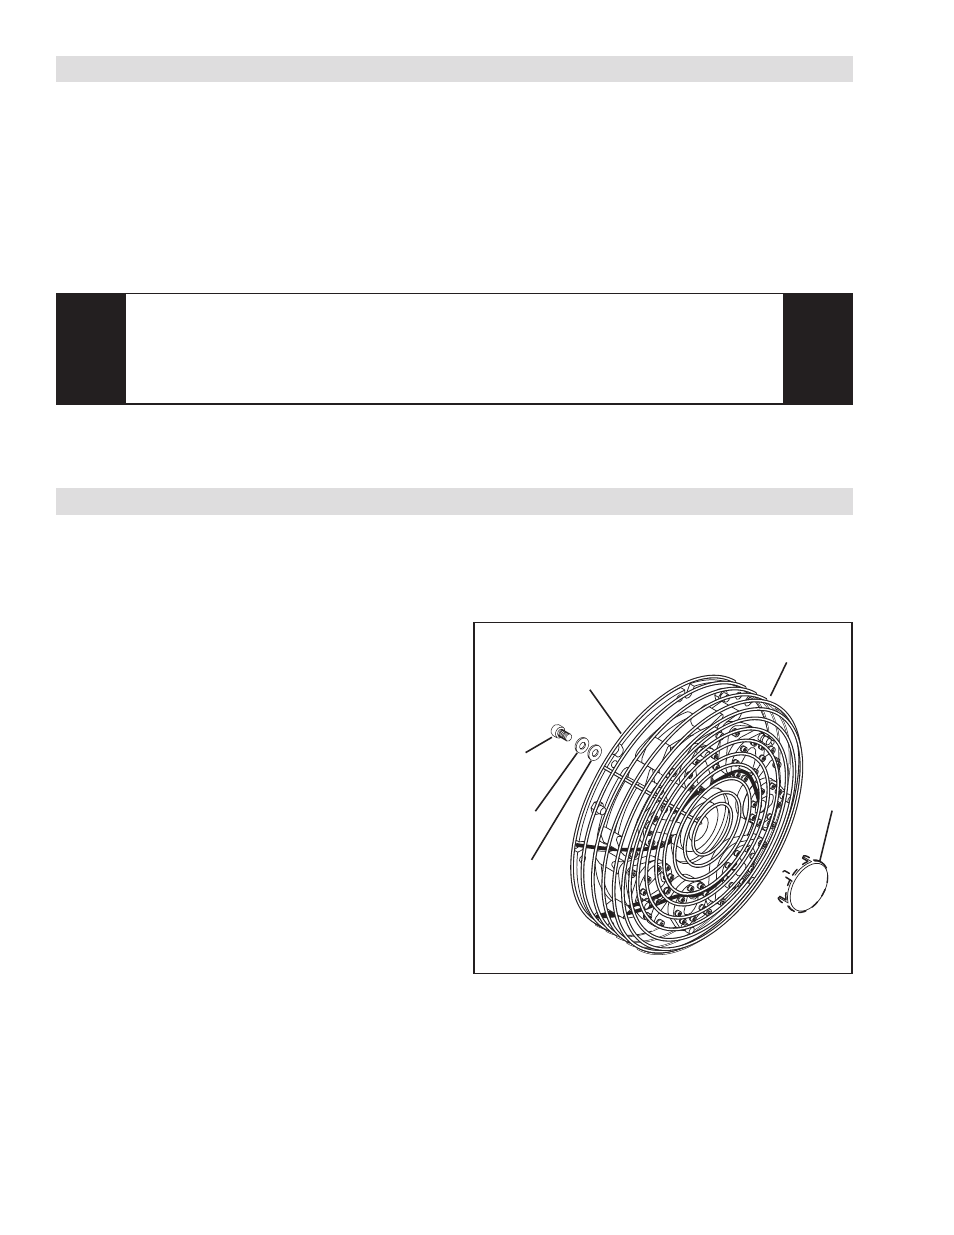
FIGURE 1
Fastening
Screws
Lock
Washers
Flat
Washers
Guard
Brake,
Clutch Assembly, or
Mounting Surface
End
Cap
1. Slide the Guard over the Brake or Clutch Assembly
(See Figure 1).
2. If the Guard is shipped with an End Cap, place the
End Cap over the front of the Guard and bend the
tabs around the Guard to hold the End Cap in place
(See Figure 1).
3. Secure the Guard to the Brake, Clutch Assembly,
or mounting surface using the Fastening Screws,
Lock Washers, and/or Flat Washers (See Figure 1).
4. If additional clearance is required (T & S 1200/
1400), secure standoffs to Air Chamber before
installing fastening screws.
- T-1200 822516 TSE-1200 822516 SSE-1200 822516 S-1400 822526 T-1400 822526 TSE-1400 822526 SSE-1400 822526 S-1000 828200 T-1000 828200 TSE-1000 828200 SSE-1000 828200 S-450 817700 T-450 817700 TSE-450 817700 SSE-450 817700 S-600 818300 T-600 818300 TSE-600 818300 SSE-600 818300 S-800 826300 T-800 826300 TSE-800 826300 SSE-800 826300