Cooling unit replacement rm360/460/660 – Dometic RM36O User Manual
Page 11
11
the room temperature at the time of the complaint Unit filling valve
must be considered, as a unit which is satisfactory
at
be
an ambient temperature
may not
satisfactory at 95 F (+35 C).
cases where satisfactory performance is obtained
"MAX" but not on other settings, the thermostat
to be suspected.
The needle valve used for admitting the filling
charge to a cooling unit is fitted to the unit's
absorber vessel and is covered by an aluminium or
plastic cap. It is strictly applied provision of
the warranty extended on the unit to the customer,
that any interference with the filling valve will
automatically void the warranty.
In
is
When a normal unit is working on "MAX" the absorber
coil will be warmer at the bottom than it is at the Unsatisfactory unit performance due to an ammonia
top. The absorber vessel will be warmer. The vapour leak can be determined in the case of a visible
cooling pipe from the boiler to the condenser will leak by traces of a yellow deposit at the point
be warm, bearably to the hand, at the bend where where the ammonia is escaping. If there is a leak
it joins the condenser, with a gradual rise in tem-
on the evaporator inside the cabinet, a smell of
perature towards the boiler end. ammonia may bee noticeable.
COOLING UNIT REPLACEMENT RM360, RM460, RM660
Remove the refrigerator from its recess as follows
1. Check that refrigerator is empty and remove
ice tray.
2. Turn off gas bottle.
3. Disconnect gas line to inlet valve
CAUTION: Use a backup wrench to prevent
undue rotation.
4. Unplug the electric line from the trailer
outlet.
5. Remove the 4 screws in rear front frame.
6. Check for any additional screws which the
vehicle manufacturer may have used to
fasten the refrigerator in place.
7. Carefully slide the refrigerator straight
out of its recess.
To remove the cooling unit from the cabinet,
proceed as follows:
1. Place the refrigerator on a work bench of
suitable height.
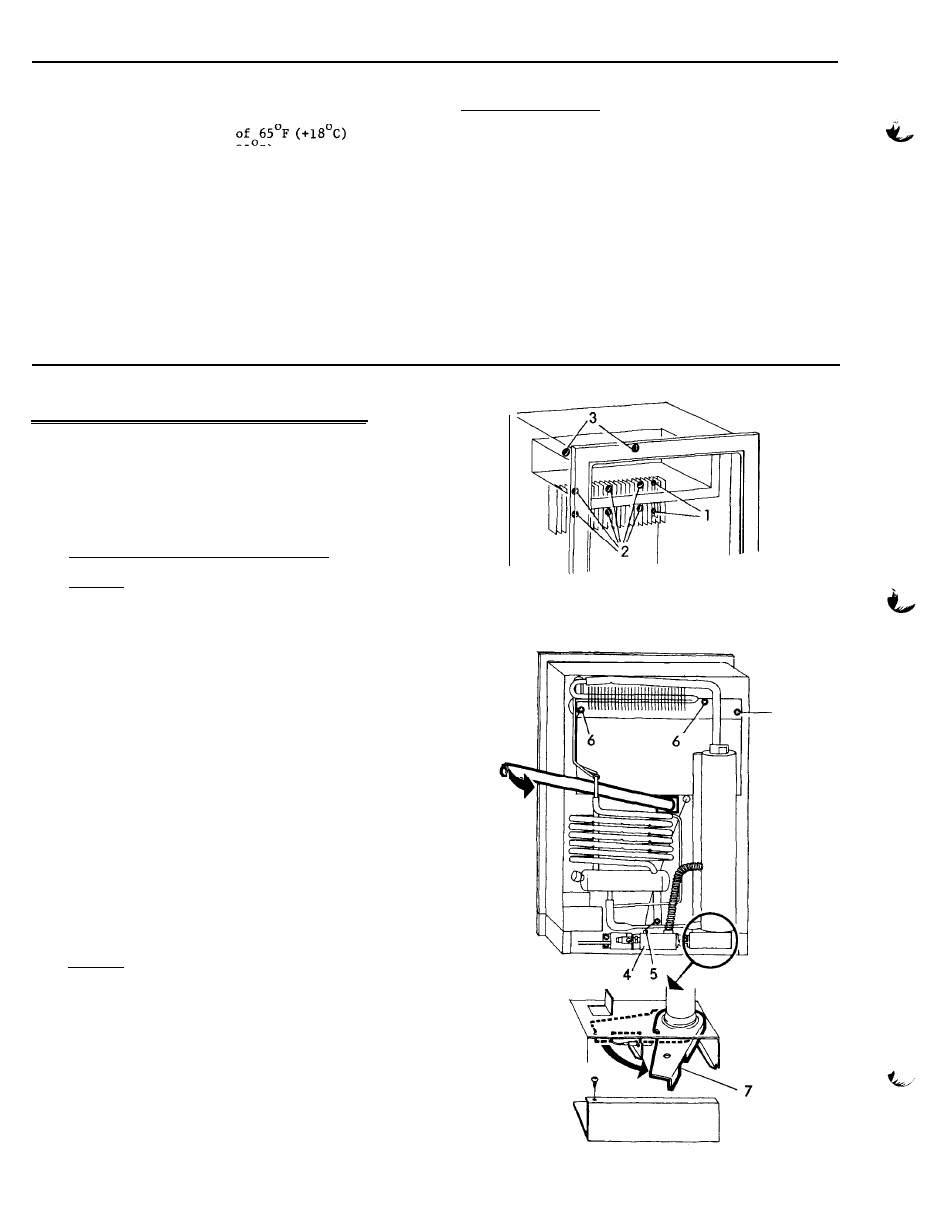
2. Remove the thermostat capillary tube by
loosening the two screws (1) on the eva-
porator fins (fig. 14).
CAUTION: The locations of the thermostat
capillary tube should be noted at this
time for relocation later on. The tubes
must be placed in the right position,
otherwise, improper performance may re-
sult.
3. Remove the two sealing plugs for capillary
tube, one on the back and one inside the
cabinet, and straighten the tubes.
4. Remove the capillary tubes by going to the
back of the refrigerator and gently pulling
the tubes straight out.
Fig.14
Fig.15
- 6