Curb mount – TAMKO Curb Mount User Manual
Page 4
CURB MOUNT
TAMKO SOLAR ATTIC VENT
MODELS 31001281 • 31001282
4
Central District
220 West 4th St., Joplin, MO 64801
800-641-4691
Northeast District
4500 Tamko Dr., Frederick, MD 21701
800-368-2055
Southeast District
2300 35th St., Tuscaloosa, AL 35401
800-228-2656
Southwest District
7910 S. Central Exp., Dallas, TX 75216
800-443-1834
Western District
5300 East 43rd Ave., Denver, CO 80216
800-530-8868
Visit Our Web Site at
tamko.com
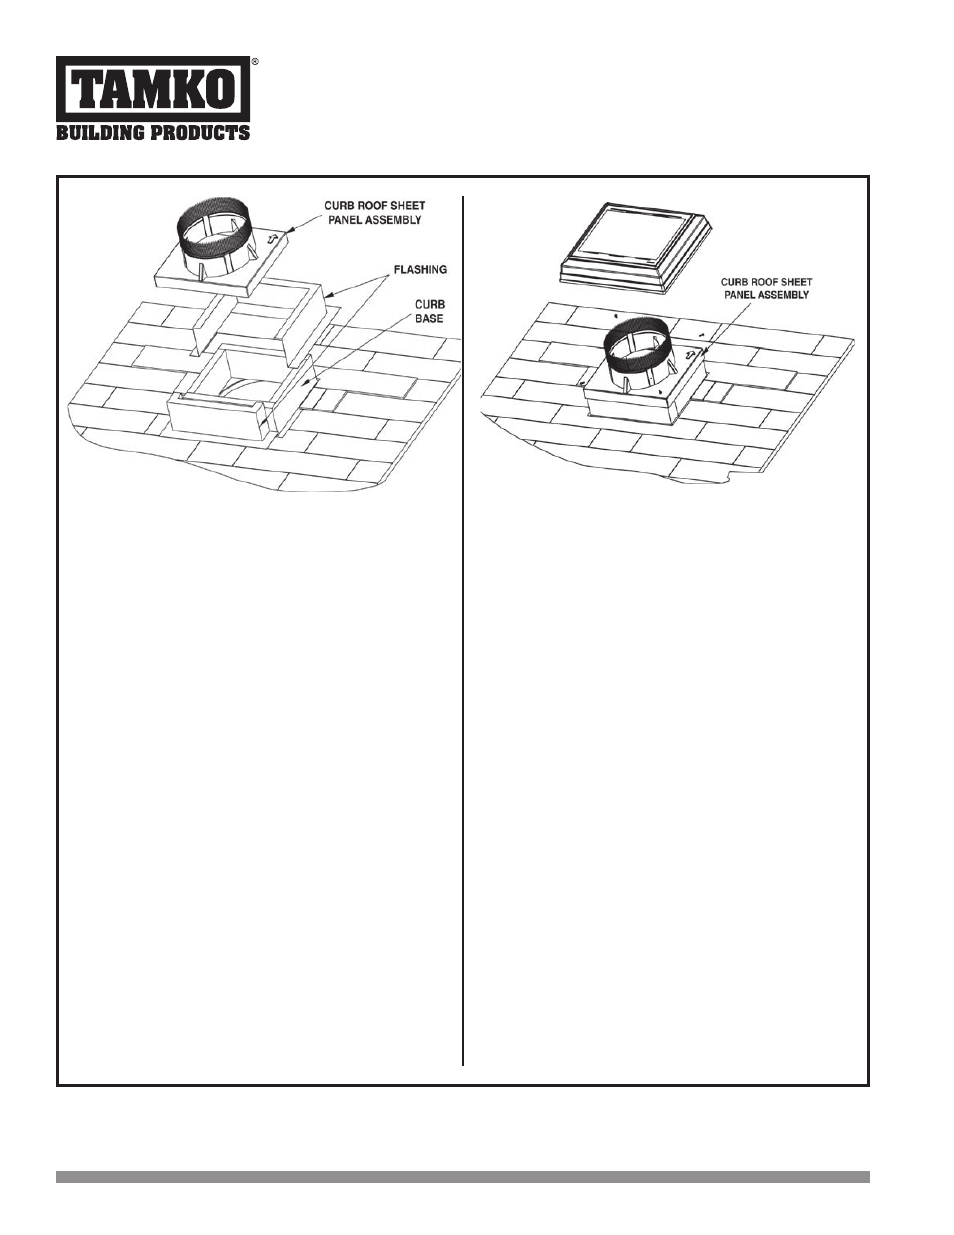
11. Center the curb over the hole, ensure the top of curb is parallel
with the roof ridge and toenail in place. Make sure the curb is
securely attached to the roof.
12. Flash with lead, copper or other preferred flashing materials.
Ensure flashing on top two thirds of curb is installed under
adjacent roofing materials.
13. Apply a large bead of silicone on the bottom side of ventilator
base, place over curb and affix with galvanized nails or screws.
Nail all corners and around perimeter of base every 6 inches.
14. Using TAM-PRO SBS Adhesive or TAM-SEAL Adhesive, seal
shingles and all nail heads. DO NOT seal the bottom edge of
the flashing.
15. Install the ventilator dome to the ventilator base using the four
(4) stainless steel 5/16" sheet metal screws removed during
step 3. Remove cardboard from the solar panel and verify the
ventilator operates.
(CONTINUED from page 3)