Replacing the spool – Ryobi ZR51950A User Manual
Page 21
20
21
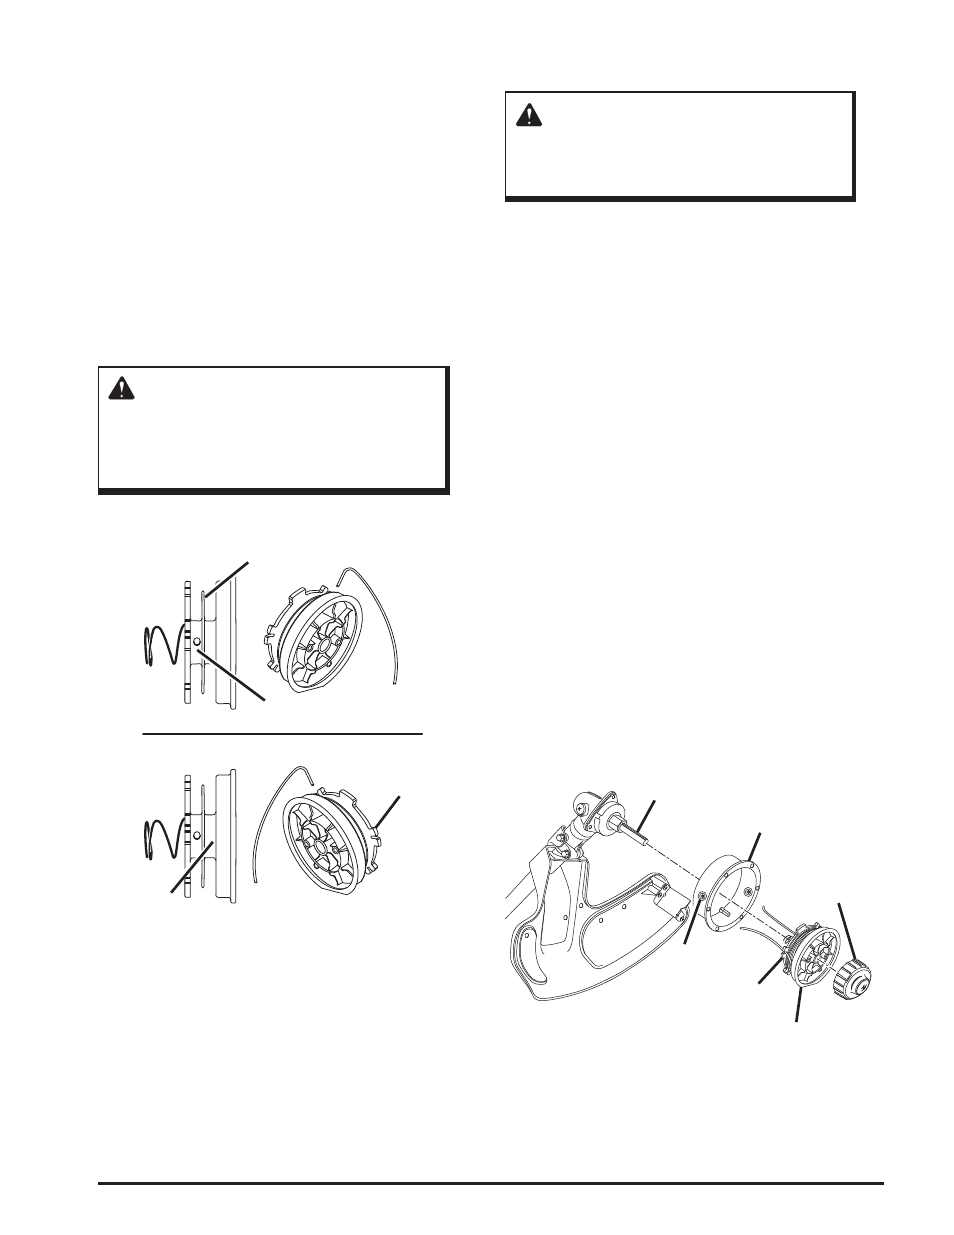
Figure 20
Replacing the Spool
See Figure 21.
Note:
For best performance, use only Ryobi spools (Part
No. AR04118). The spool may wear during normal use of
the line advance feature and may require occasional replace-
ment. Replacement spools are available through your Ryobi
retailer.
11.
Repeat the process for the lower threaded area of the
spool, winding the line and securing it in the slotted tab
opposite the first secured line.
12.
Insert the lines into the eyelets on the trimmer head.
13.
Place the spool on the drive shaft.
Note: To install the spool, you may need to rotate it
slightly. If the line should tangle or break at the eyelet,
remove the spool, refeed the line through the eyelets,
and reassemble the spool on the trimmer.
14.
Release the lines from the tabs by sharply pulling each
line.
15.
Push down on the spool to reveal the threads inside the
drive shaft.
16.
Thread the retaining cap on the drive shaft.
17.
Secure the retaining cap.
WARNING:
An improperly installed retaining cap or spool
could fly off the trimmer. Contact with a thrown
retaining cap or spool could cause personal
injury.
18.
Replace the spark plug boot. See Figure 24.
Figure 21
Maintenance
Inner Ring
Upper
Threaded Area
Slotted
Tab
Lower
Threaded Area
Follow these steps to replace the spool.
1.
Stop the trimmer.
WARNING:
Make sure the trimmer head stops rotating when
you release the trigger. Contact with a rotating
trimmer head could cause personal injury.
2.
Remove the spark plug boot. See Figure 24.
3.
Remove the retaining cap by turning as indicated by the
arrow on the cap.
4.
Remove the empty spool.
5.
Clean the trimmer head thoroughly. Inspect the trimmer
head for any damaged or worn parts.
6.
Remove the lines from the slotted tabs on the spool and
unwind approximately six inches.
7.
Secure the lines temporarily by pushing them into the
slotted tabs on the spool.
8.
Insert the lines of the new spool into the eyelets on the
trimmer head.
9.
Place the spool on the drive shaft.
Note:
To install the spool, you may need to rotate it
slightly.
Note:
If the line should tangle or break at the eyelet,
remove the spool, refeed the line through the eyelets,
and reassemble the spool on the trimmer.
10.
Release the lines from the tabs by sharply pulling each
line.
11.
Push down on the spool to reveal the drive shaft.
12.
Thread the retaining cap on the drive shaft.
13.
Secure the retaining cap.
14.
Replace the spark plug boot. See Figure 24.
Retaining
Cap
Trimmer
Head
Drive
Shaft
Eyelet
Spool
Slotted
Tab