Using the touch screen and stylus – Nintendo 3DS User Manual
Page 9
14
Basic O
per
ations
15
Basic O
per
ations
Using the
Touch S
creen and S
tylus
SD Memory Card slot
For inserting SD or SDHC
memory cards (see page 24).
Wrist strap attachment
For attachment of a licensed wrist
strap (sold separately).
Infrared transceiver
Sends and receives information when
using infrared communication.
Stylus holder
Always replace the stylus into the stylus holder
after use )see page 15).
NOTE: To prevent damage to the Nintendo 3DS
system, do not insert anything other than a
Nintendo 3DS licensed stylus into the stylus holder.
Game Card slot
For loading Nintendo 3DS Game Cards. Also compatible
with Nintendo DS and Nintendo DSi Game Cards.
Outer cameras
Used by games or other applica-
tions that include camera features.
Two cameras allow you to take 3D
photographs.
NOTE: Avoid getting the camera
lenses dirty. If they become dirty,
wipe gently with a soft cloth, being
careful not to damage the lenses.
R Button
L Button
Battery cover
Remove cover to replace the battery.
NOTE: Do not remove the cover unless you
need to replace the battery or check battery
installation.
Cradle connectors
Allows connection to the
Nintendo 3DS charging
cradle (included, see
page 16).
AC adapter
connector
Allows connection of
the Nintendo 3DS AC adapter (included), for
recharging the battery or operation using
household current (see page 16).
Camera LED
Lights up when the outer
cameras are in use.
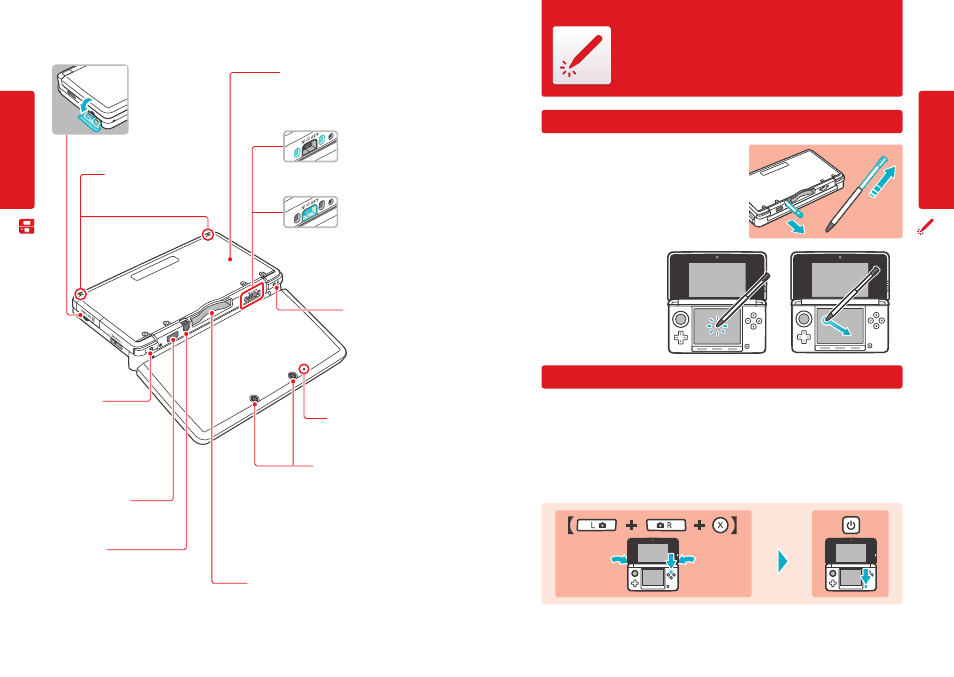
Using the Touch Screen and Stylus
Using the stylus
After removing the stylus from the stylus holder, it can be adjusted to
your desired length. Return it to the retracted length before replacing it
in the stylus holder.
The lower LCD screen, or Touch Screen, is
touch-sensitive. For games that include
this game control feature, operate the
screen by using the included stylus.
Lightly touch or slide the stylus across
the Touch Screen as shown at right.
Calibrating the Touch Screen
If the Touch Screen doesn’t seem to be responding properly...
NOTE: If the Touch Screen is not responding properly, first try removing any screen protectors (sold separately) that
you may have added to your Nintendo 3DS system.
Then you can try calibrating it from within System Settings, accessible from the HOME Menu (see page 73 for more information).
If you are unable to operate the HOME Menu successfully, use the following procedure to switch directly to the Touch Screen
calibration screens. First turn the power off. Then hold down the L Button, R Button, and X Button and turn the system on as
shown below.
While holding,
press
Nin
tendo 3DS C
omponen
ts