Saving and loading presets – Z-Systems z-16.16 digital detangler User Manual
Page 2
Z-Systems Audio Engineering
z-16.16 Manual
source can be routed to a given destination. It is because of this that when
changing the configuration, the user should rotate the
to knob first and then
change the
from knob setting. In other words, suppose you wish to change
the configuration so that destination 6 is being fed by source 1. The first step is
to turn the
to knob until the left hand side of the display reads "06." Then turn
the
from knob until the desired source is showing on the right hand side of the
display, in this example it would read "01." The next step is to hit the
route
button. You will notice at this point that the LED display shows the word
"Routing" for a brief moment. This is to let you know that your changes have
been sent to the connection matrix.
In general, the procedure for connecting a source to a destination is as follows.
First rotate the
to knob until the desired destination is shown on the left hand
side of the display. Then rotate the
from knob to show the desired source on
the right hand side of the display. Finally, hit the
route button to make the
connection. You may make as many changes as you want before hitting the
route button.
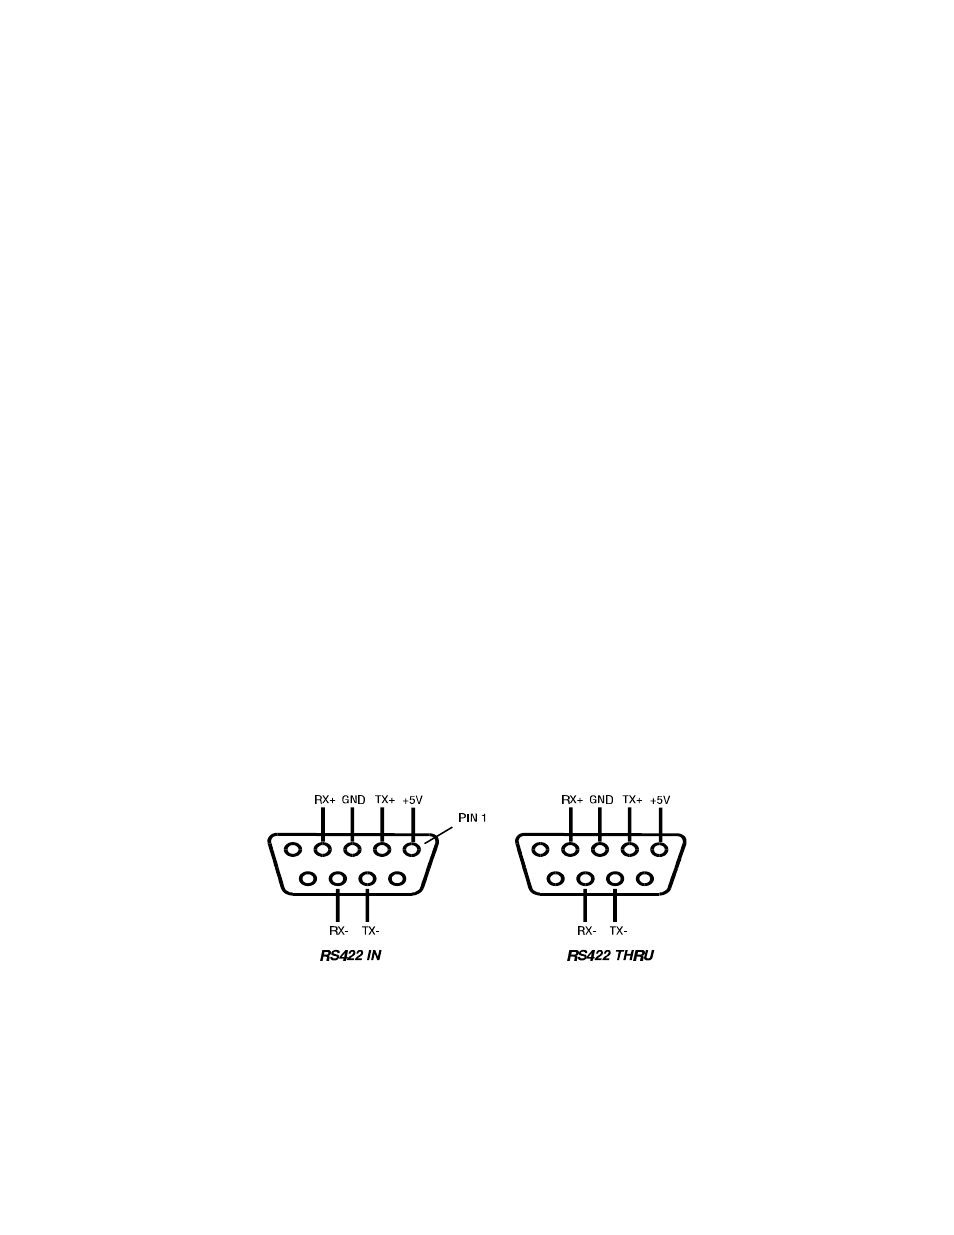
The z-16.16 is also capable of being controlled through an RS-422 link to either
the z-rrc hardware remote controller or PC or Mac software. To connect the z-
16.16 detangler to any of these devices, attach the provided cable to the "RS-
422 in" port on the rear of the unit. If more than one router are to be controlled
in this manner, the user can daisy chain the control signals from one router to
the next using the "RS-422 thru" port. The z-rrc hardware remote can control up
to 4 different routers using ID numbers of 1 through 4 while the PC and Mac
software can handle up to 16 routers. To change the ID of your z-16.16
detangler, press both the
load and save buttons simultaneously. The LED will
display "ID = 01." Rotate the Left knob until the ID number you wish to change
the router to is displayed and then press the
cancel button. Figure 3 shows
the pin-out diagram for the "RS-422 in" and "RS-422 thru" ports.
Figure 3 --
Pin-out diagram
Saving and loading presets
A very useful feature of the z-16.16 is its ability to save and load preset
configurations. To save a configuration once it has been set up, first hit the