Installing the s90i in a wall – Wisdom Audio Series S90i User Manual
Page 14
14
Installing the S90i in a Wall
Your dealer has extensive knowledge of wall construction, and will customize
these installation instructions to suit the needs of your particular situation. But
these notes provide an overview of the process.
Note that the Regenerative Transmission Line opening that vents the low fre-
quencies into the room may be placed either up near the ceiling, or down
near the floor. In most rooms, these are largely equivalent positions in terms
of acoustics. The difference will usually be aesthetic rather than performance-
based.
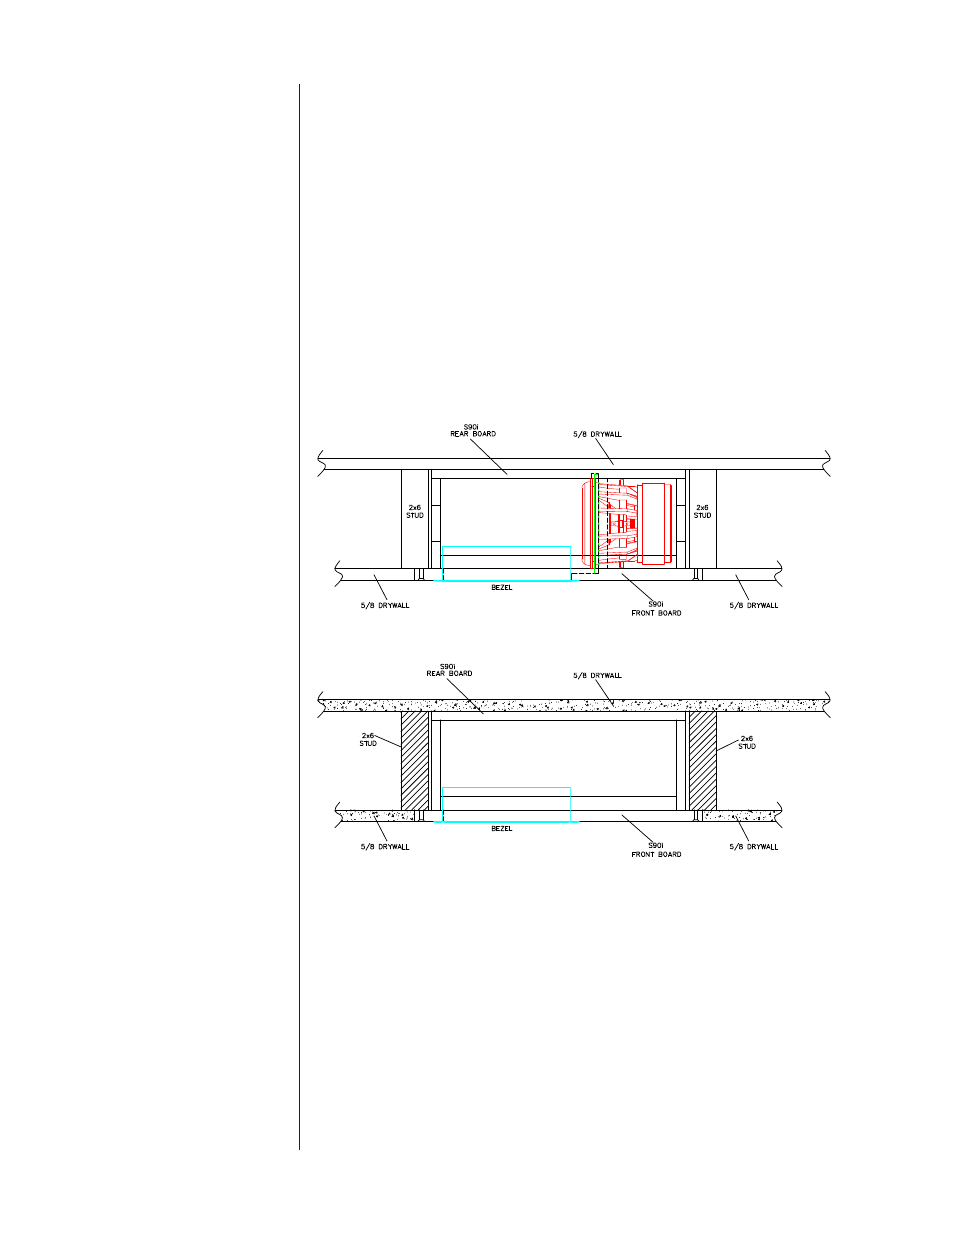
As seen from above, a cross sectional view of the S90i as mounted in a typical
2 x 6 stud wall looks like this:
The front board of the S90i is made from
5
⁄
8
” MDO plywood, which presents a
smooth, paintable finish surface similar to dry wall. It can be butted up against
the
5
⁄
8
” dry wall, taped, and spackled, and painted like any other section of wall.
It will also readily accept skim-coating if the construction calls for plaster walls.
The process of installing the S90i in a standard stud wall is quite straightforward.
1.
Open the 2 x 6 stud bay to be used
The existing dry wall (if any) should be cut back so it covers about half of
the 2 x 6 on each side of the bay. The flange of the front board of the S90i
will cover the other half.