Assembly for table mounting – Weston Roma Apple & Fruit Crusher User Manual
Page 5
The
Apple & Fruit Crusher can be used on a Table Top or Mounted to a wall.
The
Apple & Fruit Crusher
comes pre-assembled to the
Mounting Board
.
ASSEMBLY FOR TABLE MOUNTING
TOOLS YOU WILL NEED:
10mm Wrench or an
Adjustable Wrench
Note: The
Apple & Fruit Crusher
comes with the
Mounting Board
attached for use on a table top.
Begin at Step 5 to complete the
assembly.
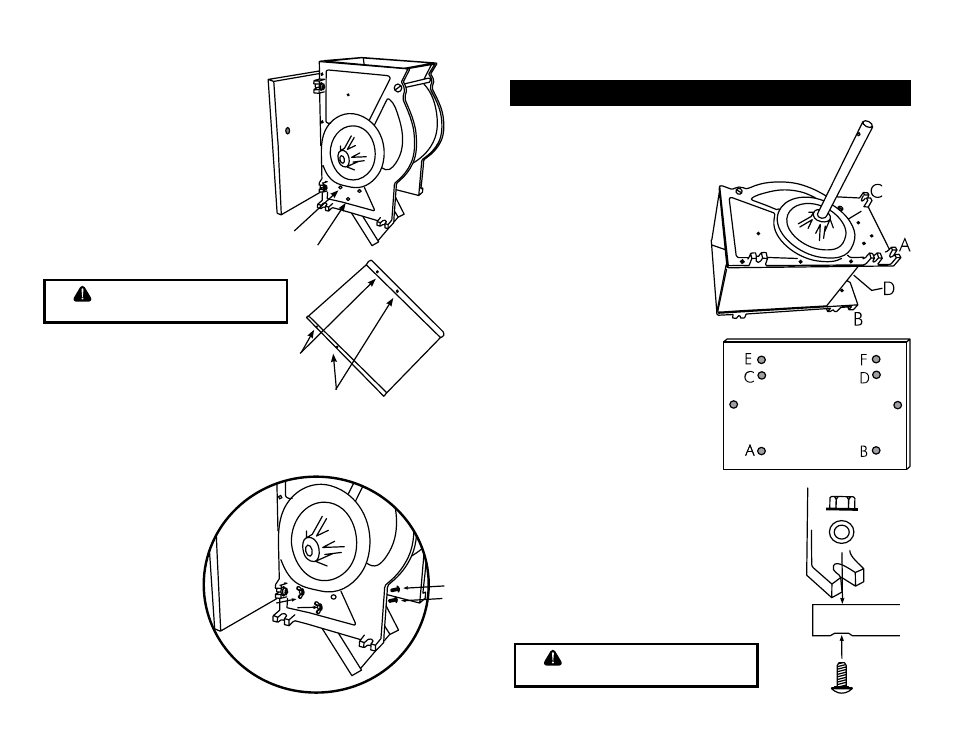
1. Set the
Apple & Fruit Crusher
on its back side on a flat, level surface
with the feet facing toward you.
2. Align holes A, B, C & D on the
Mounting Board with Feet A, B,
C, & D
(Figures 1 & 2)
. The side of the
Mounting Board with the stepped
holes should face toward you.
3. Secure the
Mounting Board to
the
Feet with the Carriage Bolts,
Flat Washers and Hex Flange Nuts
(Figure 3)
. Use a 10-mm wrench or
adjustable wrench to tighten the
Hex
Flange Nuts.
4. Stand the
Apple & Fruit
Crusher upright on the Mounting
Board.
Continue to Step 5
Back Side
Foot
Figure 1
Figure 2
Figure 3
Mounting
Board
Stepped hole
in the
Mounting
Board
4. When wall-mounting the
Crusher,
make sure the
Handle can freely rotate.
An outside corner is an ideal location.
5. Mount the
Apple Crusher to a solid
wall.
6. Slide the
Chute up into the Apple
Crusher Body
(Figures 11 &12).
7. Line up Holes 1 & 2 of the
Chute
to Holes 1 & 2 of the
Apple Crusher.
Secure the
Chute to the Apple Crusher
Main Body using Machine Screws and
Wing Nuts. Repeat on the other side
of the
Chute. Tighten the Wing Nuts
by hand
(Figure 13).
Continue to Handle
Mounting Instructions
Hole 1
Hole 2
Figure 12
Figure 11
Figure 13
Hole 1
Hole 2
-5-
-8-
CAUTION!
To avoid personal injury, DO
NOT touch the stainless steel
Blades on the Wooden Drum.
CAUTION!
To avoid personal injury, DO
NOT touch the stainless steel
Blades on the Wooden Drum.