Ravioli adapter instructions, Switch instructions, Outlet instructions – Weston Roma 2-Speed Electric Motor Attachment User Manual
Page 4
-4-
RAVIOLI ADAPTER INSTRUCTIONS
The included
Ravioli Adapter is to be used with
the ravioli attachment when using the
Motor.
1. Follow instructions 1 through 5 of the
“INSTALLING THE MOTOR ONTO THE
PASTA MACHINE” instructions.
2. Install the
Ravioli Adapter onto the Motor
by inserting the female end of the
Ravioli
Adapter onto the male end of the Motor
Shaft.
Figure 8
3. Line up the
Motor and Adapter
Shaft with the drive hole of the ravioli
attachment and rotate the
Motor
into place, allowing the left part of the
Motor to come to rest on the Motor
Mounting Bracket.
Figure 9
4. After
Motor is positioned on the Motor
Mounting Bracket, rotate the Movable
Arm counter-clockwise so it is positioned
on the
Motor.
5. Once
Motor is attached and you have
verified the
Power Switch is in the off
position (O), plug the unit into the power
source.
NOTE: It is suggested when using the Motor with the ravioli attachment, only use
the intermittent
Pulse Button. This will allow you to stop and start the Motor as you
fill the ravioli.
WARNING! Before cleaning, assembling or disassembling the Motor
Attachment, make sure the Motor is in the OFF Position (O) and the PLUG
IS REMOVED FROM THE OUTLET/POWER SOURCE!
Female End of
Ravioli Adapter
Figure 8
Male End of
Ravioli Adapter
-9-
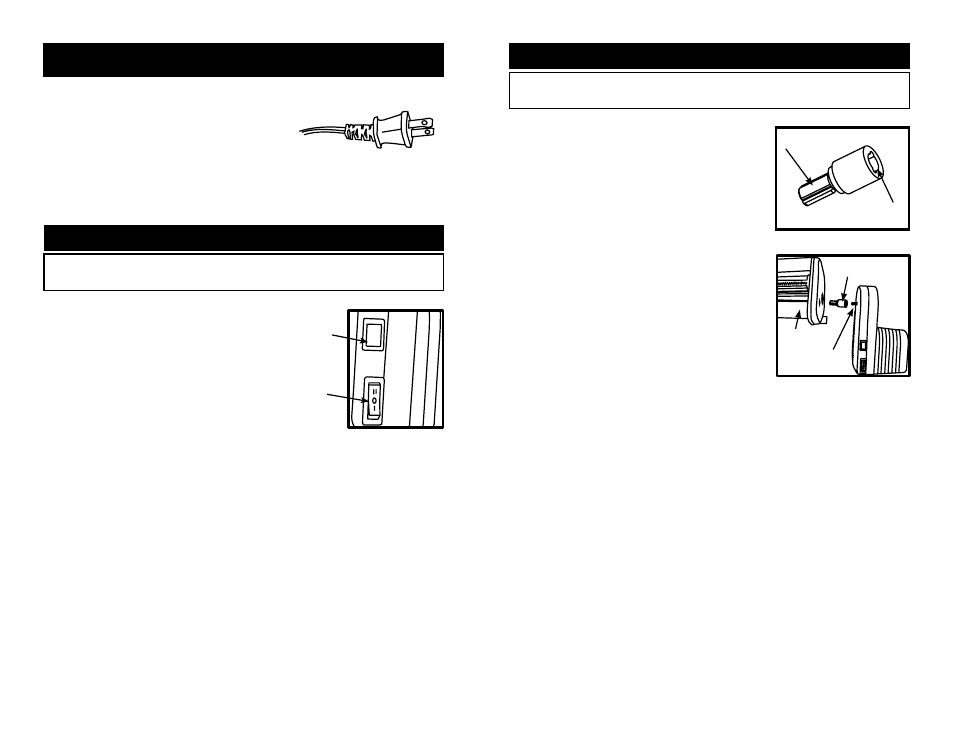
SWITCH INSTRUCTIONS
. The Motor has a Selector Switch that has two speed
settings. The first speed
is the slow speed, marked “I”,
the second speed is the fast speed is marked “II”. The off
position is marked “O”.
Figure 1
. The Motor also has a Pulse Button. Pressing this
button will engage the
Motor in its slow speed until you
release the button. This feature is designed for use with
a ravioli attachment. It allows rapid starting and stopping
of the
Motor when filling ravioli.
Figure 1
OUTLET INSTRUCTIONS
This appliance has a Polarized Plug (one blade of
the plug is wider than the other blade). To reduce
the risk of electric shock, this plug must fit fully into
the outlet. If the blades do not fit into the outlet, try
turning the plug around. If the plug still does not fit
into the outlet, contact a qualified electrician. DO
NOT attempt to modify the plug in any way.
Selector
Switch
Pulse
Button
Figure 1
WARNING! Before cleaning, assembling or disassembling the Motor
Attachment, make sure the Motor is in the OFF Position (O) and the PLUG
IS REMOVED FROM THE OUTLET/POWER SOURCE!
Figure 9
Ravioli
Attachment
Ravioli
Adapter
Motor
Shaft