VDO WL X2 DW User Manual
Page 172
X2DW
VDO CYCLECOMPUTING
12
GB
SLO
PL
JP
JP
PL
SLO
GB
www.vdocyclecomputing.com
X2DW
13
5.2 Setting and measuring the wheel size
5.2.1 Setting using tyre table
You must set the wheel size (wheel roll circum-
ference) of your bike so that your VDO computer
can measure correctly. There are 2 ways of
doing this:
The common types of tyres are listed in the tyre
table. If your tyre type is not listed, we recommend
entering the wheel size manually.
The values given in the table are approximate
values. These values differ according to brand, tyre
height and tyre profile. This can consequently also
lead to discrepancies in the distance measured
and the speed shown.
mm-value
inch-value
16 x 1,75
1272
50,1
20 x 1,75
1590
62,6
24 x 1 ⅜
1948
76,7
24 x 1,75
1907
75,1
26 x 1
1973
77,7
26 x 1,5
2026
79,8
26 x 1,6
2051
80,7
26 x 1,75
2070
81,5
26 x 1,9
2089
82,2
26 x 2,00
2114
83,2
26 x 2,125
2133
84,0
26 x 1 ⅜
2105
82,9
26 x ¾
1954
76,9
27 x 1 ¼
2199
86,6
28 x 1,5
2224
87,6
28 x 1,75
2268
89,3
28 x 1 ½
2265
89,2
28 x 1 ⅜
2205
86,8
30-622
2149
84,6
32-622
2174
85,6
37-622
2205
86,8
40-622
2224
87,6
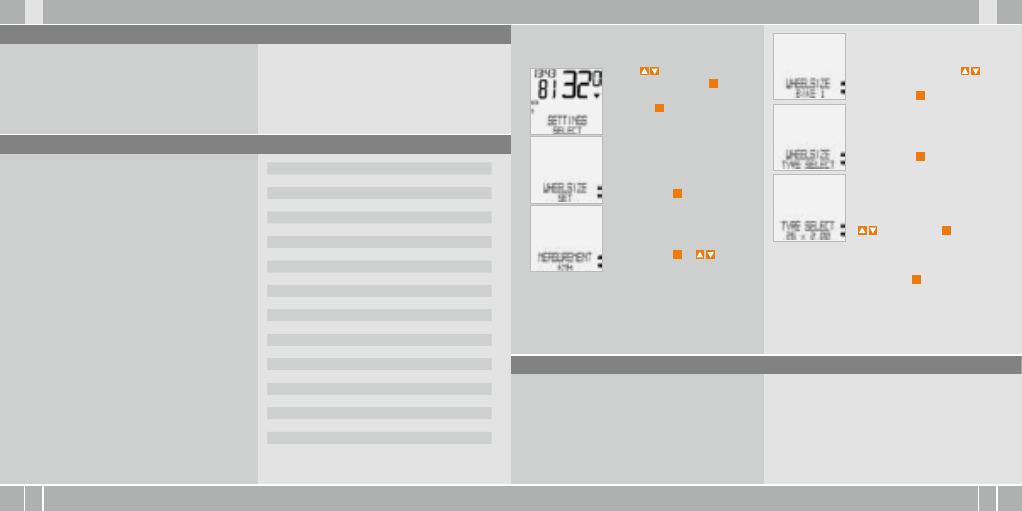
How to set the tyre size by selecting the tyre:
Using
go to SETTINGS/
SELECT. Confirm with
M
.
You are now in setting mode
(pressing
C
for 3 seconds gets
you back to function mode).
Using up/down go to
WHEELSIZE/SET.
Confirm with
M
.
MEASUREMENT/KMH.
Confirm with
M
or to
change to MPH.
WHEELSIZE/BIKE 1 (use to
go to setting for bike 2).
Confirm with
M
.
WHEELSIZE/ TYRE SELECT.
Confirm with
M
.
TYRE SELECT/SELECT.
Now select your tyres using
. Confirm with
M
.
The confirmation question appears “Tyresize“/
SELECT OK? When the displayed tyre size matches
the one you want, confirm with
M
.
The display confirms WHEELSIZE/SET DONE
Automatic return to SETTINGS/SELECT.
5.2.2 Setting using wheel circumference
>>> P07
To enter the wheel size manually, you must first
measure the wheel roll circumference on your bike.
Measuring wheel roll circumferences:
step 1
Precisely align valve on the front wheel
vertically to the ground.
step 2 Mark this spot on the ground with a line
(e.g. chalk).
step 3
Push the bike forwards one turn of the
wheel until the valve is vertical to the ground
again.