Using the hot swap board, Jumper options, Carrier removal – StorCase Technology DE75i-SW User Manual
Page 27
20
Appendix B - Factory-Installed Options
StorCase Technology, Inc.
DE75i-SW User's Guide - Rev. A01
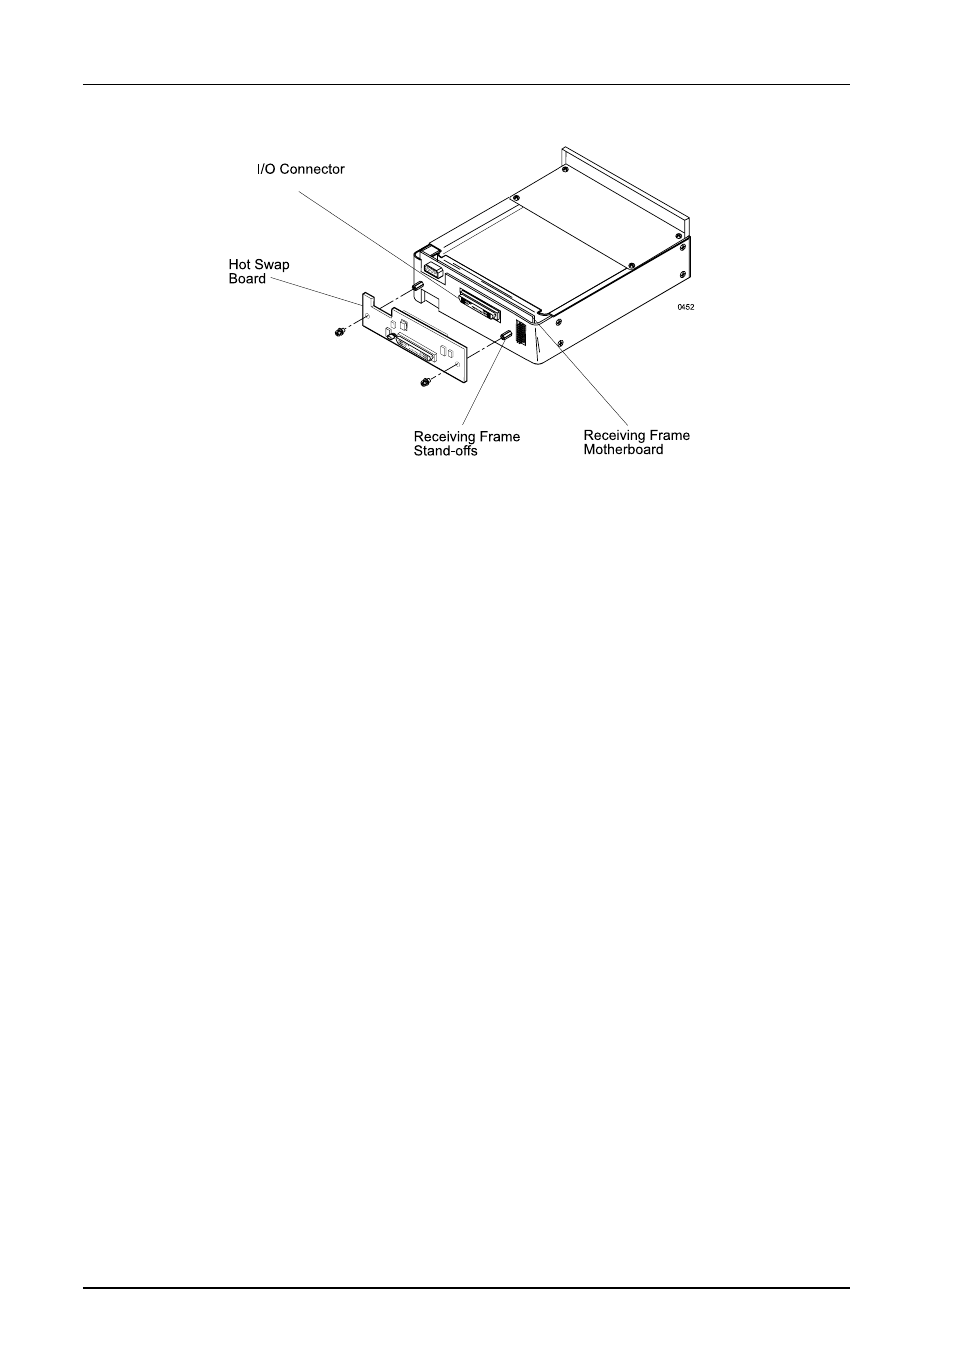
Figure B-1: Attaching the Hot Swap Board
Jumper Options
Most jumper options are configurable via the receiving frame motherboard (Figure 7). The Hot
Swap Board provides one configurable jumper, JP1 (Figure B-2). When installed (factory
default), this jumper disables onboard termination. If the DE75i-SW is physically located at the
end of a SCSI daisy chain, remove this jumper to enable termination.
Using the Hot Swap Board
Carrier Removal
Follow the procedures below to remove the DE75i-SW carrier from the receiving frame
equipped with the Hot Swap option.
1. Verify that the drive is not active. If the system is on a network, make certain other
users are not accessing the target drive, then disable it from the network. Dismount
the drive.
2. Turn the key lock mechanism (located on the front of the receiving frame), clockwise
to the OFF position. This unlocks the drive from the receiving frame and activates the
Hot Swap Board. The unit number on the display will begin flashing.