Getting started, Inserting the batteries, Turning on the sr100 – Starrett SR100 Surface Roughness Tester User Manual
Page 2
+
-
µin
µm
Ra
Rz
Rv
Rp
Rt
Getting Started
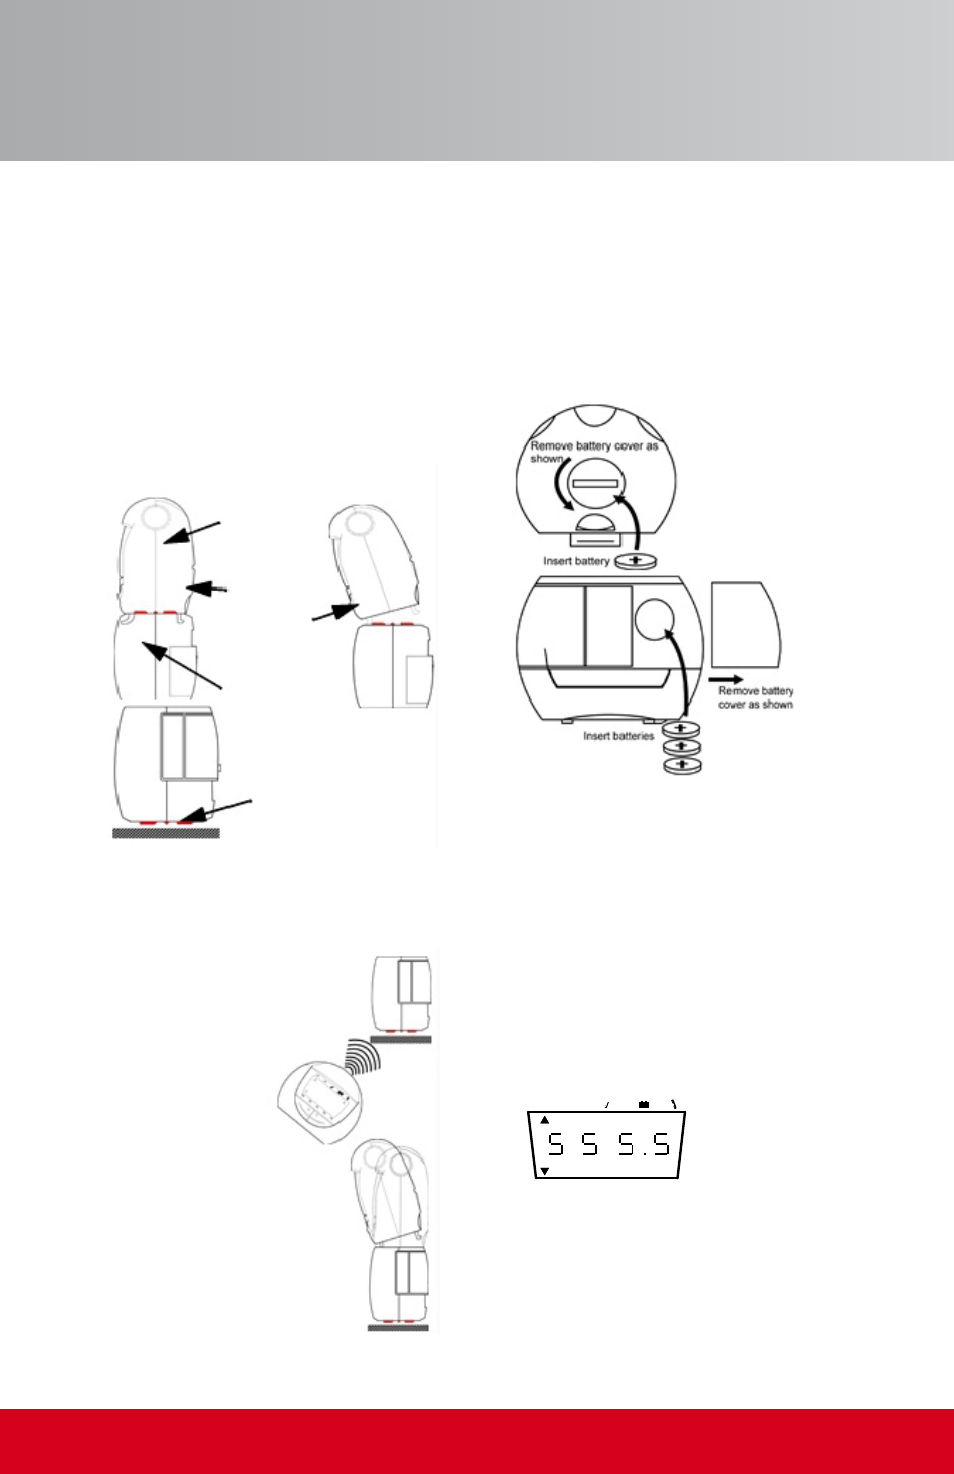
Storage. The SR100 is supplied with the
Traverse Unit (bottom) connected to the
Control Unit (top). Before use, separate the
Traverse Unit from the Control Unit.
Note: To prevent damage to the stylus, store
the SR100 with the units connected.
The SR100 can be operated in two modes:
Remote or Connected.
Remote: Position the Control Unit
within 40" (1 meter) of the Traverse
Unit. Data is passed between the
two units over the IrDA link.
Note: Alignment between the
Traverse Unit and Control
Unit separation
must be maintained during
the measurement process.
Connected: In connected mode,
the Control Unit is connected to the
Traverse Unit before the measure-
ment is made, as shown. To connect
the Control Unit to the Traverse Unit,
insert the Control Unit as shown and
tilt until the latch engages.
Inserting the Batteries
Remove battery covers as shown. Then,
insert one 3V Lithium 2450 in to the Control
Unit and three 3V Lithium 2450s in to the
Traverse Unit as shown.
Then replace the battery covers. After
the batteries have been changed, there
will be a short delay when the SR100 is
turned on.
Turning On the SR100
When the Control Unit is not used for five
minutes or more, it enters power save
mode, turning the display off. Press any
button to reactivate.
The Traverse Unit switches off com-
pletely after five minutes of inactivity.
To reactivate, press the On button. An LED
will flash to confirm activation.
Caution:
- Use recommended
batteries only.
- Do not atttempt
to recharge used
batteries.
- Safely dispose of
used batteries
Control Unit
To separate,
press here
and tilt
the Traverse
Unit as shown
Traverse Unit
Position the Traverse
Unit on the surface
as shown
Max. 40"
(1 meter)
separation