Starrett CP505E-12 Electronic Protractor User Manual
Using the standard 360 degree protractor, Single cut miter, Standard miter
Y o u r a d v a n t a g e i s s t a r r e t t i n n o v a t i o n
1
Measure
PROTRACTOR
0.0
Measure
PROTRACTOR
180.
0
Measure
PROTRACTOR
0.0
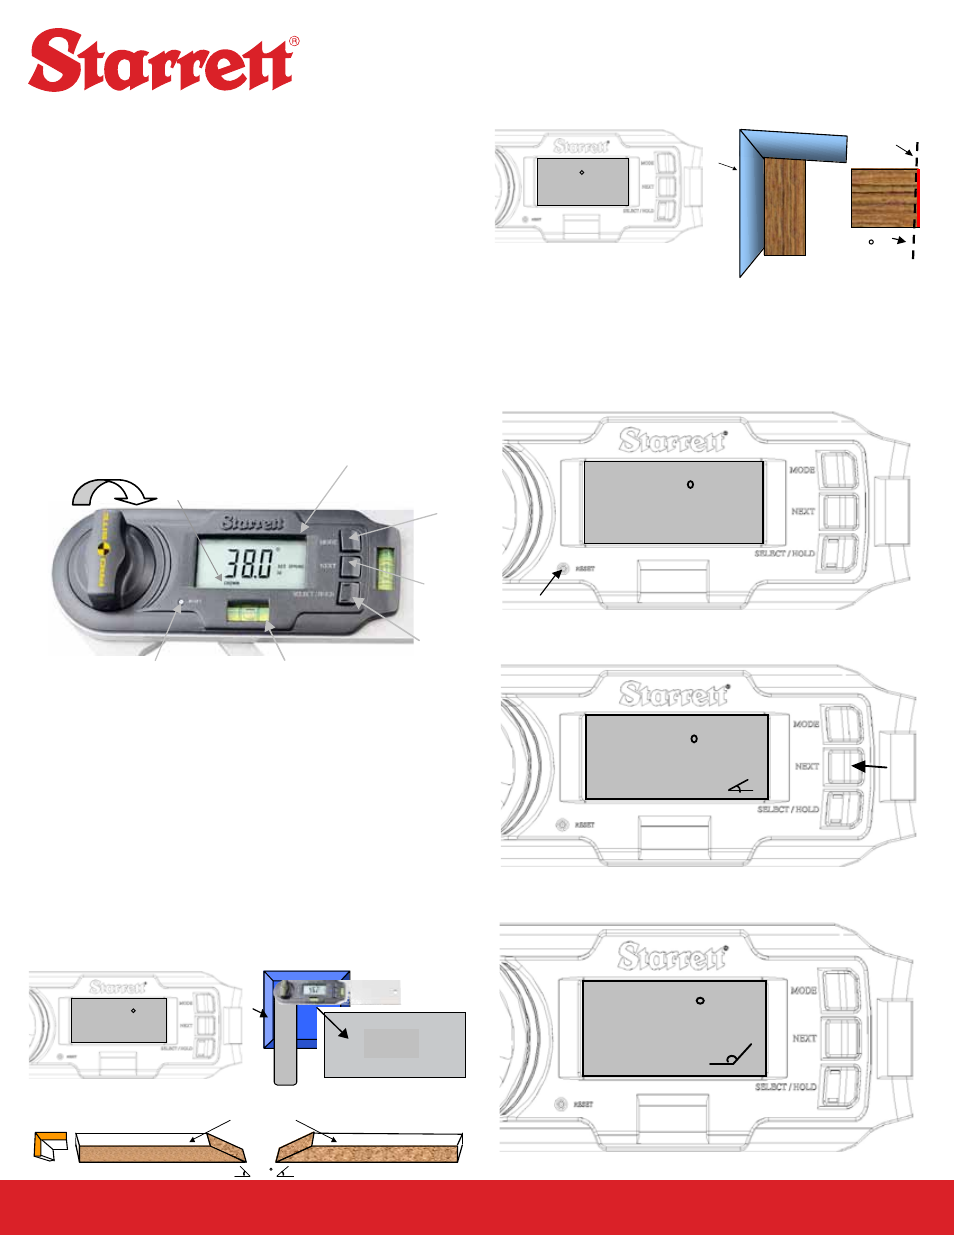
using the standard 360 degree Protractor
Press the
Mode button until the display reads PROTRACTOR. Place the
tool on a flat surface and collapse until the arms are aligned. Verify that
the display reads 0.0°. If not, press the
reset button. The display will then
read 0.0°. Then, open the arms and you will see the display change from
0° to 360° (Fig. 7).
Pressing the
neXt
button displays the acute angle, changing the 0-360°
standard protractor to one that reads 0-180-0° (Fig. 8).
Press the
neXt button again and the display will show the obtuse angle,
reading from 180-0-180° (Fig. 9).
Fig. 7
Fig. 8
Fig. 9
ADJUST SAW FOR SINGLE CUT
Measure
MITER
2.4
single Cut Miter
Fig. 5
Fig. 6
Walls
Saw Cut
Floor Board
2.4
A single cut miter is used to have a trim piece flush against a wall (Fig.
6). Open the tool so the arms touch the walls. Press the neXt button
and the single cut value will appear (Fig. 5). NOTE: This is usually a
very slight angle.
MITER
Measure
Corner
MITER
90.0
standard Miter
(Default Setting)
The
Mode
button is used to toggle the tool’s three main capabilities: Miter,
Protractor, and Crown Molding.
Miter is the default mode. The scale should read 90.0° with both arms on
a flat surface. This mode is designed for use with a Miter/Chop saw with
display indicating the saw setting.
Fig. 2
MITER
Measure
Corner
MITER
90.0
46.2
The display shows the actual
Miter angle to set your saw to.
Walls
inside Miter Cut
Left Board
Right Board
1
st
Cut
2
nd
Cut
Board Face
Fig. 3
Fig. 4
46.2
Open the arms to place them against the two walls of the corner. Read the
value from the display and press the
HoLd
button (Fig. 2). Set your saw to
this angle (Fig. 3) and make your cut. Swing the saw to the opposite side,
reset to the same value, and make your second cut (Fig. 4). For an outside
corner, flip the face of the board down on to the table and repeat the steps
above.
Turn the knob clockwise to tighten the
movement of the protractor arms.
Mode
LCD Display
Reset Button
Mode Button
Plumb Vial
Fig. 1
Select / Hold Button
Next Button
CP505e-12 Features
1. Miter Cut (for miter joints)
2. Single Cut (for butt joints)
3. Protractor (0° to 180° to 360° to 180° to 0° - 180° to 0° to 180°)
4. Compound Cut (for Crown Molding )
CP505e-12 electronic Protractor user guide
Para ver el manual en español:
www.starrett.com/u?505E-S
Pour consulter la version française du manuel:
www.starrett.com/u?505E-F