Wiring instructions mounting instructions, Wire harness replacement – Star Headlight & Lantern 6600 Series - 64"Warning Package User Manual
Page 4
-2-
Wiring Instructions
Mounting Instructions
Please review the separate Mounting Bracket manual that
is also enclosed with your bar for mounting instructions.
If the wire supplied is too short, Star recommends direct wiring to the terminal block on
the inside of the lightbar, rather than making connections to the end of the wire that is
supplied. This lightbar is designed so that no wire connectors are needed and only a few
common tools are necessary in order to do this. Direct wiring allows the wire connections
to the lightbar to be made in a clean and dry environment, avoiding any problems that may
arise due to weathering on external connections. There is also an increase in voltage loss
with the addition of each connection. Wiring directly inside the lightbar reduces the number
of connections. However, making connections to the wires already provided is an
acceptable alternative, as long as these connections are good electrical connections and
are resistant from weathering effects. For direct wiring into the lightbar, follow the
instructions listed below.
Wire Harness Replacement
PLEASE NOTE: If you are using the existing 15-foot cable supplied with the lightbar,
you may skip to the Electrical Connections section on page 4.
Step 3
Step 2
1. Use the Wire Usage Table shown on page 1 to determine how many wires you will need
to run.
2. After identifying the necessary wires, select appropriate wire sizes and colors.
3. Locate the end of the lightbar that has the external wires entering the base of the lightbar.
The black terminal block(s), which you will be making your wire terminations to, should
also be located at this same end.
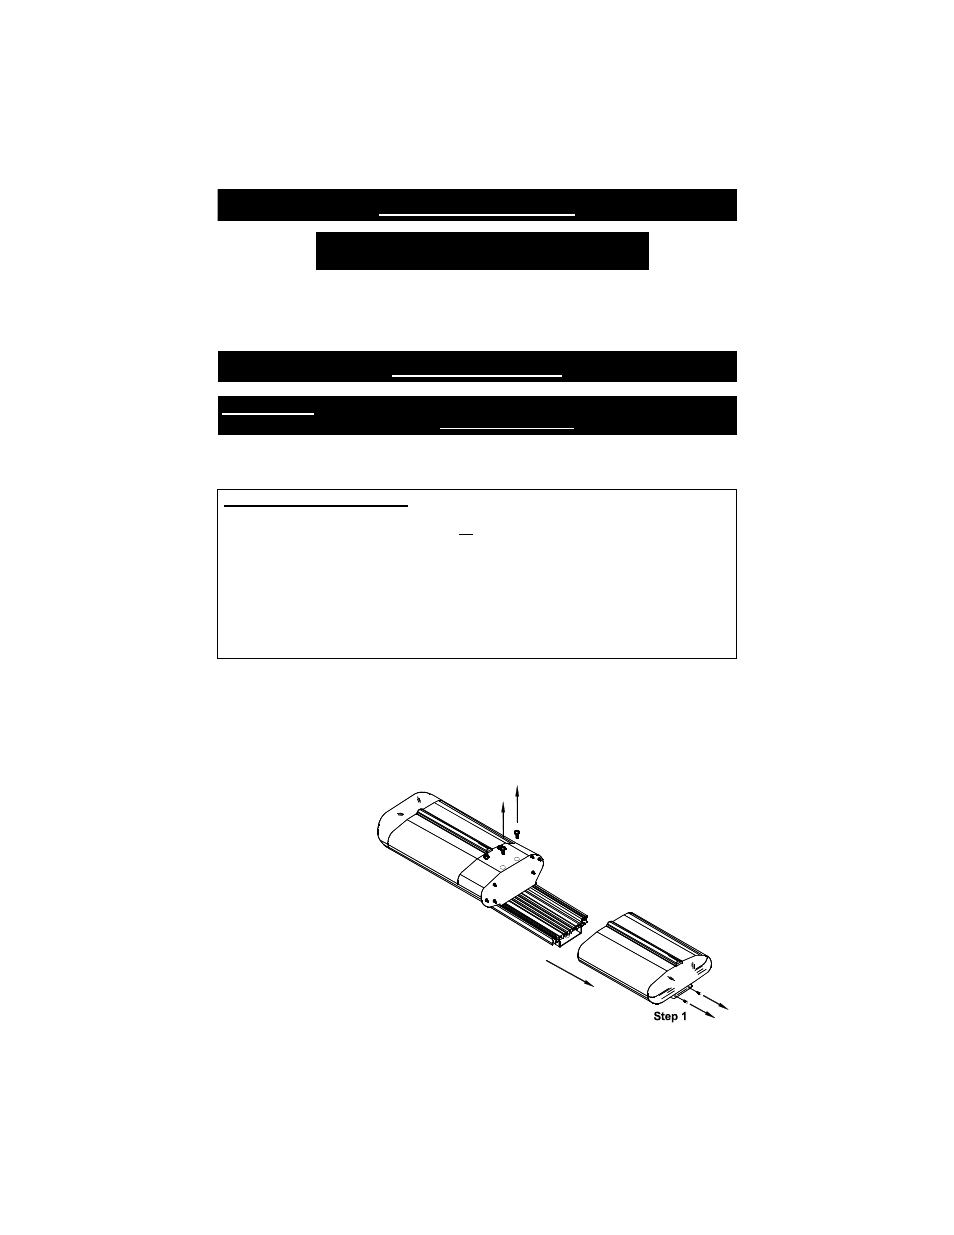
4. Remove the outer dome to
expose the terminal block.
Step 1 : Remove the
two screws
holding the
endcap to the
lightbar base.
Step 2 : Loosen the two screws that
are holding the dome to the
center divider section.
Step 3 : Slide the dome (with the attached
endcap) off the end of the base,
exposing the interior components.
Step 4 : When all work is completed, reverse the steps to reinstall
the dome, taking care that the gasket is properly aligned.
- 6500 Series - 56" Warning Package 6500 Series - 56" 3 Lens Tow Package 6500 Series - 56" 2 Lens Tow Package 6500 Series - 52" Warning Package 6400 Series - 48" 3 Lens Warning Package 6400 Series - 48" Warning Package 6400 Series - 44" Warning Package 6300 Series - 40" Warning Package 6200 Series - 24" Warning Package 6000 Series - 20" Warning Package