Pattern programming – Star Headlight & Lantern 258HTDCL Dual color User Manual
Page 4
-3-
2
1
3
Length of Hold
Unit Blinks
Single-Color Non-Rotating
And All Dual-Color
Models Jump To
Single-Color Rotating
Models Jump To
1 second
Does Not
Next Pattern
Next Pattern
12 seconds
4 times
Pattern 18
Pattern 18
9 seconds
3 times
Pattern 13
Pattern 16
6 seconds
2 times
Pattern 6
Pattern 6
3 seconds
1 time
Pattern 1
Pattern 4
18 seconds
5 times
Steady Burn
Steady Burn
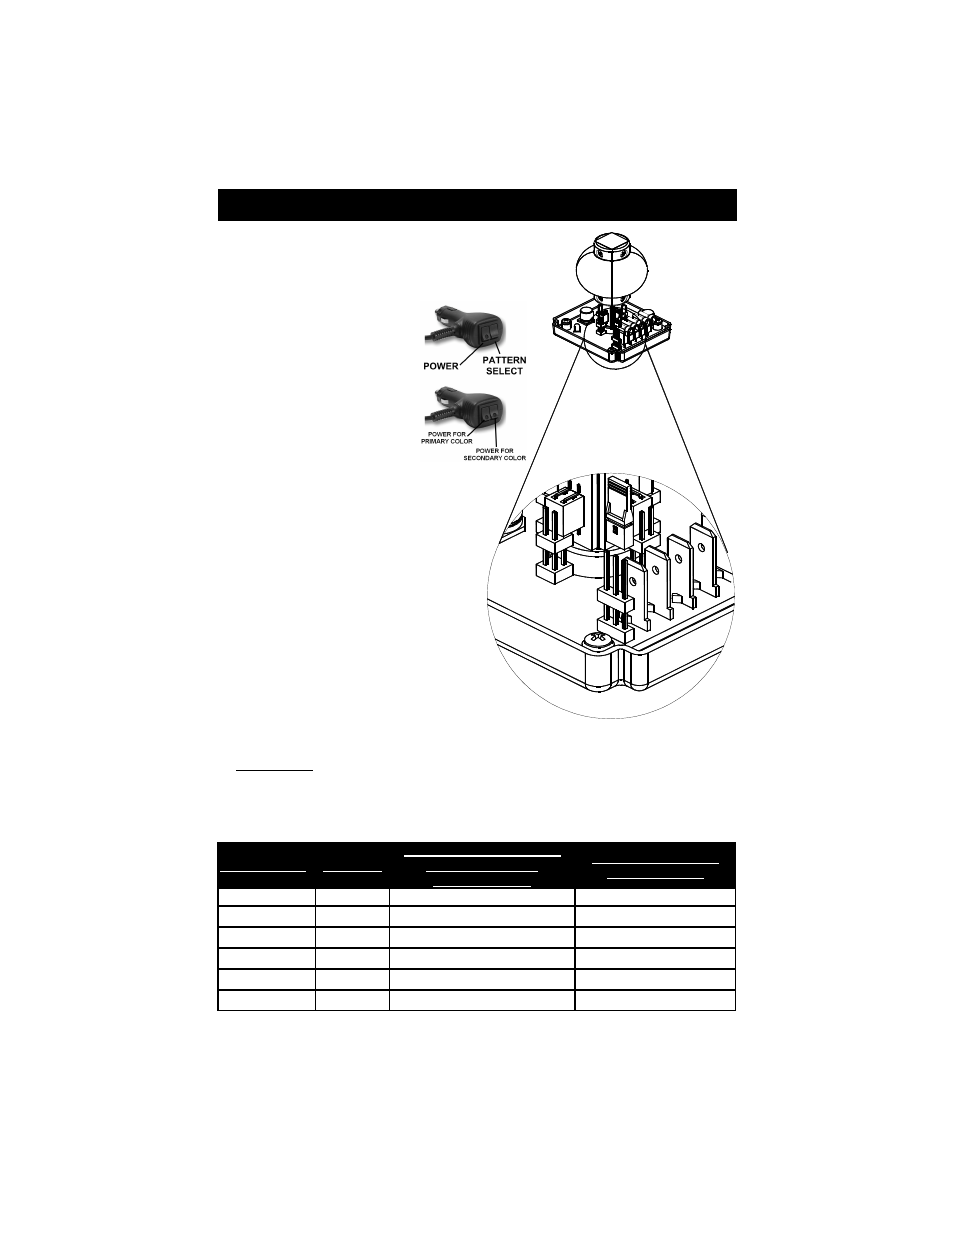
1. Set the flash pattern using any of the following:
• Green wire (permanent mount versions only)
• Pattern Select switch on the cig plug (single color
mag mount versions)
• Internal jumper (dual color mag mount versions).
2. Power up the light by
connecting the red and black
wires or by plugging the cig
plug into a powered outlet and
activating the Power switch.
For dual color lights, the cig
plug will have two Power
switches. Each color can be
programmed separately, or you
can activate both switches to
program both colors to the
same pattern.
3. You can program your light for any of the
12 different patterns in either of two “phases”.
(Refer to the pattern list on the following page).
4. The lights are preset at the factory for Pattern #6
(single-color non-rotating versions and all
dual-color versions) or Pattern #4 (single-color
rotating versions). Cycle through the patterns by:
• Touching and releasing the green wire
to ground.
• Pressing and releasing the Pattern
Select button.
• Removing the jumper from pins 2&3 and
touching and releasing it to pins 1&2.
5. After the pattern has been set, tape or place a
wirenut over the end of the green wire to prevent it
from coming into contact with ground again or
replace the jumper on pins 2&3.
6. SHORTCUTS: There are a number of “shortcuts” available to make the programming of
your light easier: Review the chart below for a list of how long you need to
touch the green wire to ground (or hold the jumper on pins 1 and 2) to go
to the desired pattern.
Pattern Programming