Sioux Tools DVRS-5 User Manual
Page 4
4
Dry Pickup:
Wet waste should be emptied from tank but filters can remain in place.
Connect suction hose and appropriate attachments for use. As suction is reduced from fine material coating the filters, shut of the unit to
clean filters. Remove the brass agitator rod cover and rock the agitator rod from sisde to side to clean filters and resume suction.
After Dry Pickup:
Disconnect cleaner from electrical outlet. Release lid latches and remove cleaner lid assembly as well as intermediate cover from tank.
Empty dry material from the tank and intermediate cover.
To avoid back strain, do not lift a full tank. First, scoop out enough debris to make tank easier to lift
Empty contents into a suitable receptacle.
Wet Pickup:
Dry waste should be emptied from tank and intermediate cover but filters can remain in place.
Should filters become wet, during use, dry both filters thoroughly before continued use, consult the trouble shooting guide (Filters get wet).
After Wet Pickup:
Unscrew drain cap from bottom of tank. This drain is regulated so that a floor drain can be used convniently. The
liquid can be regulated from a drip to a full flow.
The suction hose can be put in the drain cap to drain liquid up to 12 feet away.
Rinse inside of tank thoroughly with clean water particularly if spills or other substances other than water have
been picked up. Wipe inside of tank dry. Screw drain cap back on tightly so it is ready for use again.
Automatic Wet Shut-off:
When the tank is full of liquid, the automatic shut-off mechanism will shut off cleaner pick-up. When this happens, the motor sound will
become noticeably higher in pitch. Turn cleaner off and empty tank to continue use.
Storage:
Disconnect cleaner from electrical outlet. Empty tank. Rinse inside of tank thoroughly with clean water particularly if spills or other liquid
sub stances other than plain water have been picked up. Wipe inside of tank dry. If tank is stored with liquid left inside, the moisture may
cause damage to the motor and its internal parts.
Wands and cleaning accessories as well as hose store right on the accessory tray. Wands store on each of the back leg grooves provided.
Lubrication:
The motor is equipped with bearings which con tain sufficient lubrication for the life of the motor. The addition of lubricant could cause
damage. Do not add lubricant to motor bearings.
If you have a problem:
This appliance was inspected thoroughly and was in good operating condition when it was shipped from the factory. If a minor problem
occurs, it usually can be solved quite easily when the cause is found. Therefore, this Trouble Shooting Guide is provided for you convenience.
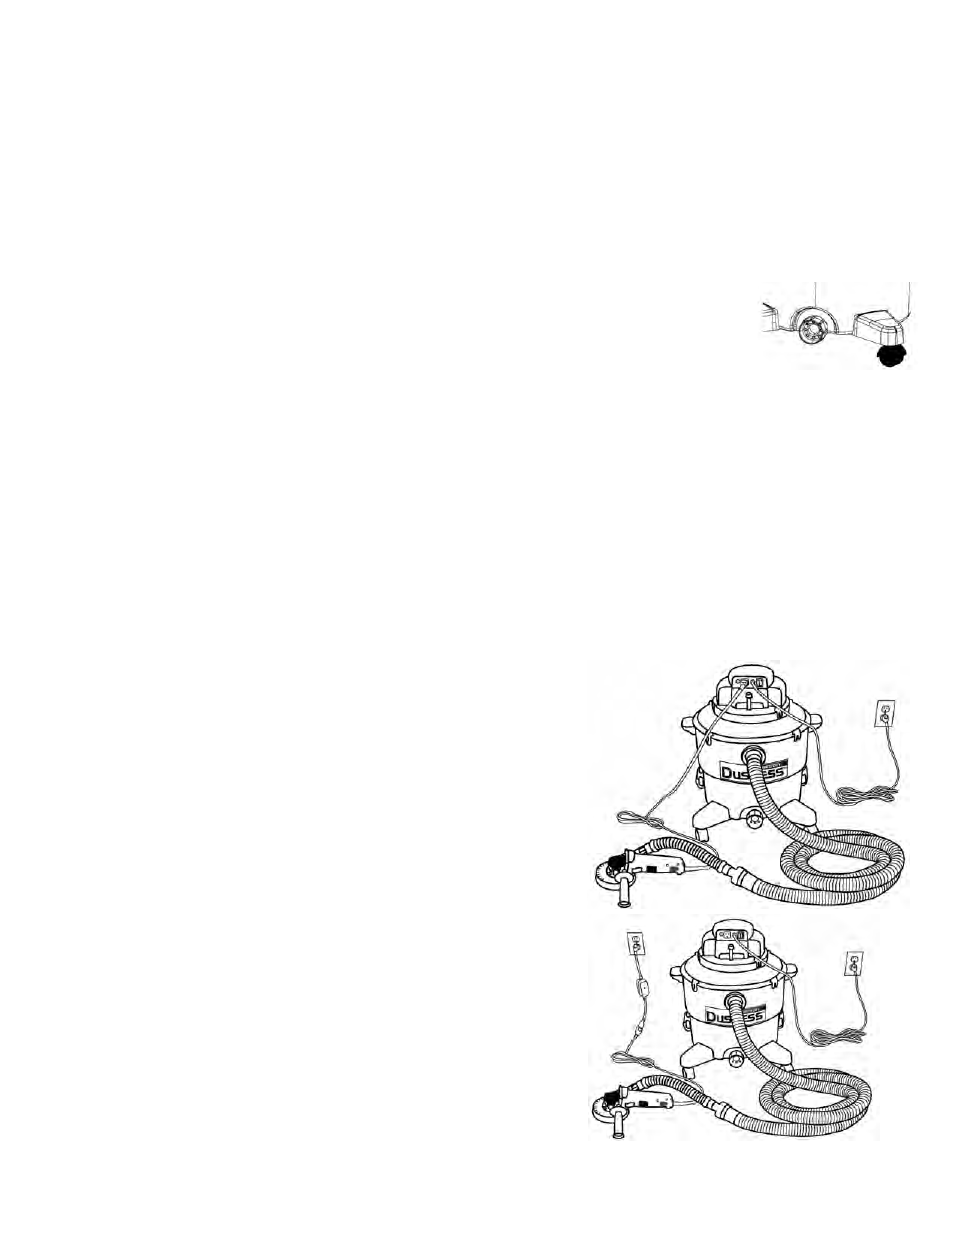
Operation:
When the switch is in the I position, the vacuum will turn on but no power will be
applied to the vacuum outlet. When the switch is in the II position, power will be
applied to the outlet on the vacuum. When the portable electric tool is activated,
the vacuum will turn on and run until the tool is turned off, then remain running for
about 6 seconds to clear the hose. If the portable electric tool being used is rated
6-8 amps, the vacuum will reduce power to the vacuum to keep the total current to
the tool and vacuum below 12 amps. The tool plugged into the vacuum will always
receive full power. If a large tool is attached to the vacuum outlet, there may not be
enough available current to supply the vacuum and the vacuum motor will shut off. If
this occurs, a remote/wireless electric start module will need to be used.
Some portable electric tools rated less than 1 amp may not trigger the automatic
mechanism. When these low amperage tools come into contact with the work
surface, they often draw enough current to activate the automatic start. When the
vacuum is started with an attached tool, and the tool is turned immediately off (within
1-2 seconds), this will allow the vacuum to remain running in a “Clean-up mode”. To
clear “Clean-up mode”, simply turn the tool on for more than 1-2 seconds, or turn the
vacuum to the off position. “Clean-up mode” only works with a device plugged into
the vacuum outlet
Wireless Remote Start Operation:
There are 2 types of wireless start modules available. The pneumatic wireless start
module (Remote start A) is plugged inline with the air hose supplying air to a tool.
When air flows, a wireless signal is transmitted to the vacuum to signal it to turn on.
When the air flow stops, the vacuum is signaled to turn off after about a 6 second
delay. The Electric wireless start module (Remote start E) works in the same way as
the Remote start A module except it plugs into a power outlet and measures current
flow to signal the vacuum to operate. Both remote start modules have a red blinking
light that signals the unit is transmitting
Note for Remote start E electric wireless start modules: When using large amperage
devices and the Remote start E modules, it is important to plug the tool into a
different circuit than that of the vacuum to avoid tripping a circuit breaker. Never plug the Remote start E into the vacuum outlet.
Do not plug Electrical Tool Start Module into the vacuum