Installation guide, 4 installing the unit, Tools required – Sanuvox S300 FX-GX User Manual
Page 7: Location, Step-by-step installation
PAGE 7
Tools required
• Phillips #2 or
Robertson #1 screwdriver
• 3/32" drill bit
• Tin snips or metal shear
• Power drill
Location
Return side connection is to be
installed after the last branch on the
return air plenum and a minimum of
2 linear feet from the furnace.
A 5-foot power cord is supplied with
the unit. A 120VAC outlet needs to
be supplied.
Note:
Refer to Section “4” for details on
how to remove the door and filters.
Step-by-step Installation
Steps involved in the preparation of the return plenum mount system:
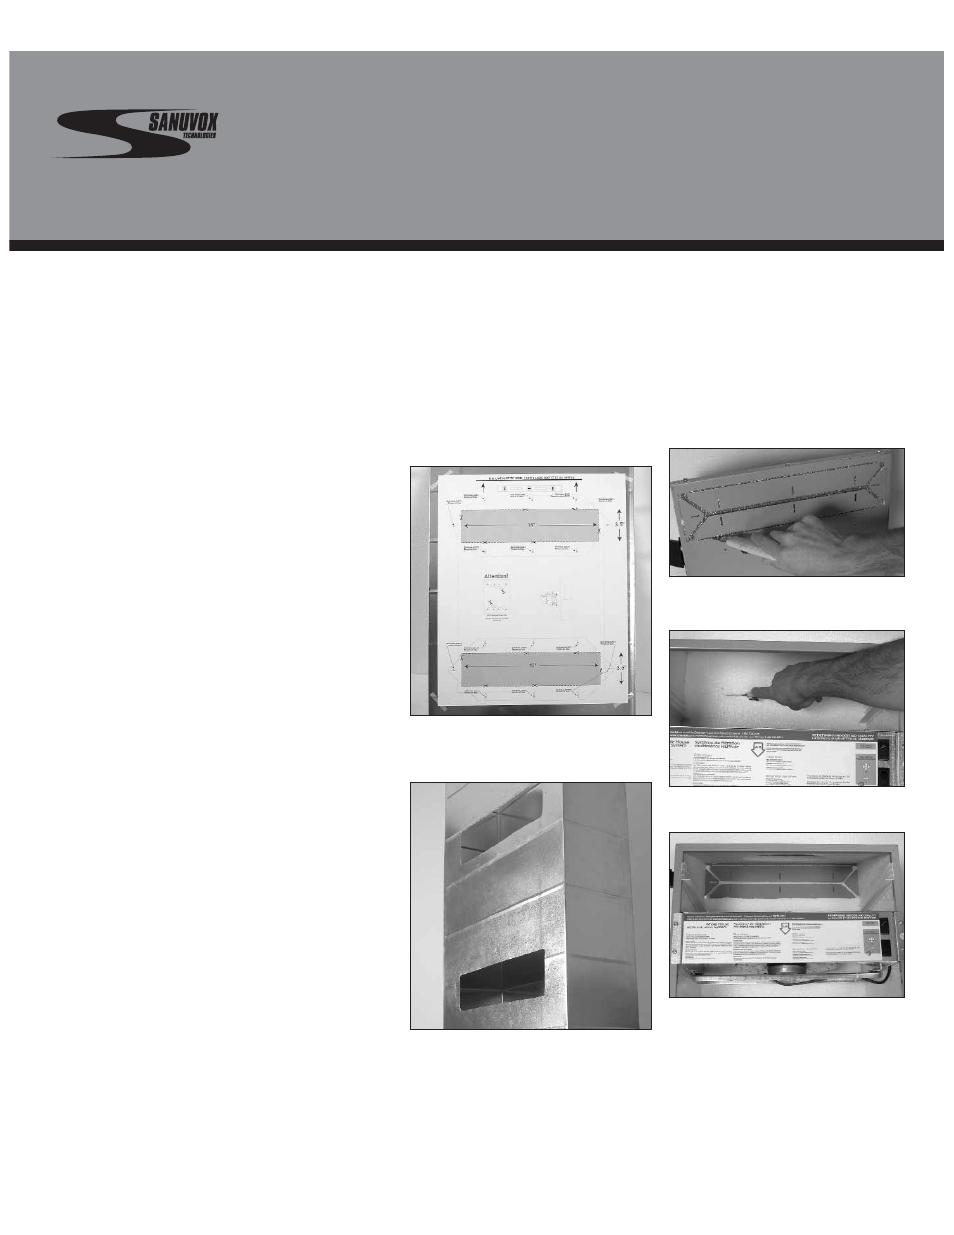
Figure 2.2b
- One cut permits the clean
removal of the insulation piece.
Step 2:
Preparing ducting flairs
Remove the door and filters and proceed
to cut the insulation as illustrated below.
Figure 2.2a -
Cut insulation along the inside
edge of both of the inlet and outlet ports to
remove the insulation from the port openings.
Step 1:
Preparing return air plenum
Find a location that satisfies both service
and maintenance requirements. Cut holes
as illustrated below
Figure 2.1a -
Tape template to return air
plenum. Cut opening with metal shears
and pre-drill for the securing screws.
Figure 2.1b -
Remove template.
Figure 2.2c
-The unit should look like this
when the foam piece is removed.
Installation
GUIDE
2.4 Installing the unit