RODE Microphones VideoMic Pro User Manual
Page 23
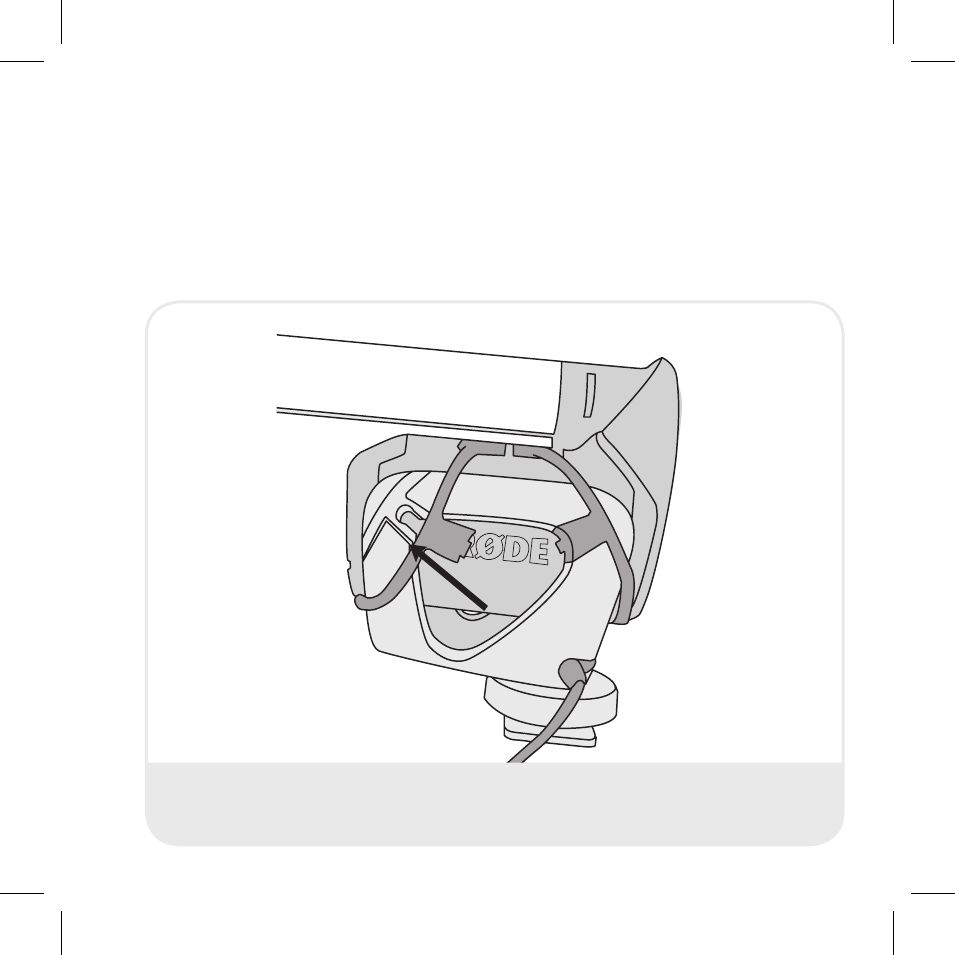
Figure 9 - Slide the tapered square in the middle of each band into the
corresponding notch on the mount.
Next, slide the tapered square on the middle of the band into the
notch on the shock mount. The circular knob on the inner side of
the band will lock into the shock mount notch. Repeat the process
for all four bands, and the VideoMic Pro will be securely mounted to
its shock mount cradle.
See also other documents in the category RODE Microphones Microphones:
- M3 (16 pages)
- NT55 (8 pages)
- nt1-a (12 pages)
- Classic II Limited Edition (9 pages)
- NT1 (208 pages)
- NT1000 (8 pages)
- NT2-A (12 pages)
- NT2000 (12 pages)
- K2 (16 pages)
- NTK (12 pages)
- NT-USB (105 pages)
- NT-USB (13 pages)
- Stereo VideoMic X (129 pages)
- NT3 (12 pages)
- NT4 (12 pages)
- NT5 (8 pages)
- Broadcaster (12 pages)
- HS1 (24 pages)
- PinMic (20 pages)
- Podcaster (12 pages)
- NTG1 (8 pages)
- NTG2 (8 pages)
- NTG3 (8 pages)
- NTG8 (12 pages)
- Stereo VideoMic Pro (18 pages)
- NT6 (12 pages)
- S1 (8 pages)
- Procaster (2 pages)
- VideoMic (2 pages)
- Stereo VideoMic (12 pages)
- Reporter (12 pages)
- M1-S (8 pages)
- M2 (8 pages)
- M1 (4 pages)