Installing wings, Installing horizontal tail – ParkZone PKZ5480 User Manual
Page 7
7
EN
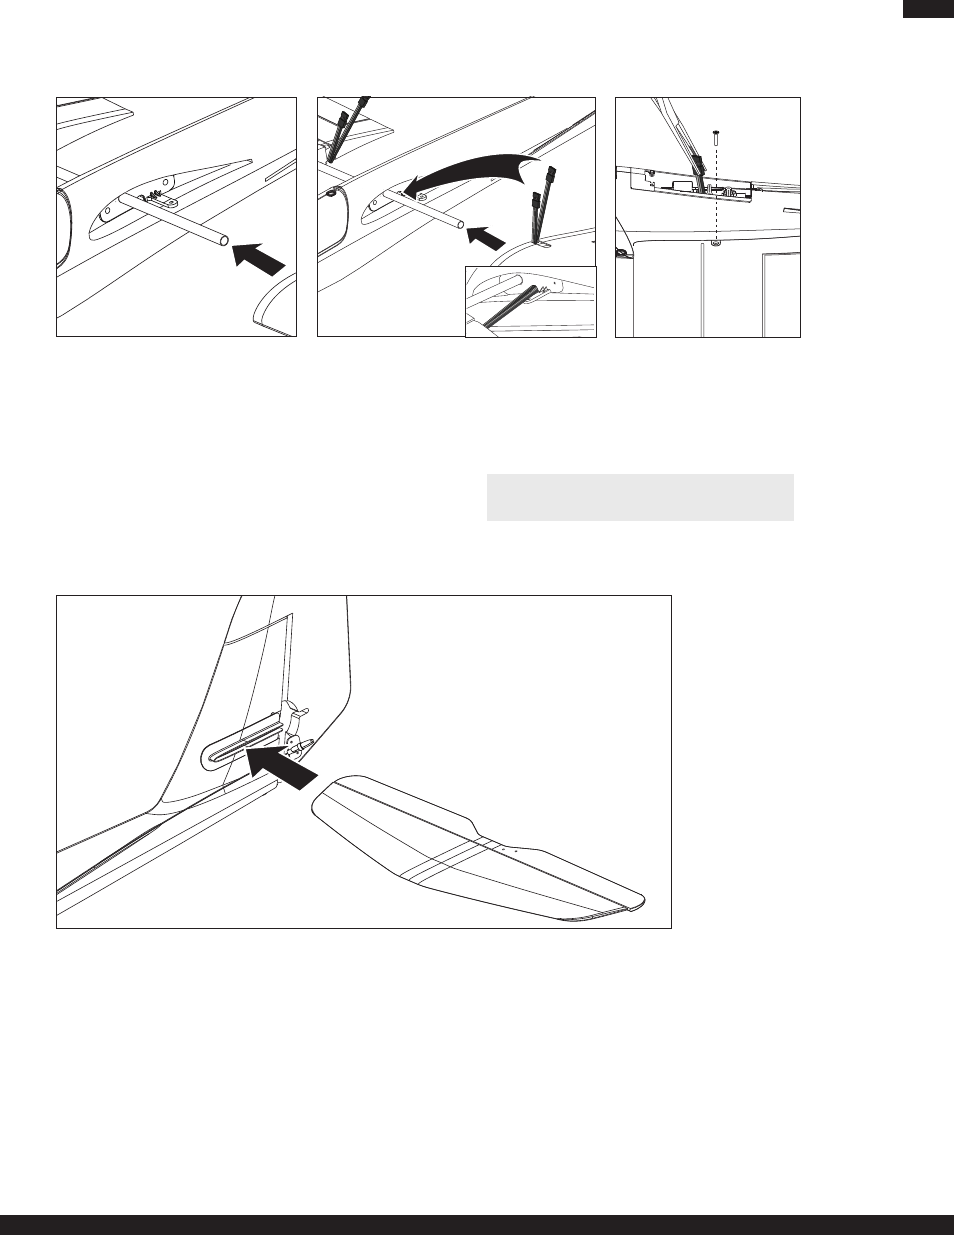
Installing Wings
1. Put the wing tube in the round hole in the wing slot of the fuselage.
2. Put left wing on the wing tube.
3. Move the wing on the tube into the slot in the fuselage while putting the
aileron and flap connectors in the fuselage.
Note: Hemostats or needle-nose pliers may be required to put the connectors
in the fuselage for connection to the receiver.
4. Fully install left wing in fuselage and secure wing with countersunk screw.
5. Install the right wing using the steps above.
6. Attach the 2 aileron connectors to the aileron Y-harness in the fuselage.
Note: When using a transmitter capable of controlling separate ailerons, the
aileron Y-harness is not required.
7. Attach the 2 flap connectors to the flap Y-harness.
Note: To remove wings, follow steps in reverse order.
1. Install horizontal tail from the left side of the fuselage through the hole in
the rudder and fuselage. The black and red decal will be facing up with
the black orientation stripes facing down. Make sure horizontal tail is
centered on the fuselage.
2. Apply 4 pieces of tape to horizontal tail sections and top and bottom of
fuselage.
3. Install elevator clevis in outermost hole of control horn (on horizontal tail,
under left side). The elevator control horn is on the bottom of the left side
of the horizontal tail.
4. Move silicone band over clevis to keep the clevis on the control horn.
Installing Horizontal Tail
Note: Left and right servo connectors do not have to be
connected to a particular side of a Y-harness.