Step 5 step 6 – ParkZone PKZ5080 User Manual
Page 5
7
8
Step 5
Step 6
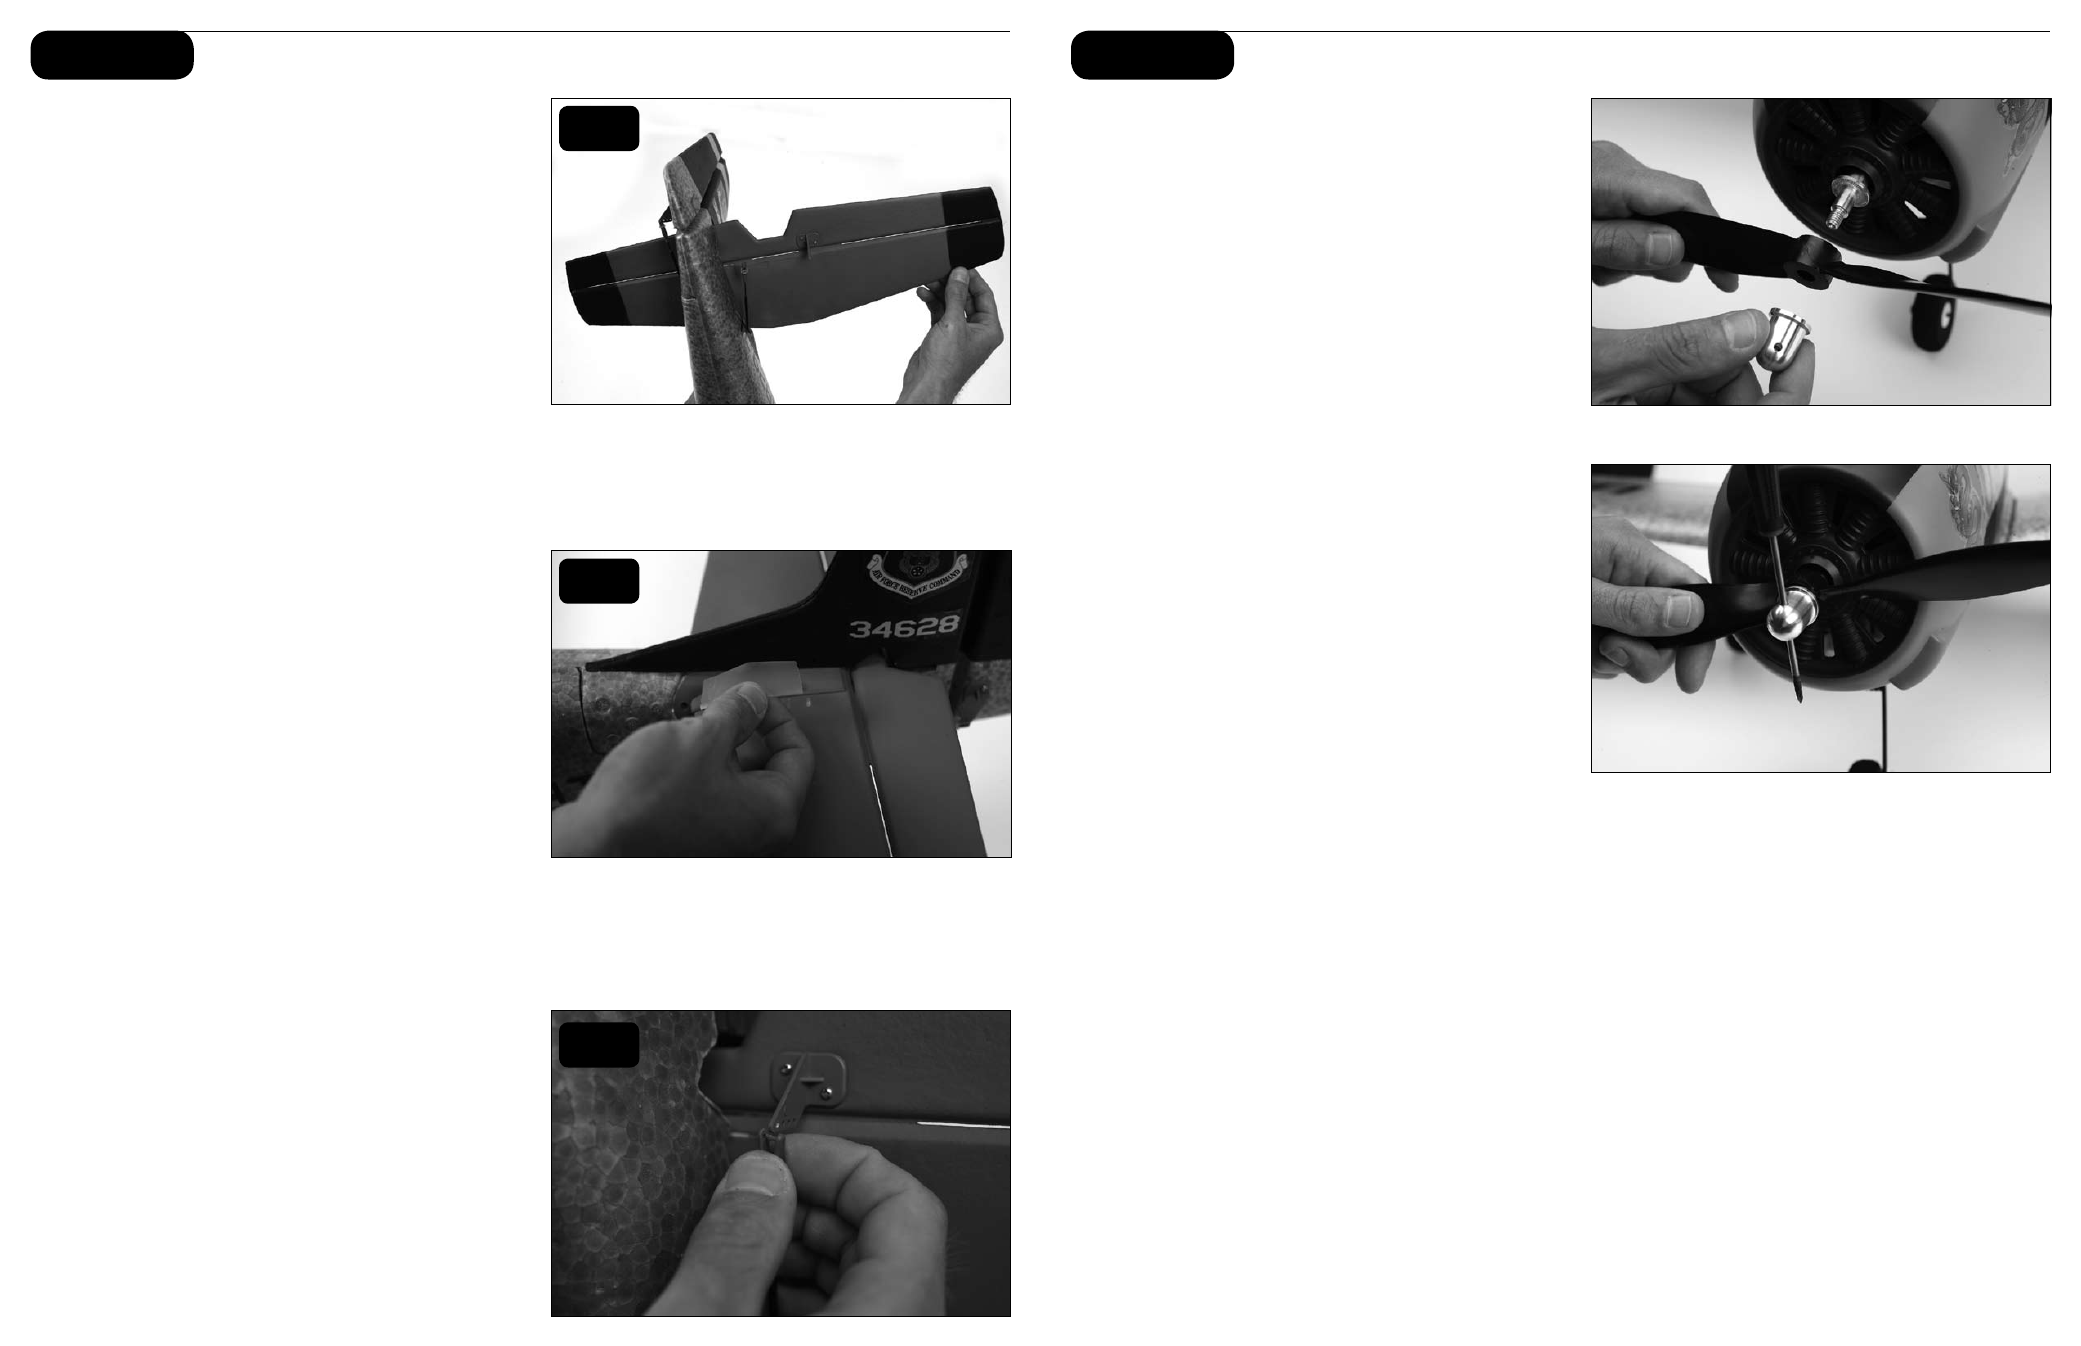
Attaching the Horizontal Stabilizer
1. Locate the horizontal stab of the tail.
2. Slide tail in allotted space of fuse, making sure
the control horn installed into the horizontal tail will
properly align with pushrod and clevis exiting the
back of the fuse.
3. When you are certain the tail is centered correctly
and in the right place, use the tape provided to
properly secure the tail to the fuselage as shown.
Use the tape on the top and bottom of each side of
the tail (total of 4 applications).
4. Turn on the transmitter and plug in the flight battery.
Make sure the trim levers are centered and the left
stick is in the full down position.
5. Locate the clevis and rod exiting the right side of the
fuselage, and attach the clevis to the control surface
as shown.
6. Make any trim adjustments as necessary prior to
flight (see Step 10).
Note: To make trim adjustments to the horizontal
stabilizer:
a. Turn on radio transmitter.
b. Plug in fully charged battery into fuse.
c. Use the elevator trim of the radio by moving up or
down to center the tail at neutral when the gimbal is
also at neutral. If these changes are not sufficient,
center the transmitter elevator trim lever, then
remove the clevis from the control surface and
turn clevis in or out as needed to move the control
surface back to neutral.
Warning: Always keep hands and all objects away from
the propeller in case the motor is engaged. A moving
propeller can cause severe injury and/or damage.
Replacing the Propeller
1. Loosen prop hub by inserting a hex driver through
the prop hub. Remove the prop hub and propeller.
2. Slide the new propeller on. Make certain the
numbers on the prop (9.5 x 7.5 for 2 blade) are
visible from the front.
3. Replace the prop hub and tighten it securely.
2
3
5