Step 5 step 6 – ParkZone PKZ4980 User Manual
Page 5
7
8
Step 5
Step 6
Attaching the Horizontal Stabilizer
1. Locate the horizontal stab of the tail.
2. Slide the stab joiner rod into one side of the stab.
Slide the stab with the joiner rod through the fuselage
and then slide the opposite stab onto the fuselage.
3. Use the tape provided to properly secure the tail
to the fuselage as shown. Use the tape on the
top and bottom of each side of the tail (total of 4
applications).
4. Turn on the transmitter and plug in the flight battery.
Make sure the trim levers are centered and the left
stick is in the full down position.
5. Locate the pushrods and clevises exiting both
sides of the fuselage, and attach the clevises to the
outermost hole of the control horns as shown.
6. Make sure both elevators are at neutral, without
any deflection on either side. Both sides must be
even. Make any trim adjustments as necessary prior
to flight.
Note: To make trim adjustments to the horizontal
stabilizer:
a. Turn on radio transmitter.
b. Plug in fully charged battery into fuse by connecting
the blue EC3 connector on the battery to the blue
EC3 connector on the ESC.
c. Use the elevator trim of the radio by moving up or
down to center the tail at neutral when the gimbal is
also at neutral. If these changes are not sufficient,
center the transmitter elevator trim lever, then
remove the clevis from the control surface and
turn clevis in or out as needed to move the control
surface back to neutral.
Warning: Always keep hands and all objects away from
the propeller in case the motor is engaged. A moving
propeller can cause severe injury and/or damage.
7. Your Bf-109G is supplied with a small Maltese
cross for the tail insignia, to be applied as shown.
For those desiring a more accurate tail insignia,
an optional swastika decal is available separately
(PKZ4930, not available in all territories).
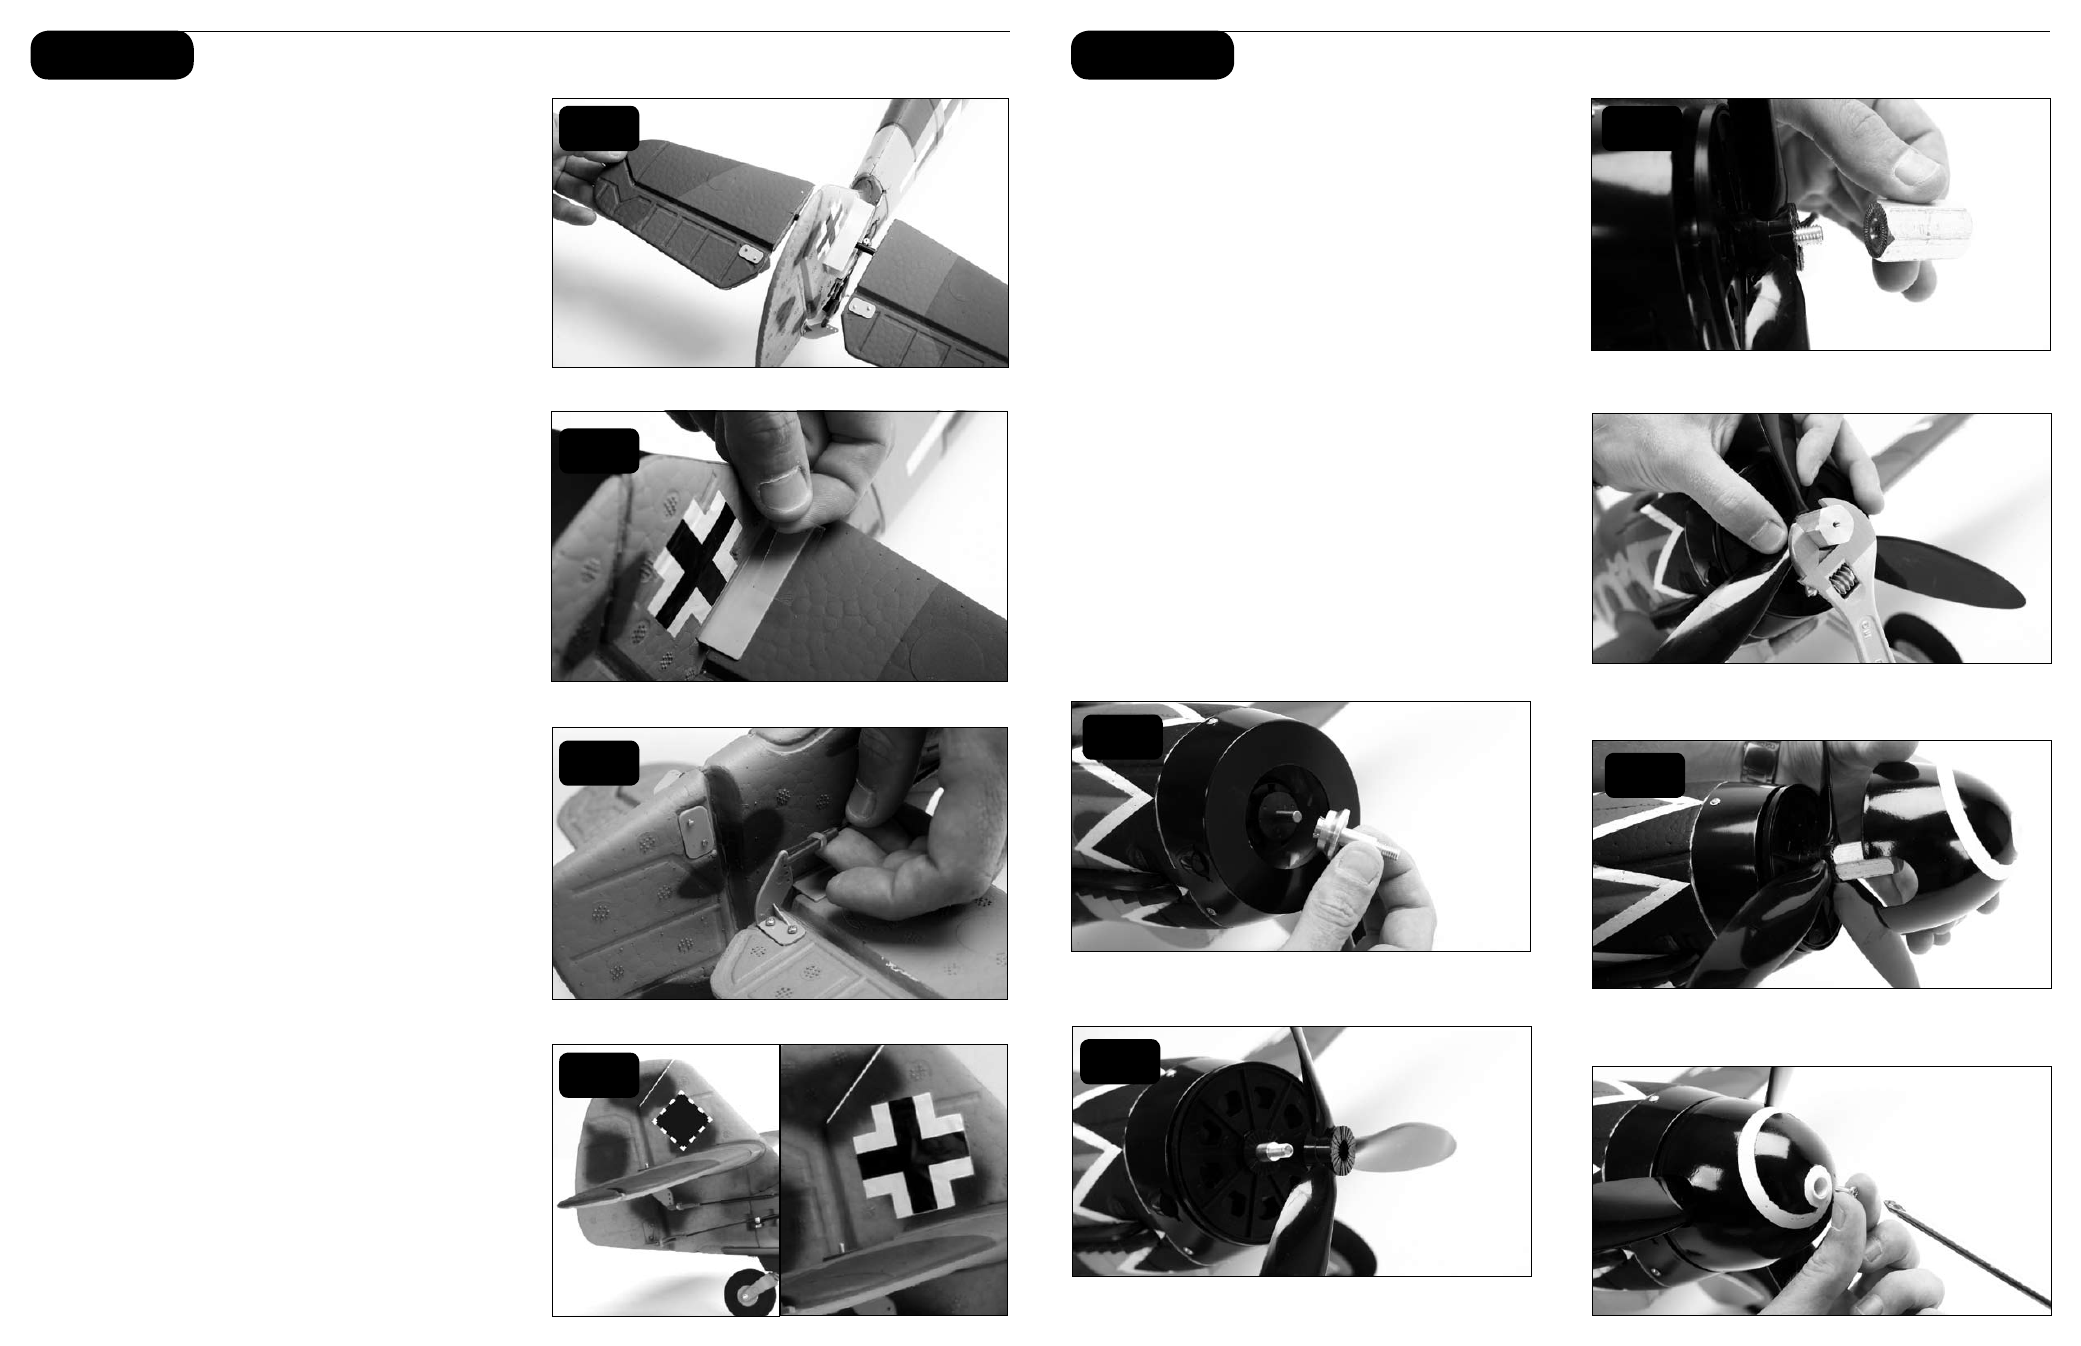
Installing the Propeller and Spinner
1. Slide collet onto motor shaft.
2. Slide spinner backplate followed by the propeller
onto the collet shaft.
3. Thread aluminum hex nut onto threaded collet and
tighten securely.
4. Install spinner making sure it is keyed into the
spinner backplate and using a Phillips screwdriver
install the 3mm x 10mm screw. Take care to center
the propeller blades in the cutouts of the 3-bladed
spinner, without allowing any of the blades to contact
the spinner.
Note: Another available option is the 2-bladed spinner
(PKZ4908). The included motor has a low Kv that was
engineered to match the included 3-bladed propeller. If
a two-bladed propeller is used with the stock motor, we
suggest using a 12 x 12 electric propeller. In addition,
the E-flite Apprentice motor is a higher Kv and is a drop-
in fit for the stock Bf-109G motor.
Warning: Use of the 3-bladed prop with the Apprentice
motor will result in excess current and likely damage
the motor.
2
1
2
3
4
3
5
7