Step 6, Step 5, Step 7 step 8 – ParkZone PKZ4200 User Manual
Page 4: Continued
7
6
Step 6
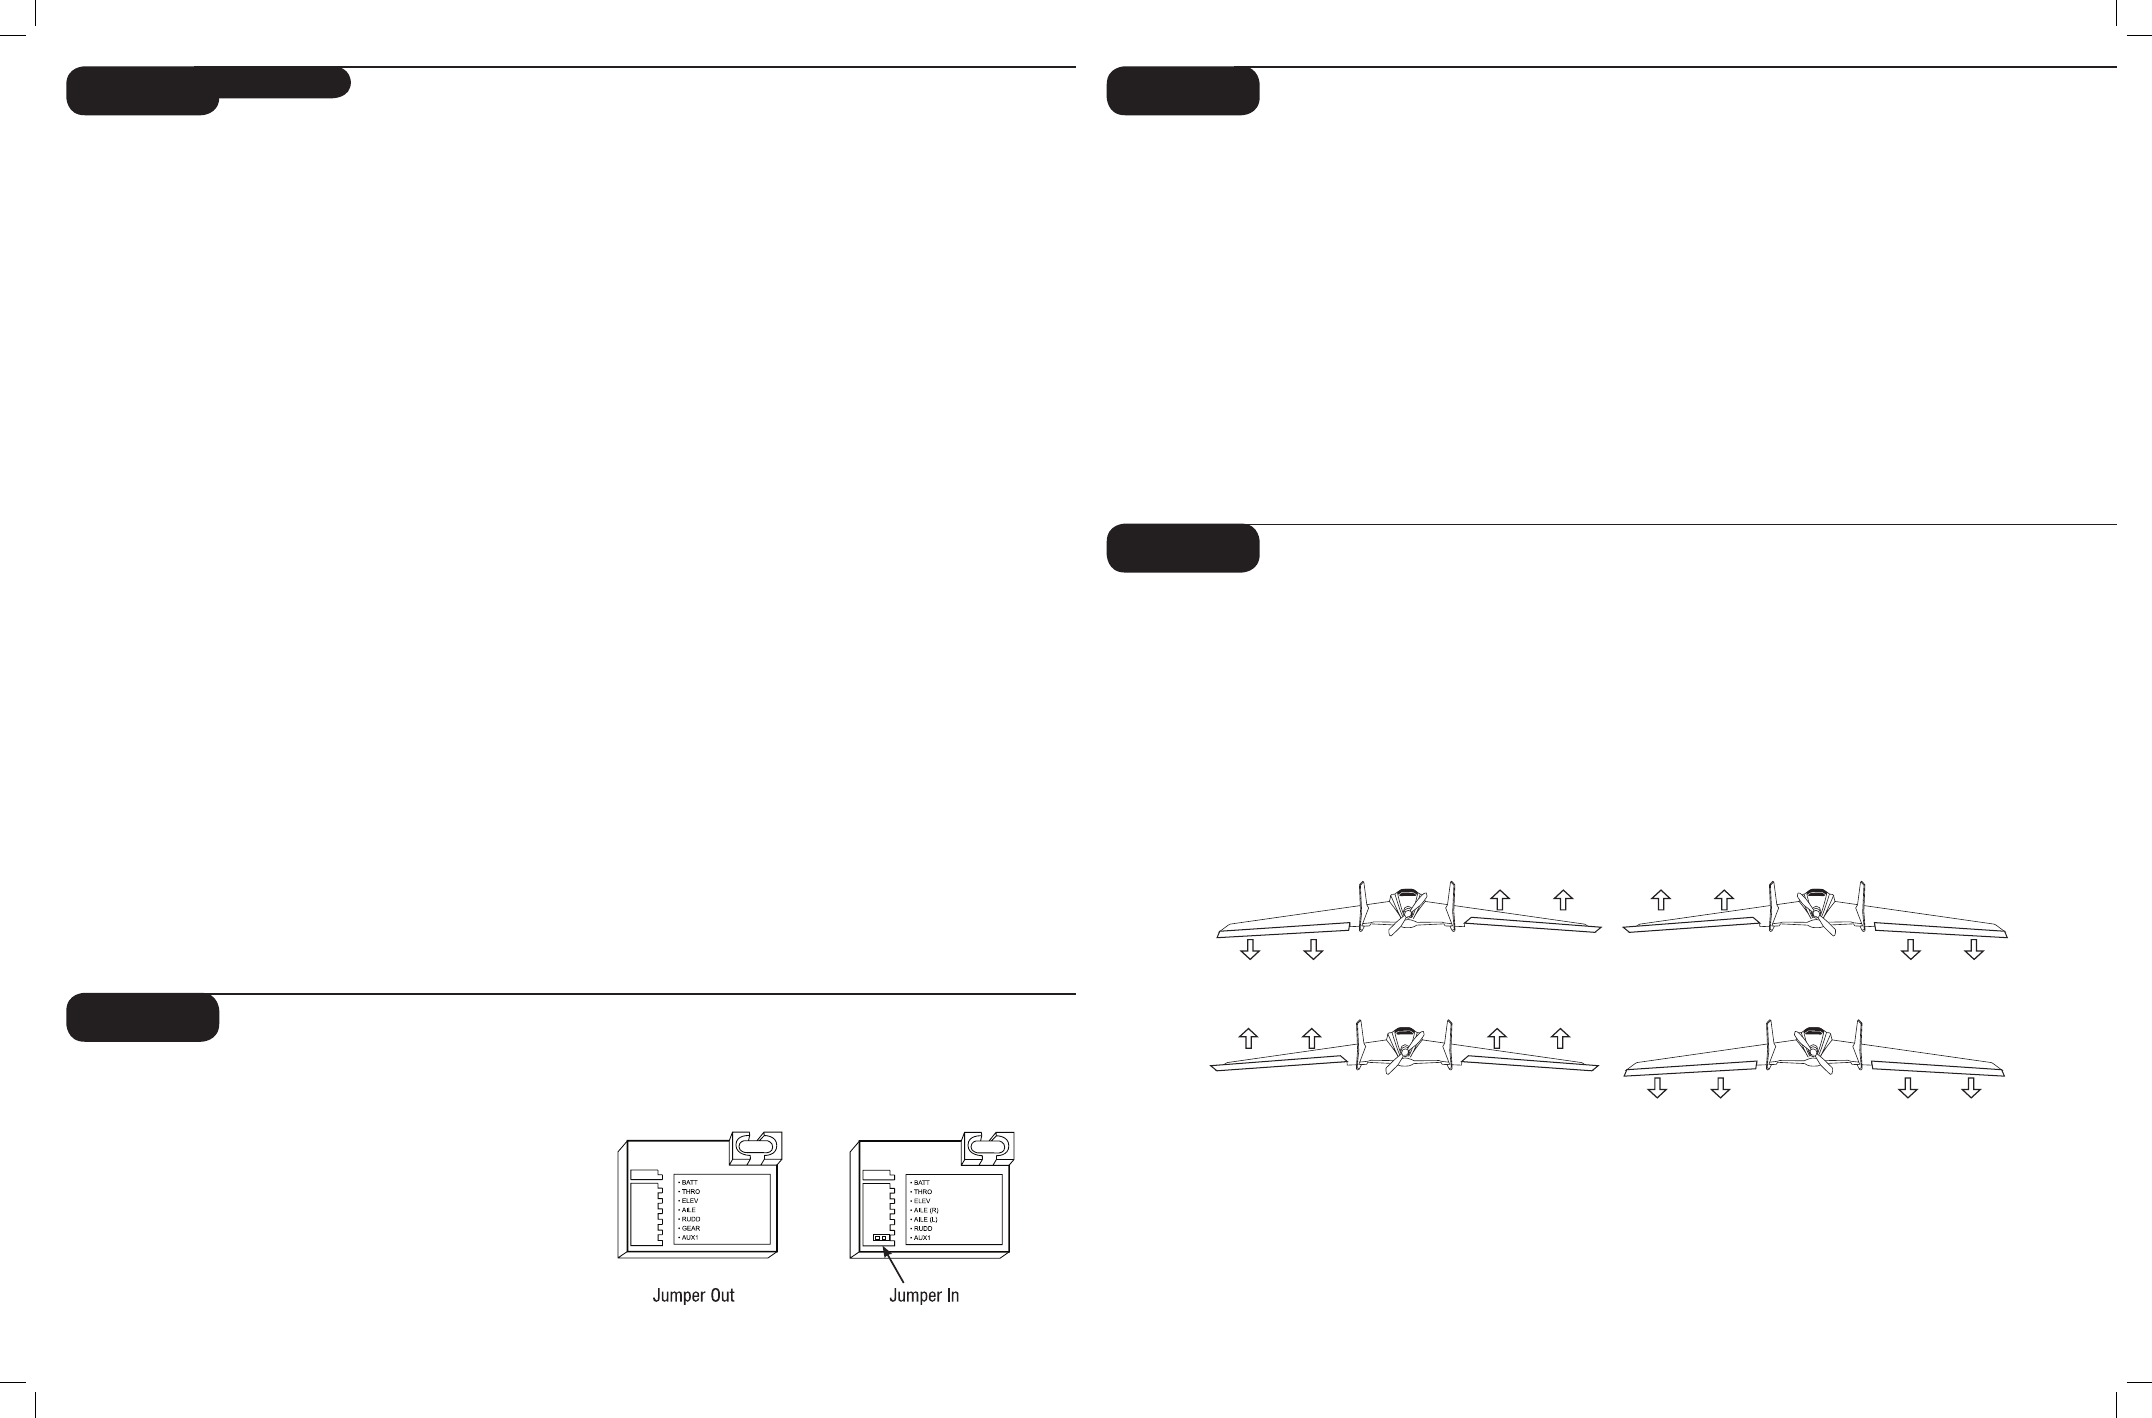
When you are looking from the tail of the aircraft toward the
nose, and you give right aileron command, the right elevon
should deflect upward, while the left deflects downward. The
opposite should happen when you give left aileron command,
the left elevon will go up and the right elevon will go down.
When pulling the elevator stick back (down), the elevons should
both deflect upward. Conversely, when pushing forward (up), the
elevons should both deflect downward.
Jumper In
Your F-27C Stryker receiver comes with a jumper installed
into the sixth port (Aux 1) of the receiver. When this jumper is
installed, the switch at the top right of the transmitter will func-
tion as a dual rate switch.
Menu Item Selections:
The menu items and choices are as below, where “Yes” means
Full Throttle and “No” means Idle.
Menu Item 1: Cell Count
Stick up
- 3S Li-Po soft cut (default)
Stick down - 2 cells Ni-Cd or Ni-MH and our exclusive 70%
Smart Cut. (See below for more information).
To access the 70% Smart Cut option, leave the stick at full
throttle for 7 seconds while in menu item 1, until 7 beeps are
heard, then continue through the program normally. This option
will activate the soft cut at 70% of startup voltage. For example,
if your pack measures 10.0 volts at startup, then the soft cut
will occur at 7 volts. The Smart Cut option will check the startup
voltage every time you plug the controller in, so beware of using
partially-charged packs, as the system cannot protect your Li-Po
batteries if you are using Smart Cut and connect a partially-
charged pack.
Note: The default setting is 3-cell auto cutoff (3.05 volts per cell).
You will know that your battery pack has reached auto cutoff
when you hear the motor “whine/pulse” repeatedly.
Menu Item 2: Brake
Stick up
- Brake inactive (default)
Stick down - Brake active
This option gives you the choice to force the propeller to
stop during flight or allow it to windmill. Use the brake option
for gliders.
Menu Item 3: Timing
Stick up
- 4-pole and greater timing mode (default)
Stick down - 2-pole motors
Refer to your motor specifications to confirm the number of poles.
Menu Item 4: Input Range
Stick up
- Throttle range 1.1mS to 1.9mS
Stick down - Auto set (default)
This option allows all the different radios on the market to work
with the F-27C Stryker. Most radios work well with the auto set
option, but some radios have a wider output range and may give
a more linear response with the 1.1- to 1.9-mS range. If you feel
there is too much “dead” area in the stick movement near full
throttle, try adjusting the end points in your radio or change to
the wider input range. Beware that if these settings are not cor-
rect, it may be impossible to arm the controller. If this happens,
return the input range setting to the default auto-learning set-
ting. The auto-setting option learns the minimum position of your
throttle (between 1.1 and 1.3mS), stores this value at each start-
up, and then adds a value of 0.6mS for the full throttle setting.
Error Codes:
The controller will beep continuously if the input voltage is
below the soft cut voltage (beep..beep..beep) when the battery
is connected. If you have trouble arming the controller, enter the
programming mode and try the auto setting in menu item 4 to
see if it helps fix your problem.. (If it is a computer radio, you
may alternatively increase your ATV (endpoint) percentages).
Note: If you reverse the polarity of the ESC, you will destroy it. Do
not allow the ESC to contract any moisture.
When flying in hot weather, we recommend checking on the
condition of the ESC, battery, and motor after each flight. You
should strongly consider letting the electronic components cool
between flights. We also recommend throttle management. It is
not recommended that you fly an entire flight at full throttle. If
this is done, it is possible to cause permanent damage to your
motor, battery, and ESC.
For more information regarding your E-flite 25A ESC please visit
www.E-fliteRC.com.
continued
Step 5
The following are the channels programmed into
the receiver:
Ch.1: Throttle (ESC)
Ch.2: Elevator (left servo)
Ch.3: Aileron (R) (right servo)
Ch.4: Aileron (L)
Ch.5: Rudder
Ch.6: Aux 1
The channels in bold italics are the channels that are used in
the stock setup of the F-27C.
ParkZone 6-pole 1880Kv Brushless Motor
Your F-27C Stryker is powered by ParkZone’s 6-pole 1880Kv
brushless motor, which is installed at the factory, and a 6 x 4
propeller. The 6 x 4 propeller, along with the motor, was chosen
to create the correct balance of speed and torque and we do not
recommend changing propeller sizes.
Warning: Changing the propeller size could increase the current
draw and may cause damage to the motor, ESC and battery pack.
Center of Gravity
The center of gravity (CG) is set at the factory based on using
the included battery. As long you insert the battery in the
provided battery saddle that is molded into the foam, this CG
should be accurate. The 3S Li-Po battery should fit snuggly
into the foam saddle.
For your reference, the CG sits approximately 6 inches (15.25cm)
in front of the trailing edge of the elevons. There are molded
round holes on each side of the finger holds on the bottom of the
plane that indicate the spot where the CG is located.
Aileron and Elevator throws:
The recommended throws for low rate are approximately:
Ailerons: +/- 7/16 inches (11mm)
Elevator: +/- 3/8 inches (9mm)
The recommended throws for high rate are approximately:
Ailerons: +/- 5/8 inches (16mm)
Elevator: +/- 1/2 inches (12mm)
Step 7
Step 8
Elevator Up
Aileron Right
Aileron Left
Elevator Down
RECEIVER
INFORMATION
MOTOR AND CG INFORMATION
CONTROL
TEST
*Activates dual rates (stock)