Step 3 step 4 – ParkZone PKZ1700 User Manual
Page 4
4
Attaching the Wing
In order to attach the wing of your Spitfire Mk IIB,
please follow these simple instructions:
1. Locate the included wing screws (in clear plastic
bag).
2. Plug in the aileron servo lead from the wing into
the aileron extension. This is very important, as
the ailerons will be reversed if this is not done.
3. Carefully attach the wing to the fuselage. Use 3
screws to secure the wing as shown.
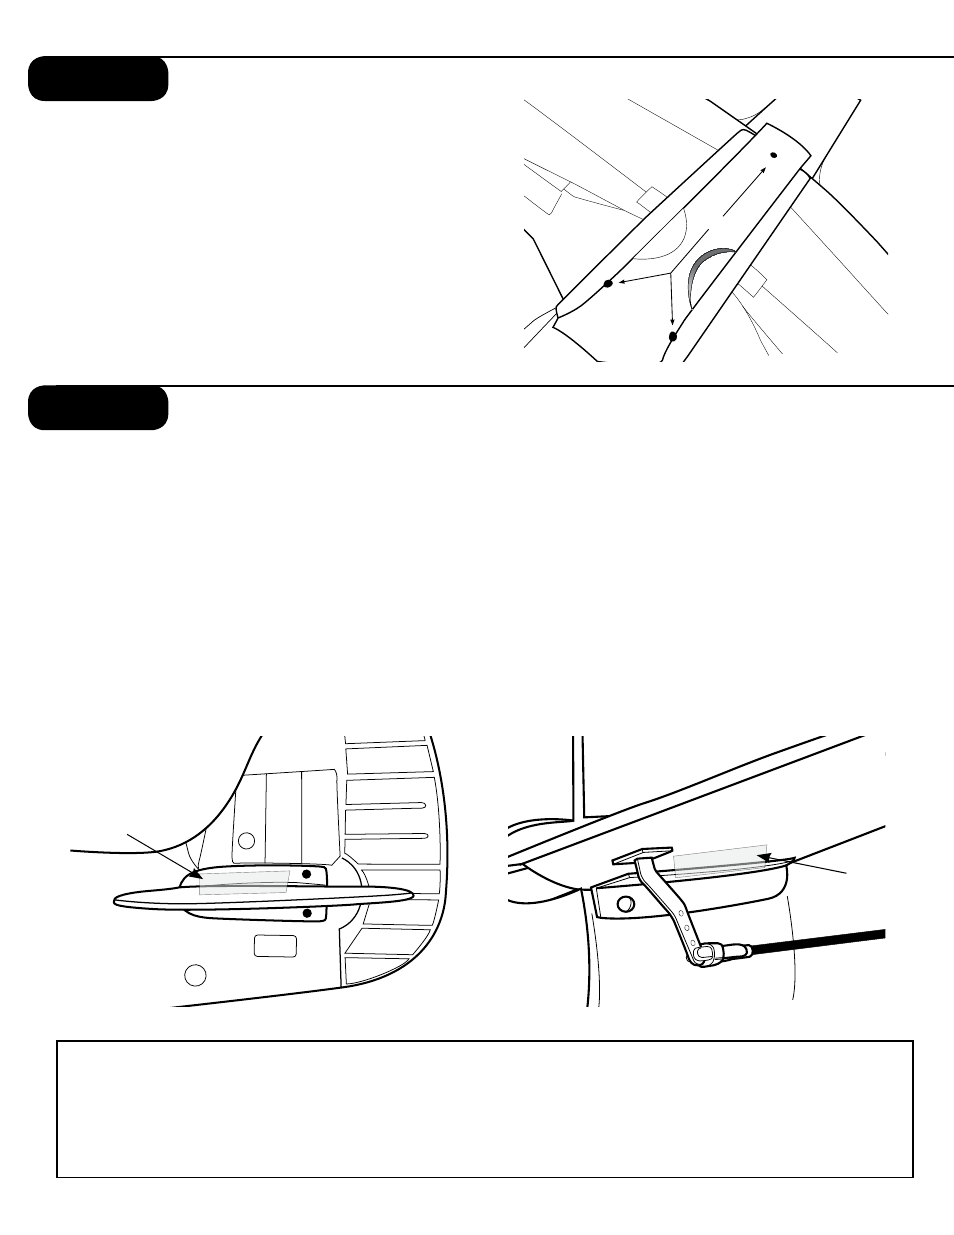
Attaching the Horizontal Stabilizer
1. Locate the horizontal stab of the tail.
2. Slide the horizontal tail stab through the allotted
space in the fuselage, making sure the control
horn attached to the horizontal tail stab will prop-
erly align with pushrod and clevis exiting the back
of the fuselage.
3. When you are certain the tail is centered correct-
ly, use the provided clear tape to properly secure
the tail to the fuselage, as shown. Use the tape
on the top and bottom of each side of the tail
(total of 4 applications).
Step 3
Step 4
TDSFXT
TDSFXT
4. Make sure that the throttle slider is all the way
down, in the “off” position. Turn on the transmit-
ter and plug in the flight battery. Make sure the
trim levers and control stick are centered.
5. Locate where the clevis and rod exit the fuse-
lage, and attach the clevis to control surface
as shown.
6. Make necessary trim adjustments prior to flight.
See step 5 for instructions on how to do this.
Center of Gravity Information
The CG locations for the Spitfire will be the following:
The center of gravity (CG) of the ParkZone Spitfire Mk IIB is approximately +/– 2
2
/
3
” (67mm) behind the leading
edge of the wing for the stock 10.8V Ni-MH battery and +/– 2
3
/
4
” (70mm) for an optional 11.1V 3S Li-Po battery.
You can confirm the CG by placing your fingers on the bottom of the wing and balancing it while it is inverted.
tape
tape