Save these instructions, Cartridge insertion & manual paper advance, Cartridge insertion – Paraclipse Terminato User Manual
Page 3: New unit, Step 2 - unsnap the new halves to separate, Paraclipse ™ terminator, Mounting instructions, Water
Save these instructions
Page 6
CARTRIDGE INSERTION & MANUAL PAPER ADVANCE
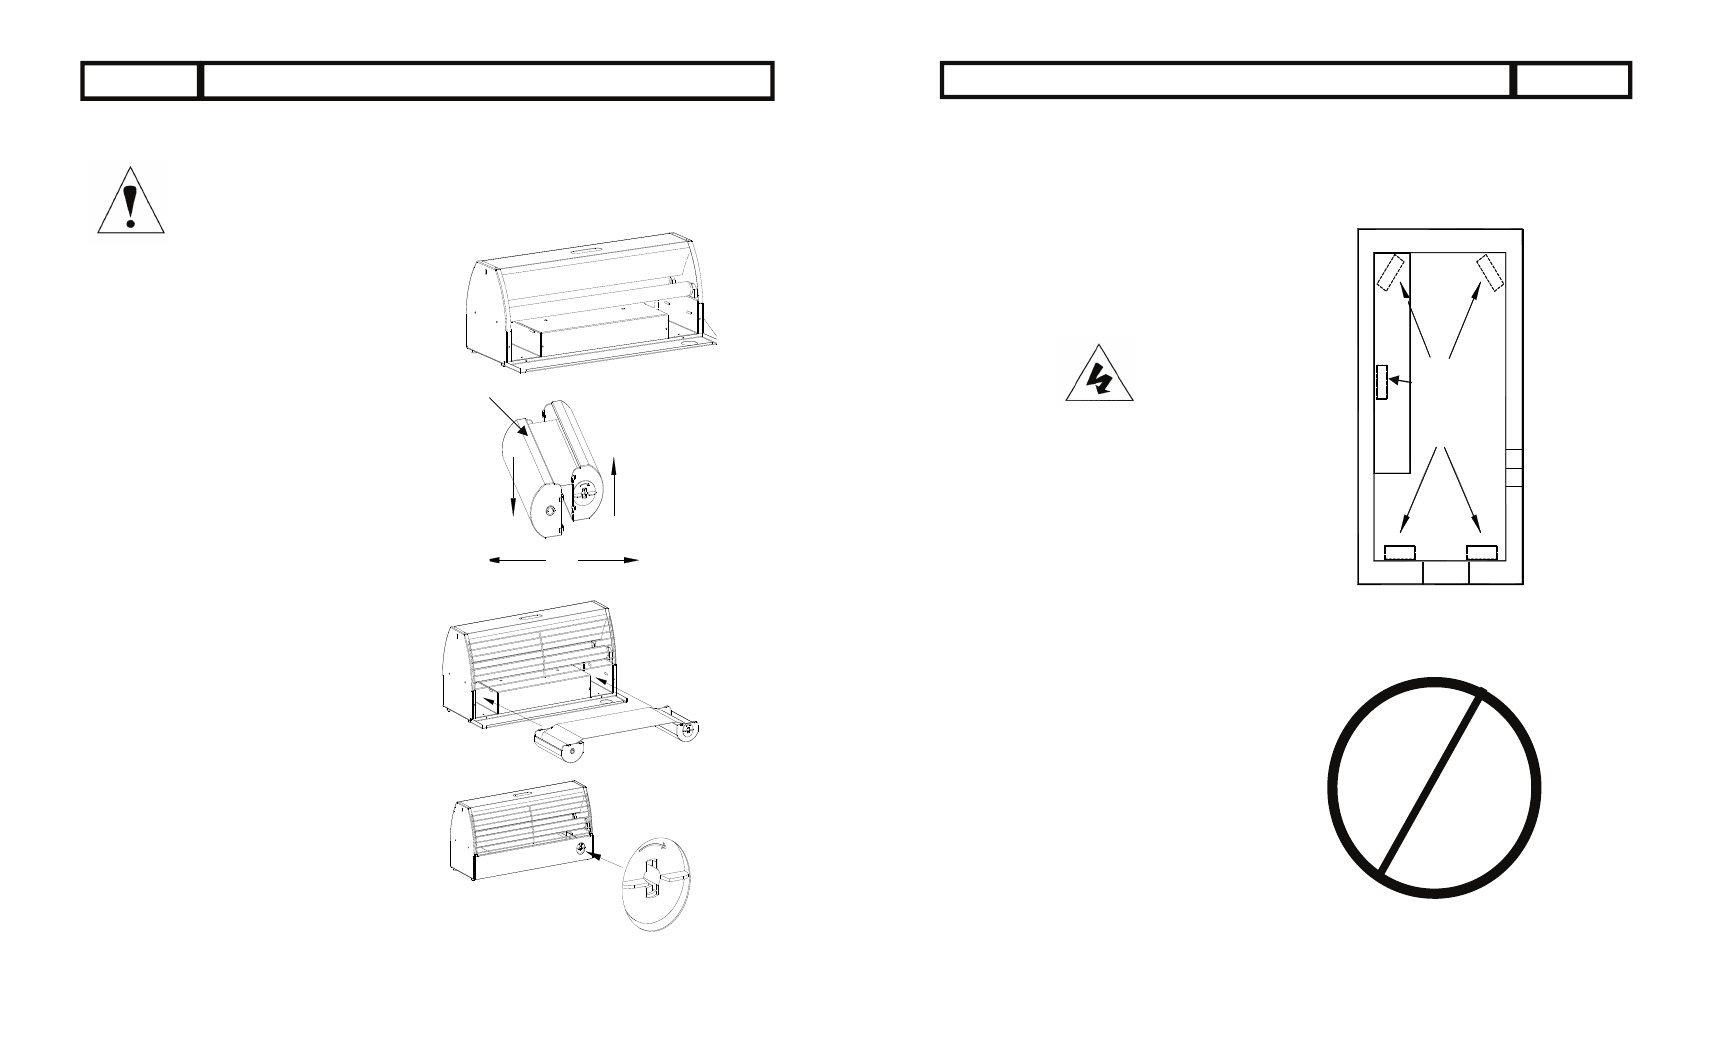
Cartridge Insertion
The tacky cartridge paper and unique motor drive
system are the heart of this state of the art insect
trap. The ease of changing the cartridge and safe-
ty provided (because of the unsanitary dead in-
sects) sets your Paraclipse ™ Terminator trap
apart from the others. The tacky cartridge can also
be used as an aid in monitoring insect types and
volumes. The side of the paper is marked every 3”
with a different thickness line. The 3” lines get
thicker and repeats every 21” as the paper ad-
vances.
1. New
Unit:
Your Paraclipse ™ Terminator is shipped with
cartridge preinstalled. You will need to advance
the cartridge until the glue surface spans the full
length of the cartridge. (fig. 7, step 5)
2. Replacement Cartridges: (Reference fig. 7 for
all steps)
Step 1- To install a replacement cartridge lower
the cartridge door.
Step 2 - Unsnap the new halves to separate.
Step 3 - Slowly pull apart the cartridge halves
and unwind paper so the cartridge halves are
approximately 16” (41 cm) apart.
Step 4 - Insert cartridge halves into place. Mak-
ing certain the roll of paper is on the left side
and the right side is engaged with the motor
drive shaft.
Step 5 - Close the cartridge door. Manually
advance the drive spool of the cartridge in the
direction of the arrow on the drive spool until the
glue surface spans the full length of the car-
tridge.
Use the same procedure when installing a new
cartridge and advancing the paper due to heavy
insect catch.
DEAD INSECTS ARE
UNSANITARY
72955-5-6-2014
Step 1
Fig. 7
Step 2
Roll of Paper
Lower Door
Separate Cartridge
Step 4
Insert Cartridge
Step 5
Drive spool
Pull apart
Step 3
Paraclipse ™ Terminator
Page 3
Mounting Instructions
Your Paraclipse
TM
Terminator will attract and
catch many types of insects. The trap’s superior
effectiveness is based on an insects’ desire to be
attracted to the integrally designed ultraviolet light
source and specialized attractants. Trap Place-
ment is important to optimize the performance to
the trap. Traps installed in areas without obstruc-
tion can cover up to about 4000 square feet (750
square meters). For best results follow the below
listed guidelines.
1. Select an area (see fig. 1) near an electrical
outlet or plan to bring an electrical source to
the area. The simplest installation is to place
the trap within 6’ (1.8m) of an electrical outlet.
This may not always be practical, it may be
necessary to wire a new source of electricity
near the ideal trap placement location. If a
new source of electricity is required seek the
help of a qualified electrician.
2. Install near room entrances. This will maxim-
ize the chances the trap will catch the insects
as they enter a room.
3. Install near areas of highest insect population.
4. Install in areas where room temperatures
average above 50° F. Most insects like to be
in a warm ambient temperature. Installing
your trap in a warm room will help maximize
the insect catch.
5. Install unit 4’ to 6’ (1.2 m to 1.8 m) above the
floor.
6. Do not install:
Near competing light sources
Near water or other damp locations
Where traffic could possibly damage unit
Near excessive heat sources such as ovens
or furnaces
Fig. 1
POSSIBLE TRAP
LOCATIONS
Window
Entrance
C
o
u
n
t
e
r
T
o
p
72955-5-6-2014
CHAIN
CHAIN
WATER