Setup of simnewb advanced components – Laerdal SimNewB Advanced User Manual
Page 9
7
S
ETUP
G
UIDE
SHOOTING
S
PECIFICATIONS
S
IMULATION
I
NTRODUCTION
EN
G
LI
SH
Start the Instructor Computer
- Connect the mouse and power supply
to the computer and power ON.
- Make sure that the SimNewB simulator icon
is displayed on the Instructor PC desktop.
Install the USB HUB
- Connect Power to the USB hub
- Connect smaller end of included USB
cable into the upstream port of the usb hub.
- Plug the rectangular end of the included USB
Cable into a USB port on the Instructor Computer
Connect the Patient Monitor Cables
- Put aside the software CD that comes with the monitor.
DO NOT INSTALL software CD.
- Route the cables through the Patient Monitor stand and
connect them to the corresponding outlets located
at the bottom of the screen.
- Secure the cable using the strain reliefs.
- Connect power cable to a wall outlet and power ON.
the Patient Monitor.
IMPORTANT: Do NOT connect the USB cable
to the USB hub yet.
IMPORTANT: Do NOT use the Patient Monitor software CD
that comes with the Manikin.
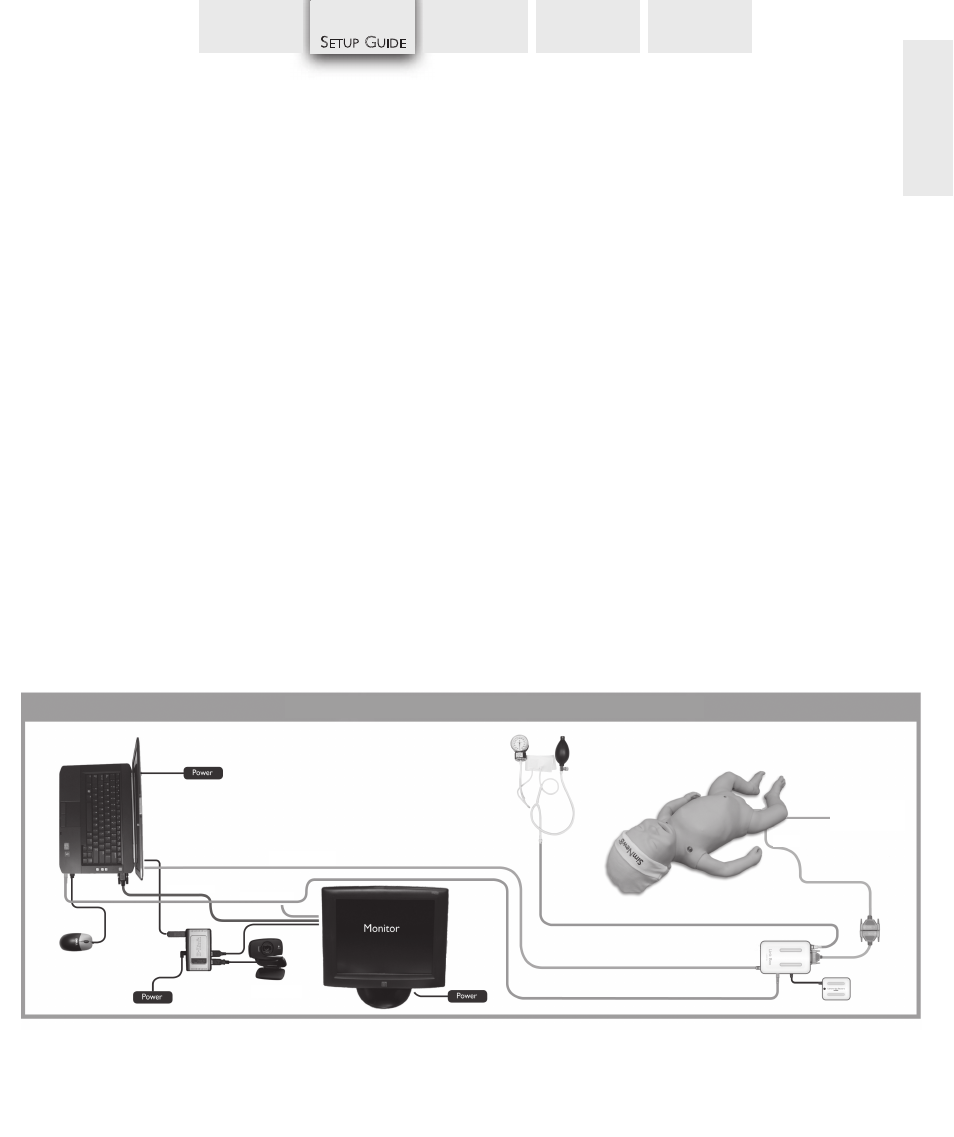
Network Cable
Battery
Manikin Cable
Link Box
BP Tube
Adapter Cable
Video Cable
Audio Cable
USB Camera
Connect the Patient Monitor to the Instructor Computer
- Connect the Patient Monitor video cable and 3-way
audio cable (black mini jack with double wire) to the
Instructor PC.
IMPORTANT: Do NOT connect the USB cable to the
Patient Monitor yet.
Set Up the Instructor PC for Extended Desktop Display
to Support the Patient Monitor
- Right click on the instructor PC desktop
- In the drop down menu select
- In the
- Click
- The Instructor PC (display 1) should have a resolution of
1600 x 900.
- The Patient Monitor (display 2) should have a resolution of
1280 x 1024.
- Click
Connect the Monitor to the USB HUB
rce
T
ROUBLE-
C
OMPRESSOR
C
LINICAL
Setup of SimNewB Advanced Components
External Air
Source
External Air
Source
Setup of SimNewB Advanced Components