English – Laerdal Nursing Kelly (SimPad Capable) User Manual
Page 5
Nursing Kelly
3
Laerdal
Dusting with talcum powder is helpful when replacing belly plates .
To remove:
1 . Position plate over cavity .
2 . Reconnect bowel sound speaker .
3 . Work plate edges into groove on pelvis cavity .
Belly Plate with Colostomy Stoma
To remove:
1 . Apply pressure to center of plate .
2 . Work fingers under edge while lifting . (Photo 2)
To insert:
1 . Attach valve and genitalia (see Genitalia, page 5) .
2 . Work plate edges into pelvis cavity .
The belly plate with colostomy also contains the urinary reservoir and
colostomy stoma .
To insert:
a . Remove colostomy stoma .
b . Fill with fluid .
c . Gently reinsert stoma .
Make sure genitalia and urinary connectors are in place prior to filling .
Injection Pads
a . To remove, squeeze center of pad with fingers and pull .
b . To replace, squeeze pad and insert in opening .
Dusting pads with talcum powder will assist with reinsertion .
Injection pads may be injected with water . Foam should be removed from
pads immediately following training . Squeeze out fluid and air dry .
To prevent mildew or mold, pads can be soaked in a mild solution of disin-
fectant and water or bleach and water . Squeeze excess solution from pads,
allow them to dry, then store or reinsert in manikin .
Waist, Knee and Ankle Joints
These joints are connected with a bolt and lock nut . To remove, unscrew lock
nut and pull bolt from joint . Segments will now easily disconnect .
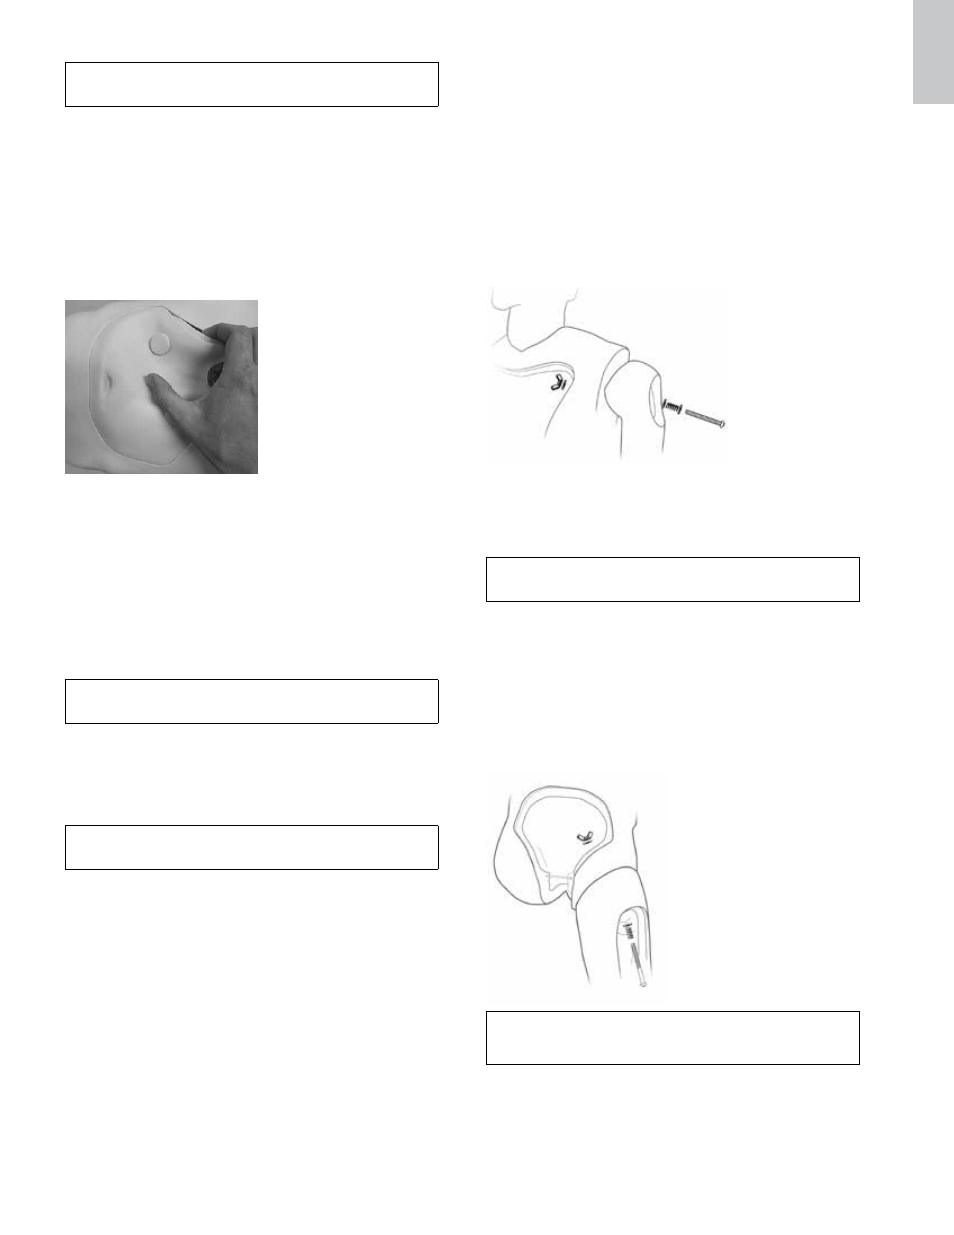
Arms
Manikin is shipped with arms attached . The attachment comprises of a washer,
spring, and additional washer on the 4 .5 inch bolt in that order . The bolt is then
placed through the hole in the shoulder and into the chest cavity . A washer,
then wing nut are placed on the bolt within the chest cavity . Tighten the
wing nut .
To remove:
1 . Remove chest plate from manikin to locate hole in the shoulder .
2 . Remove deltoid injection pad from arm by squeezing skin in center of pad
while pulling .
3 . Use a screwdriver to hold bolt steady while removing the wing nut .
4 . Remove the washers and spring, then the bolt can be removed .
Legs
Legs are attached with a 6” long bolt, a spring, a large washer, a small washer
and a wing nut .
Attachment hardware is located in envelope inside carton .
To attach legs:
1 . Remove belly plate from the manikin to locate hole in hip .
2 . Remove thigh injection pad from leg by squeezing skin in center of pad
while pulling .
3 . Place spring and small washer over bolt .
4 . Insert bolt through leg hole and then to pelvis .
5 . Slide large washer and wing nut over bolt inside pelvis .
6 . Use a screwdriver to drive a bolt into wing nut and tighten .
7 . To remove legs, reverse procedure .
Articulating parts will benefit from a light application of talcum
powder prior to training sessions .
English
Photo 2
Figure 1
Figure 2