Connecting the purified water supply – Labconco FlaskScrubber Vantage Series Glassware Washers 4540031 User Manual
Page 15
Chapter 3: Getting Started
Product Service 1-800-522-7658
11
To connect the hot water supply:
1.
Be certain the hot water supply piping has been thoroughly flushed prior to
connecting it to the washer. Debris in the piping can clog the washer valve.
2.
Make the necessary plumbing connections to properly connect the hot water
supply to the washer.
3.
It may be necessary to place a loop in the supply tube to allow the washer to
be slid in or out of its operating position. Be careful not to kink the water
supply tube when the washer is placed into its final location. If kinking
occurs, it may be necessary to replace the straight fitting on the valve with an
elbow.
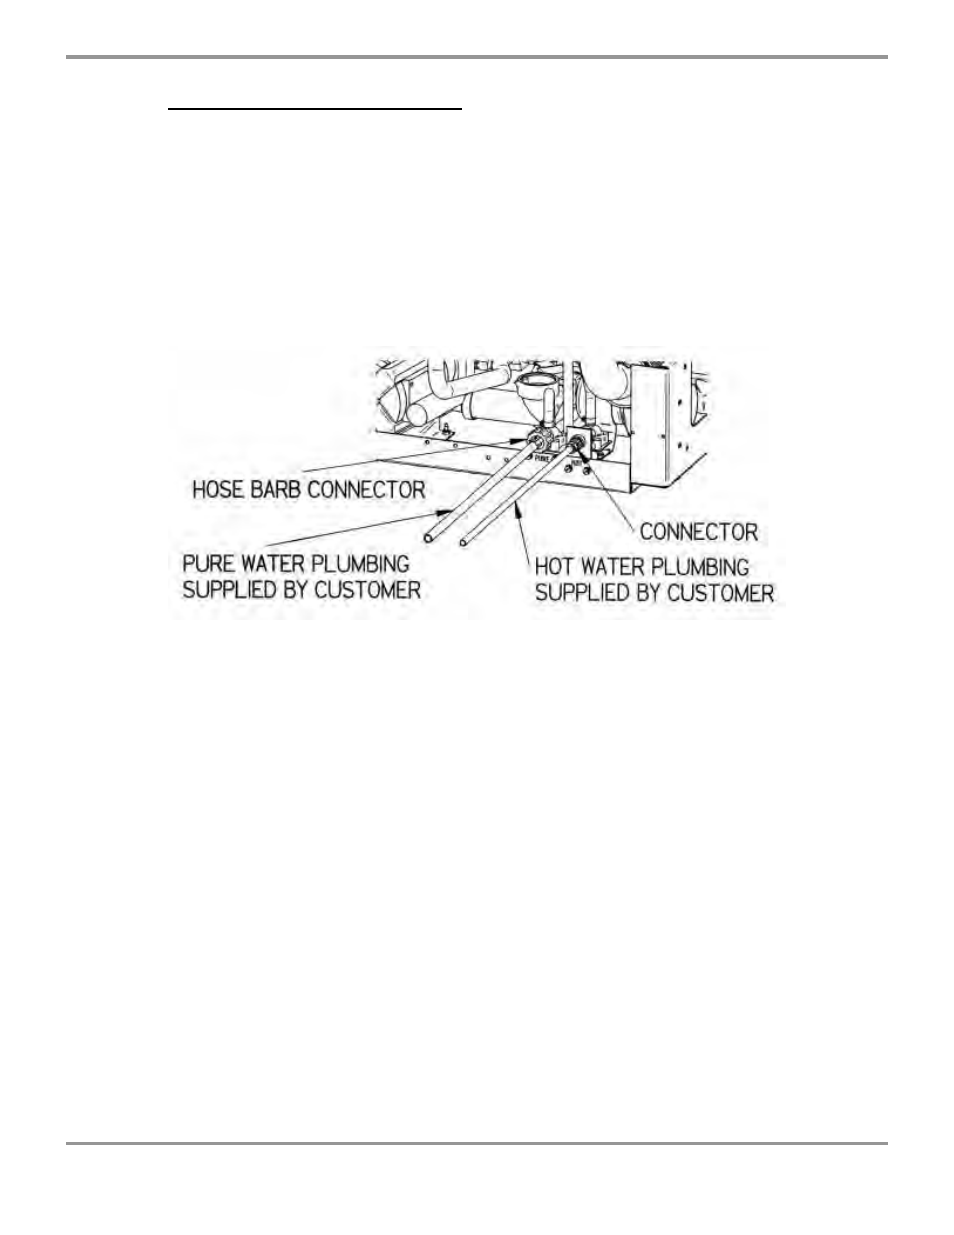
Washer Back View
Connecting the Purified Water Supply
To prevent valve and pump clogging, flush all of the water lines for your purified
water supply source prior to connecting the washer to the water lines. The valve
to which the purified water supply must be connected is located on the back of the
washer base. The back panel must be removed to access the valve. Refer to the
previous figure.
The purified water inlet valve is equipped with a plastic hose barb connection to
accommodate .375" (9.53 mm) ID flexible plastic or rubber hose. The hose
connection may be removed from the valve to expose a male 3/4" – 11-1/2 NH
hose coupling. Rigid plastic, tin-lined, or stainless steel tubing and fittings may
be connected to the washer fitting.
At least 0.9 gallon (3.4 liters) per minute of purified water flow is required. At
least 3.4 gallons (12.9 liters) of purified water must be available for each pure
rinse. A .375" (9.5 mm) ID pipe is the minimum recommended.
If you do not use purified water during the rinse cycles, you may disable the
purified water pump. Refer to Controller Set-Up in this section.