Stand assembly, Y y y – Krix Tryptix User Manual
Page 8
!
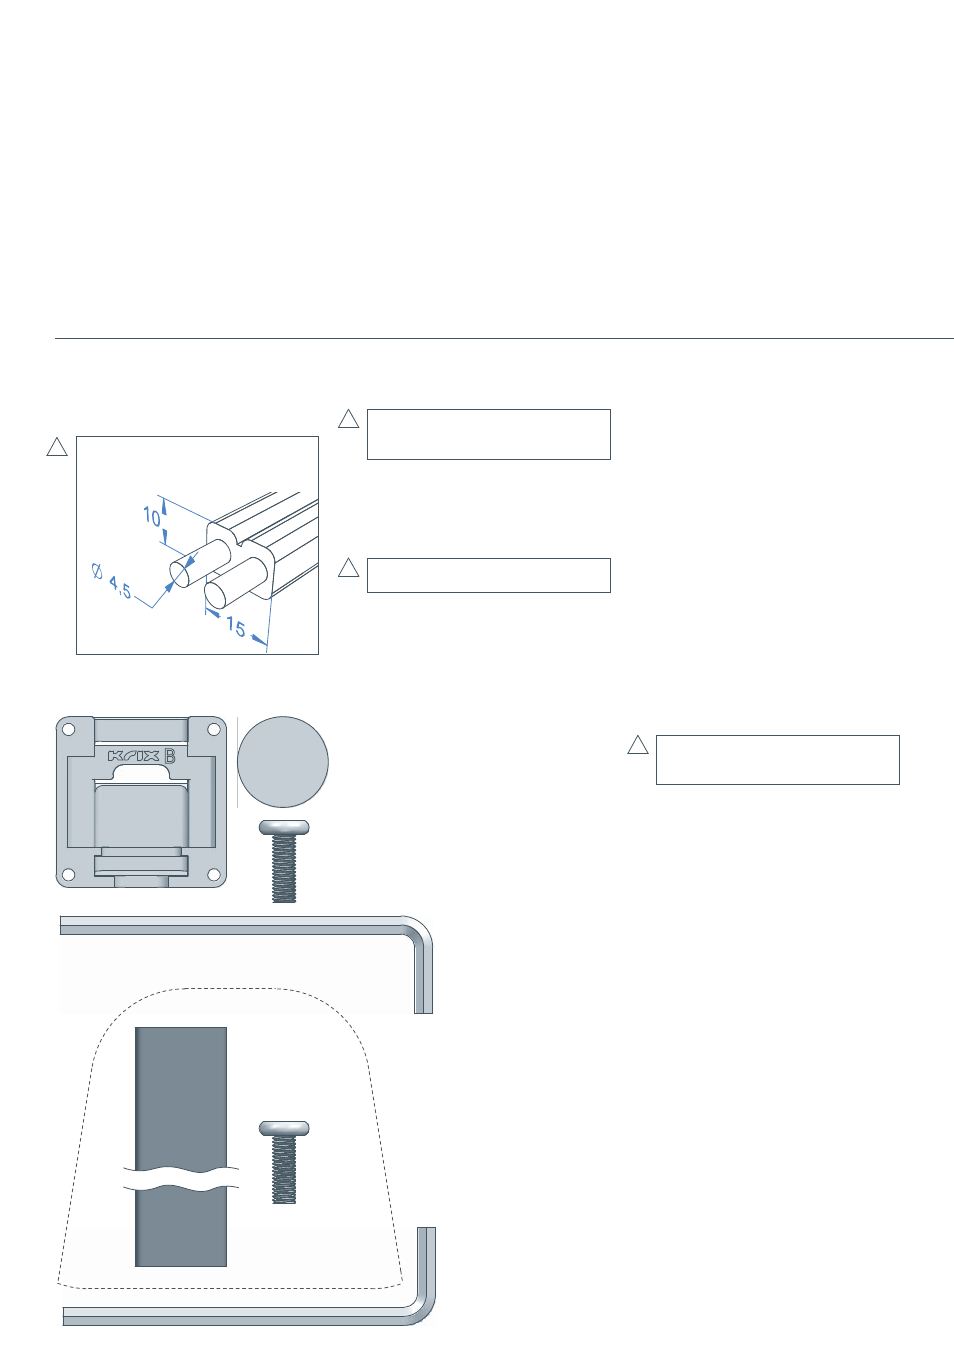
speaker cable
10 x15mm maximum size
fi gure 13
Y
Y
Y
!
before you begin
Select speaker cables. See fi gure 13 for
maximum cable dimensions compatible
with Tryptix binding posts and bracket.
connecting
To ensure optimum performance it is
•
important that your speaker system is
connected properly:
Turn off all electronic equipment and
disconnect from the power point.
Follow the connection instructions
•
supplied with your amplifi er, CD/DVD, hard
disk recorder, video player etc.
Follow the connection instructions
•
supplied with your amplifi er to connect
the speaker cables to amplifi er. Take
care to assign the same cable colour or
trace to the positive (+) connector on the
amplifi er, as the positive (+) connector on
the speaker.
stand assembly
assembly
Attach post to base using allen
•
key and allen bolts supplied.
(fi gure 14a-fl oor stand, 14b-table stand)
If using Tryptix fl oor stand four fl oor
•
spikes and rubber feet are supplied. Select
and install spikes or feet appropriate to
your fl oor surface. (fi gure 14a)
Feed speaker cable through hole in base
•
of stand and out through top of post.
(fi gure 15)
Feed cable through speaker bracket.
•
(fi gure 15)
Prepare speaker cables for connecting to
•
speakers by neatly stripping cable ends.
(Note: Spade lugs or banana plugs are not
compatible with Tryptix binding posts.)
Care should be taken to eliminate loose
strands of wire that may be present a
short circuit hazard.
Push and hold down positive (+) red
•
binding post on speaker and insert positive
(+) wire through hole in post. Take care
to assign the same cable colour or trace
to the positive (+) connector on the
amplifi er, as the positive (+) connector on
the speaker. Repeat connection process
with negative (-) black binding post and
negative (-) wire. (fi gure 16)
Attach speaker bracket to the rear of the
•
Tryptix using allen key and four allen head
bolts supplied. (fi gure 17)
Self-adhesive silicon pads are supplied
•
with each Tryptix. Put at least one pad on
the back at the bottom of the Tryptix to
protect and isolate speaker from the post.
(fi gure 18)
Whilst feeding the excess cable back
•
through the stand, carefully align and hook
speaker bracket onto post. (fi gure 18)
!
!
hardware/tools required
You may require:
wire strippers/cutters
•
hardware supplied
with speaker:
with stand:
8