Wall installation, Yy – Krix Tryptix User Manual
Page 6
YY
hardware/tools required
electric drill
•
2x wall anchors, suitable for wall material
•
(wall anchor must fi t through 6mm
•
bracket mounting holes)
drill bit, sized to suit wall anchor
•
screw driver, to suit wall anchor
•
You may also require:
wire strippers/cutters
•
hardware supplied
wall installation
before you begin
• Select the desired position and orientation
for mounting the loudspeaker on the wall.
To avoid injury or damage ensure that
the fasteners used to attach the bracket
to the wall will not interfere with any
electrical wiring, plumbing, etc, behind
the mounting surface.
• Select wall anchors appropriate for the
desired mounting surface and speaker
weight. Wall anchor size must fi t through
6mm bracket mounting holes. Two
wall anchors are required per bracket
assembly.
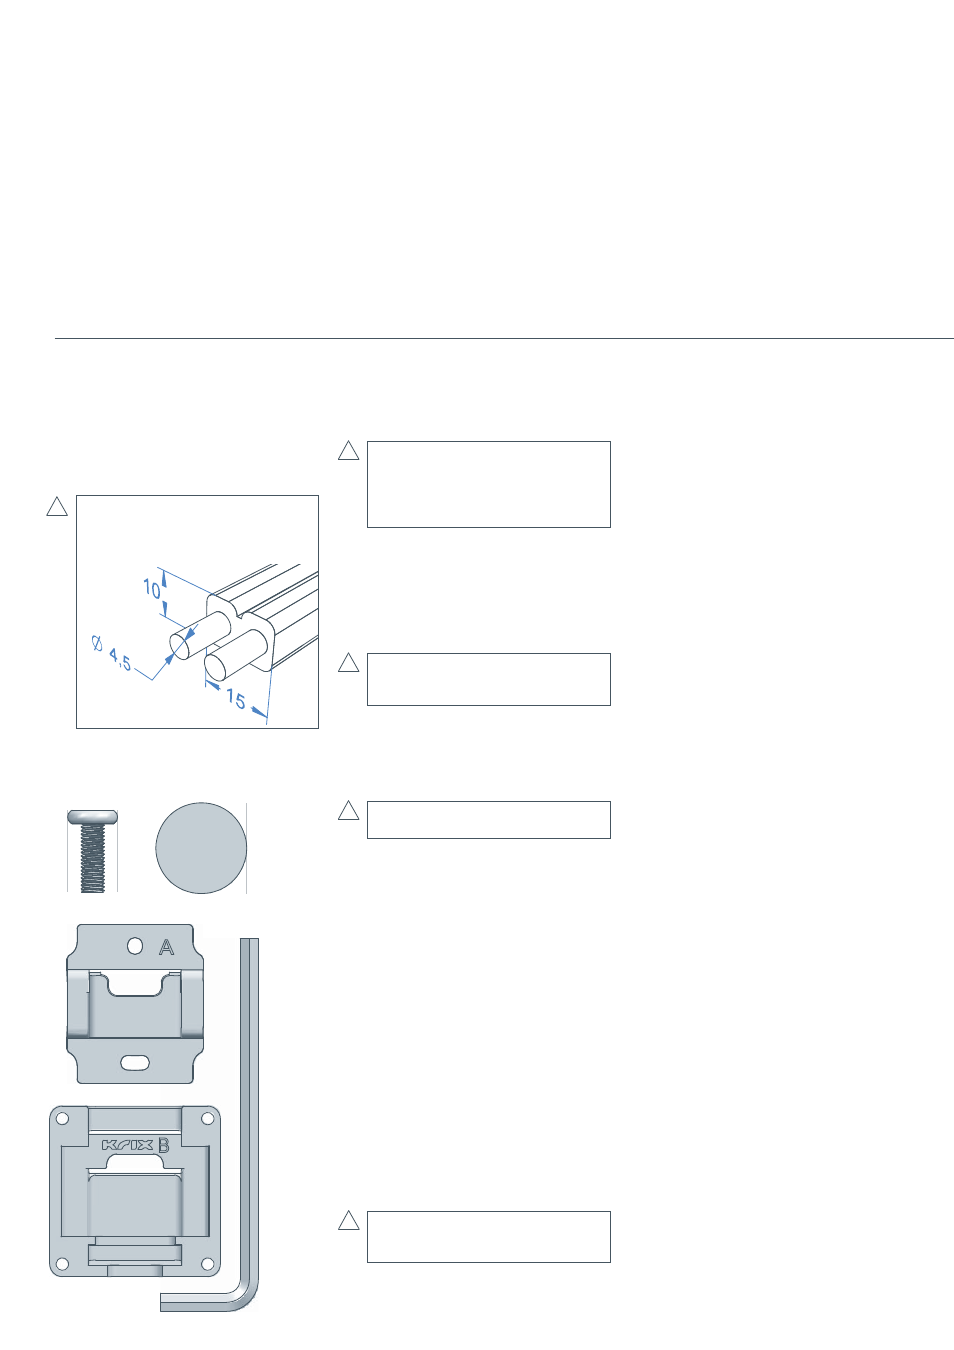
Select speaker cables. See fi gure 6 for
maximum cable dimensions compatible
with Tryptix binding posts and bracket.
connecting
To ensure optimum performance it is
important that your speaker system is
connected properly:
Turn off all electronic equipment and
disconnect from the power point.
• Follow the connection instructions
supplied with your amplifi er, CD/DVD, hard
disk recorder, video player etc.
• Install speaker cable in wall or ceiling
cavity, or run cable along wall surface.
Allow approximately 300mm of excess
cable to facilitate Tryptix installation.
• Follow the connection instructions
supplied with your amplifi er to connect
the speaker cables to amplifi er. Take care
to assign the same cable colour or trace to
the positive (+) connector on the amplifi er
as the positive (+) connector on the
speaker.
• Prepare speaker cables for connecting to
speakers by neatly stripping cable ends.
(Note: Spade lugs or banana plugs are not
compatible with Tryptix binding posts.)
Care should be taken to eliminate loose
strands of wire that may be present a
short circuit hazard.
installation
Tryptix wall installation requires only one
person but an assistant may be helpful.
Using wall bracket (A) as a guide, mark out
•
and drill wall anchor holes. If the Tryptix
are to be mounted next to a display screen
a minimum clearance of 42mm must be
maintained between the screen edge and
bracket. (fi gure 7)
If loudspeaker cable has been run inside
•
the wall, guide cable through the wall
bracket (A). (fi gure 8a)
If loudspeaker cable has been run
•
along the wall, slide cable under wall
bracket (A). (fi gure 8b)
Attach wall bracket (A) to wall using
•
appropriate wall anchors.
Feed cable through speaker bracket (B).
•
(fi gure 9)
Push and hold down positive (+) red
•
binding post on speaker and insert positive
(+) wire through hole in post. Take care
to assign the same cable colour or trace
to the positive (+) connector on the
amplifi er, as the positive (+) connector on
the speaker. Repeat connection process
with negative (-) black binding post and
negative (-) wire. (fi gure 10)
Attach speaker bracket to the rear of the
•
Tryptix using allen key and four allen head
bolts supplied. (fi gure 11)
Self-adhesive silicon pads are supplied
•
with each Tryptix. Put at least one pad
at each end on the back of the Tryptix to
protect and isolate speaker from the wall.
(fi gure 12)
Whilst feeding the excess cable back
•
through wall bracket (A) carefully align
and hook speaker onto bracket (A).
(fi gure 12)
!
!
!
!
!
6
speaker cable
10x15mm maximum size
(5x15mm is the maximum recommended
size for running cable along a wall, see
fi gure 8b)
fi gure 6