Installation, The bicycle wheel, Attaching the disc rotor to the hub – Hope Tech C2 Brake User Manual
Page 7
7
2. Installation
The disc brake system is supplied fully assembled and bled, i.e. containing brake fluid.
The Cycle Dealer is responsible for supplying the caliper with the correct bolt mounting
pattern to fit your particular fork or frame. Some installations may require an additional
mount bracket as advised by your dealer.
In the first instance it is recommended that you install the brake as supplied without
disconnecting and routing the hose through frame guides (if present) or attempting to
shorten the hose. Once you have experienced the fully working brake you may decide
at a later date to make some hose routing or shortening modifications as described
later in this manual.
2.1. The bicycle wheel
The wheel should be built by a skilled wheelbuilder using a 3 cross lacing pattern and
correctly tensioned. Your dealer will advise whether the hub in your wheel is compatible
with this Hope disc brake. There are two types of compatible hubs; splined Hope hubs
that require a 5 bolt disc spider (purchased separately) and International Standard 6
bolt hubs (made by Hope and other hub manufacturers) where the disc rotor bolts
directly to the hub.
2.2. Attaching the disc rotor to the hub
For Hope splined hubs fit the spider to the hub splines
and ensure it is squarely seated before securing it with
the spider lockring. Hubs using a spider require a disc
rotor with a 5 bolt pattern.
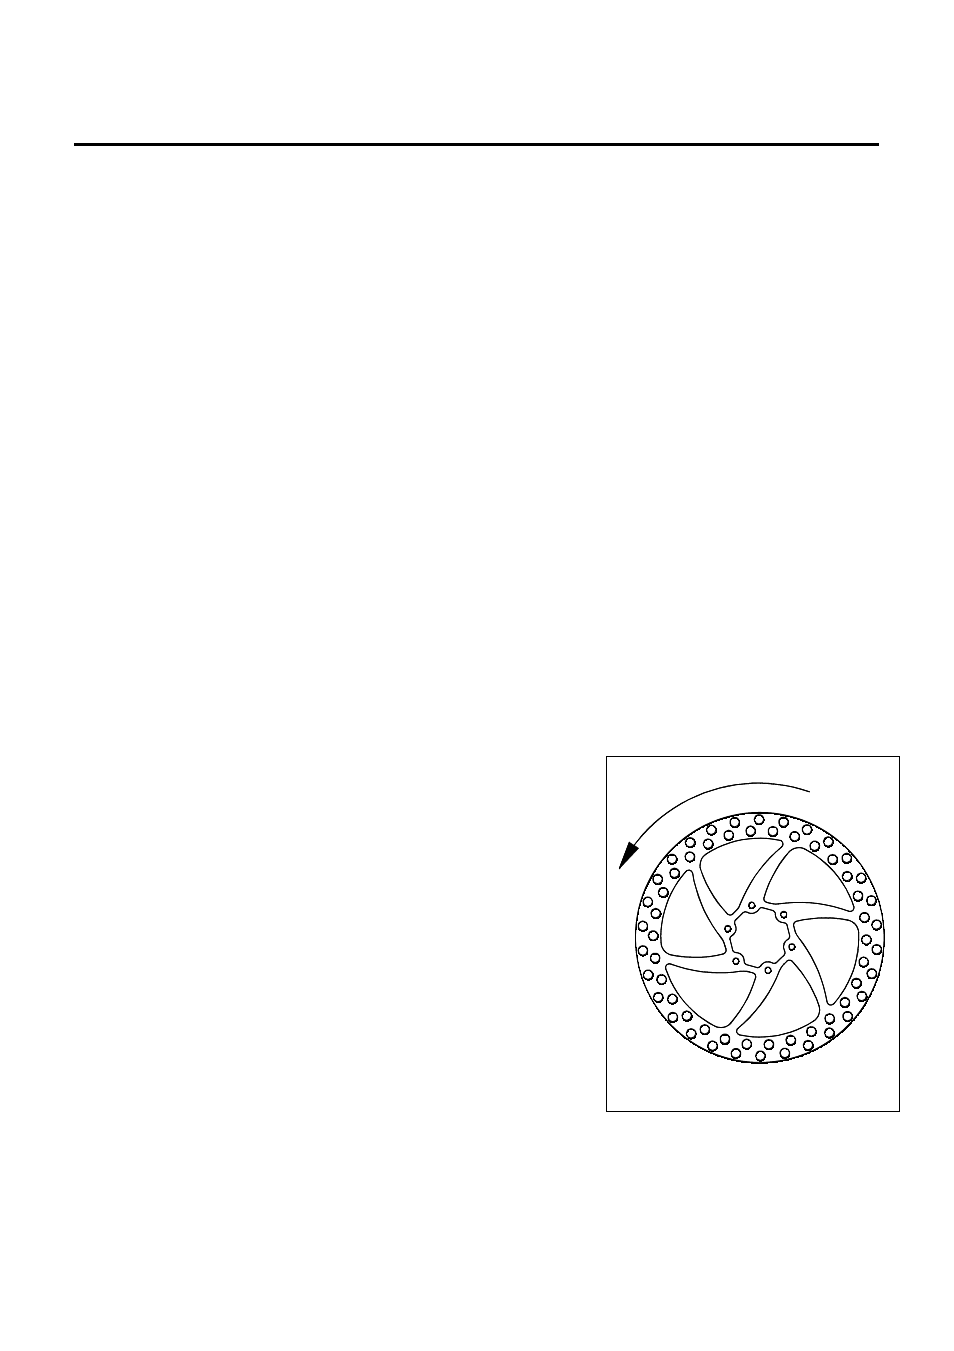
Attach the disc rotor to the hub with the orientation of the
rotor arms as shown in Figure 1 (6 bolt disc rotor shown).
It is recommended that a mild engineering adhesive
often referred to as ‘threadlock’ is used on the bolt
threads to prevent them unscrewing. Do not use a
permanent adhesive or this will prevent removing the
disc rotor at a later date.
Replace the wheel with the attached disc rotor in the
forks (or frame) making sure the wheel axle is sitting
square in the dropouts and that the wheel skewer is
correctly tightened.
F O R W A R D R O T A T I O N O F W H E E L
Figure 1